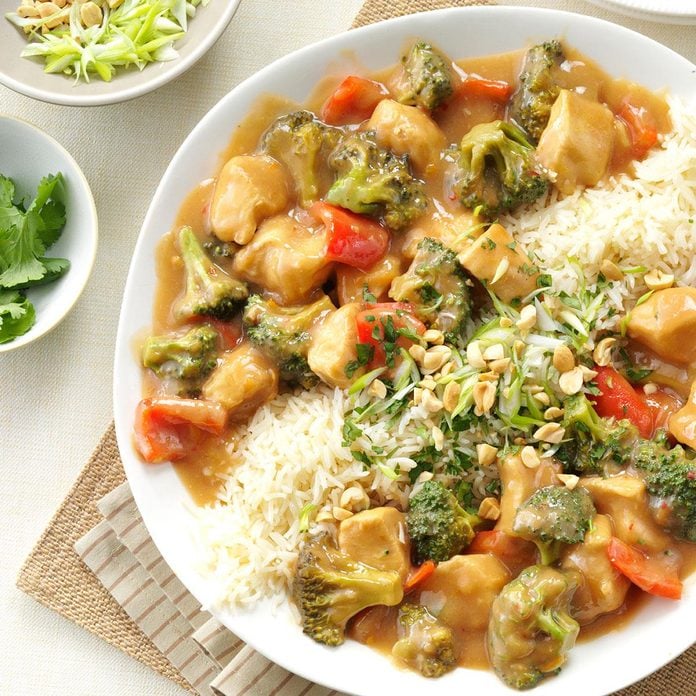
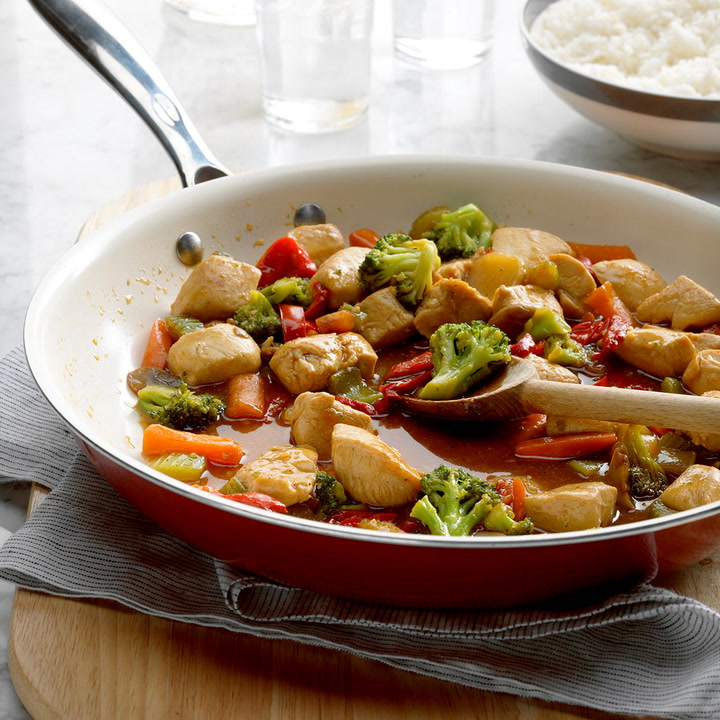
 Honey Chicken Stir-Fry
Total Time:
 30 minutes
Main Ingredients: Chicken breasts, honey, soy sauce, frozen broccoli stir-fry blend
Level: Beginner
Go to Recipe
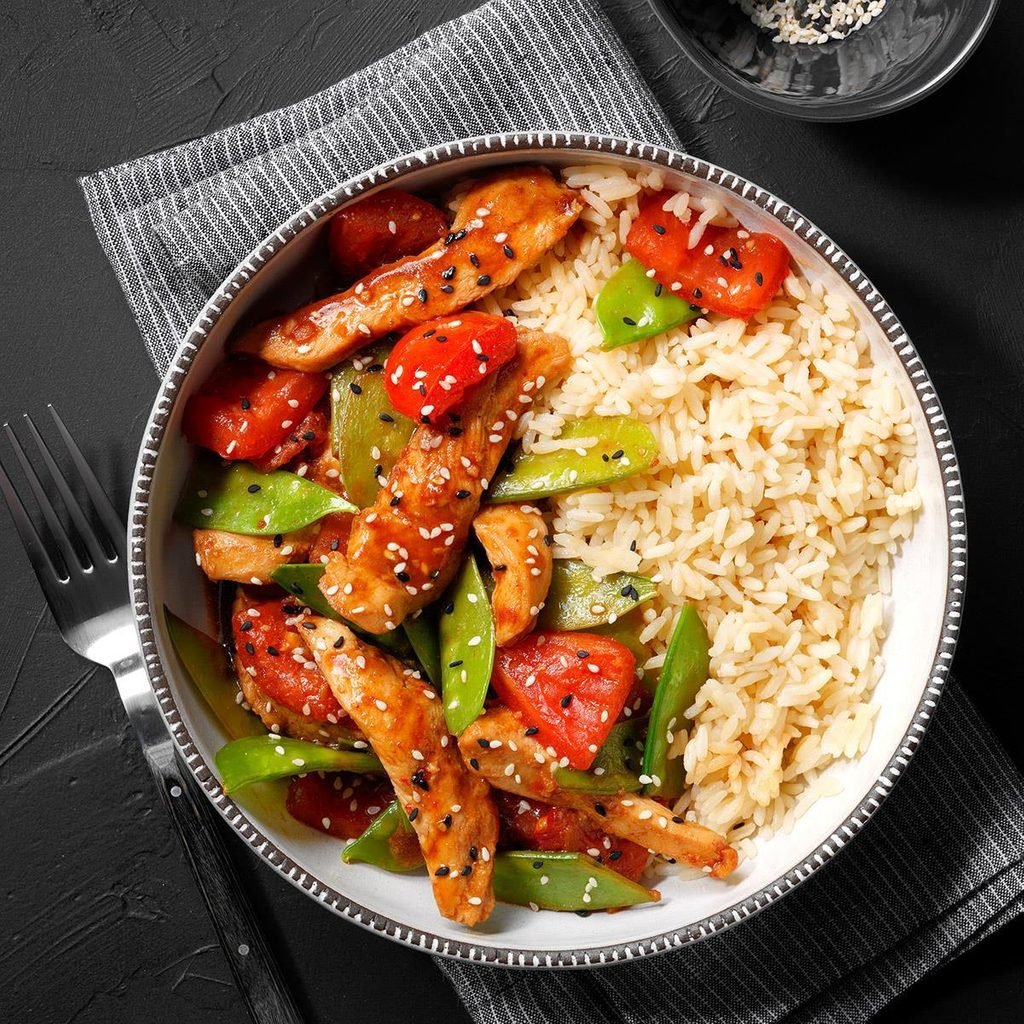
This one-pot meal is one of our favorite chicken breast recipes for busy weeknights. The chicken and vegetables cook together in a single
nonstick skillet and the flavors of honey, garlic and soy sauce blend to make an incredible sauce. Serve it over rice to create a complete meal.
"I'm a new mom, and my schedule is very dependent upon our young son, so I like meals that can be ready in as little time as possible. This all-in-one chicken stir fry recipe with a hint of sweetness from honey is a big time-saver." —Recipe contributor Caroline Sperry, Allentown, Michigan
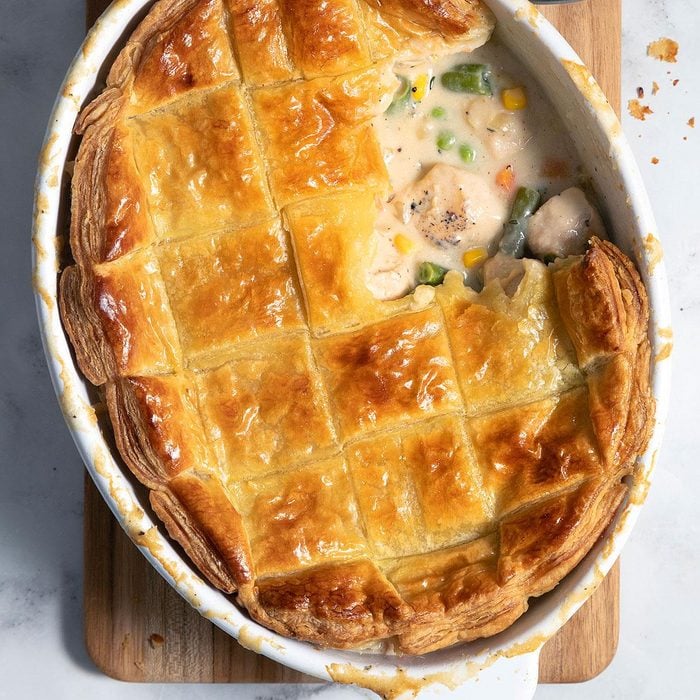
Puff Pastry Chicken Potpie
Total Time: 1 hour and 30 minutes
Main Ingredients: Chicken breasts, frozen puff pastry, half-and-half cream, frozen mixed vegetables
Level: Intermediate
This twist on the classic chicken potpie uses puff pastry instead of pie crust to create a satisfying, crispy exterior. The recipe calls for cutting the pastry sheets and layering them to make a visually appealing lattice pattern, but you can place the whole sheet directly on the baking dish if you're running short on time.
"When my wife is craving comfort food, I whip up this chicken pot pie with puff pastry. It's easy to make, sticks to your ribs and delivers soul-satisfying flavor." —Recipe contributor Nick Iverson, Denver, Colorado
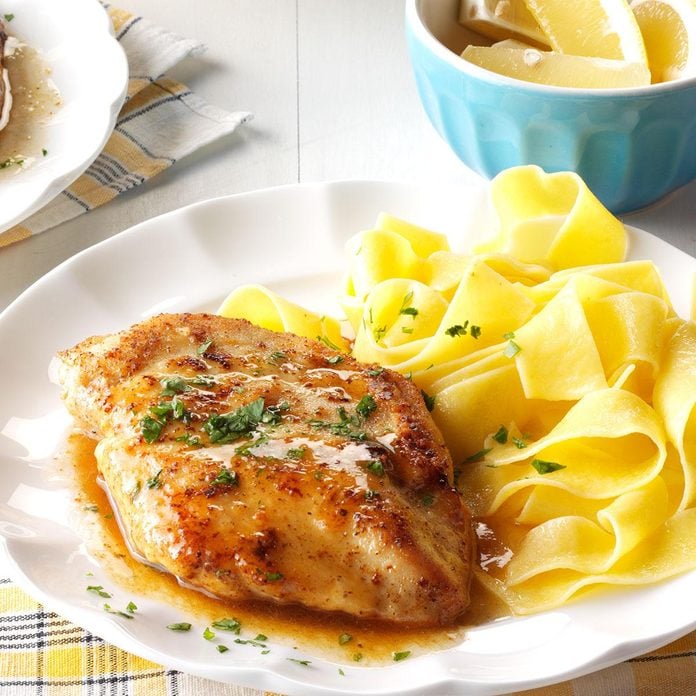
Quick Chicken Piccata
Total Time: 30 minutes
Main Ingredients: Chicken breasts, white wine or chicken broth, lemon juice
Level: Beginner
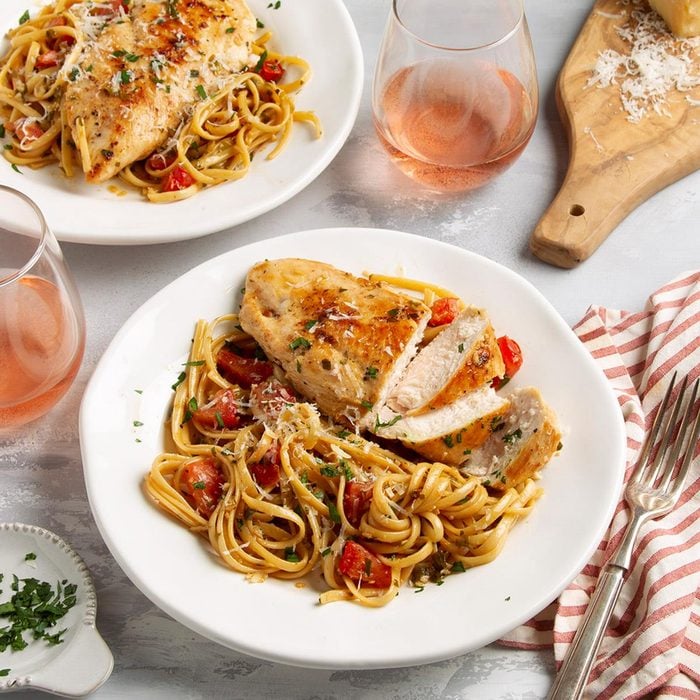
Chicken piccata is a delightful dish featuring pan-fried chicken served in a bright lemon-butter sauce. You have a choice when it comes to preparation: Pound the chicken breasts to 1/2-inch thick or cut the breasts in half to make chicken cutlets.
"Laced with lemon and simmered in white wine, this stovetop entree is super easy and elegant. Just add a side of veggies and bread to make it into a wonderful meal." —Recipe contributor Cynthia Heil, Augusta, Georgia
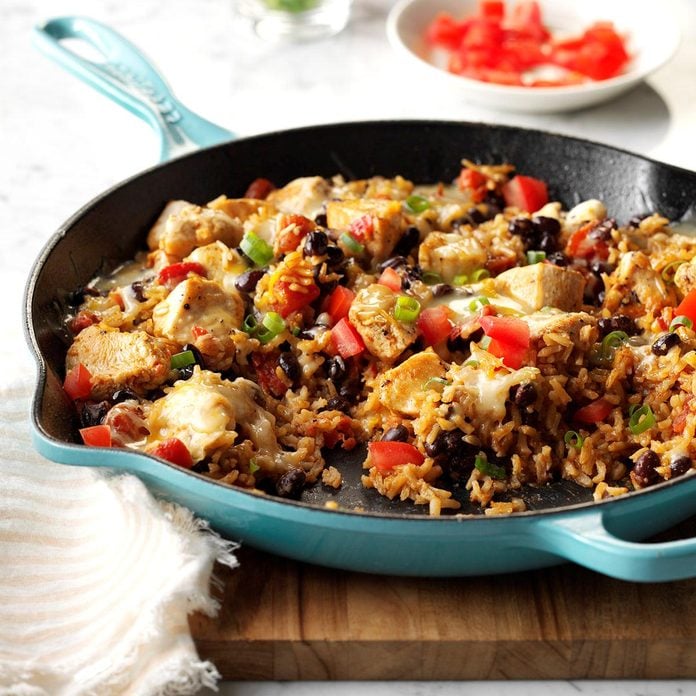
Chicken Burrito Skillet
Total Time: 45 minutes
Main Ingredients: Chicken breasts, long grain rice, canned black beans, reduced-sodium chicken broth, shredded Mexican cheese
Level: Beginner
This chicken burrito skillet is packed full of chicken, tomatoes, green onions, rice and beans—like your favorite burrito! It's a fantastic chicken breast recipe, but it's also a good way to use up leftover rotisserie chicken. If you don't have a can of black beans handy, substitute any beans you have in the pantry.
"We love Mexican night at our house, and I love to recreate dishes from our favorite restaurants. This burrito-inspired dish is ready for the table in almost no time!" —Recipe contributor Krista Marshall, Fort Wayne, Indiana
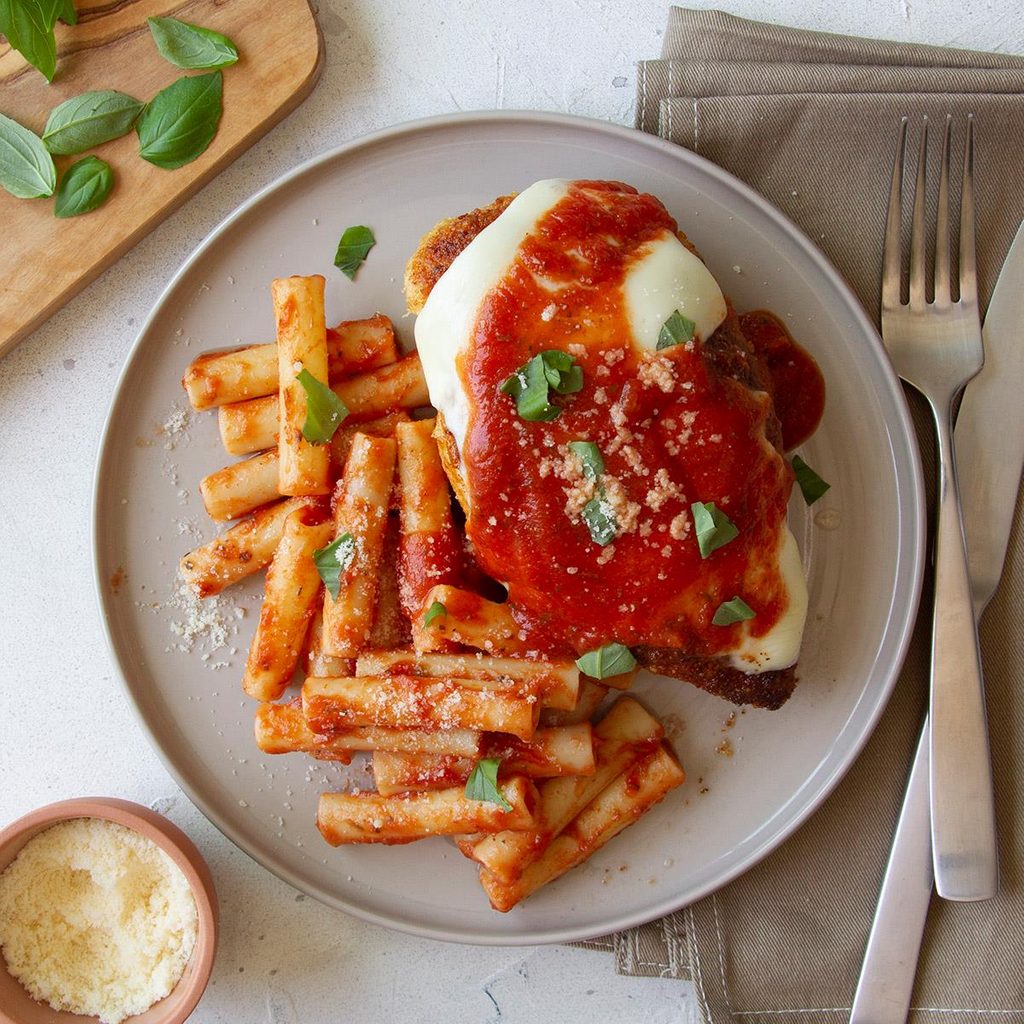
Cheesy Chicken Parmigiana
Total Time: 40 minutes
Main Ingredients: Chicken breasts, tomato sauce, mozzarella cheese
Level: Beginner
If you've never made this dish before, you'll be amazed at how easy it is to make chicken Parmesan at home. Simply coat the chicken with seasoned bread crumbs and cook in oil for about five minutes a side. Melt a little mozzarella cheese on top and serve with tomato sauce. Pasta is the classic choice here, but
zucchini noodles or spaghetti squash work well, too.
"My husband used to order chicken parmigiana at restaurants. Then I found this recipe in our local newspaper, adjusted it for two and began making the beloved dish at home. After more than 50 years of marriage, I still enjoy preparing his favorite recipes." —Recipe contributor Iola Butler, Sun City, California
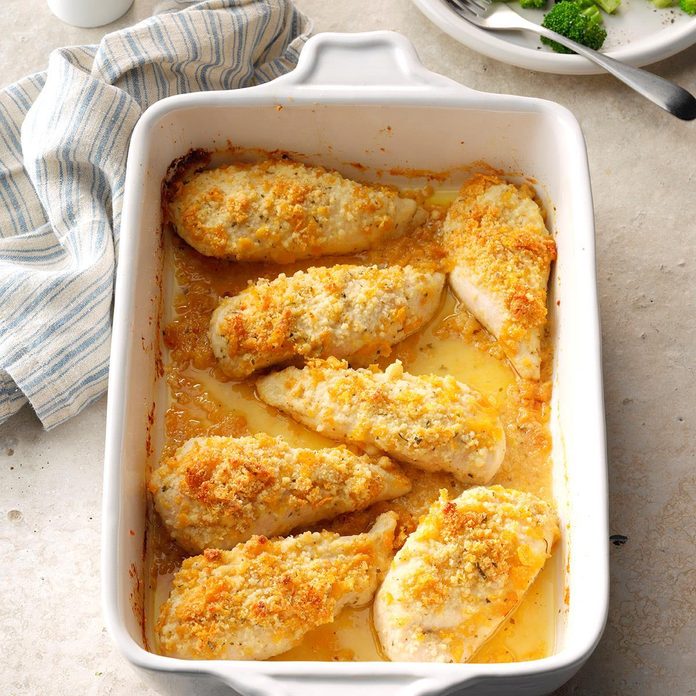
Breaded Ranch Chicken
Total Time: 55 minutes
Main Ingredients: Chicken breasts, cornflakes, ranch salad dressing mix
Level: Beginner
A five-ingredient chicken breast recipe that's ready in less than an hour? Yes, please! The chicken breasts stay juicy and moist as they bake, and the cornflake crust is irresistibly crunchy. Use a store-bought ranch seasoning packet, or make your own with this
ranch dressing and dip mix recipe.
"A crunchy coating of cornflakes and Parmesan cheese adds delectable flavor to this zesty ranch chicken. The golden, crispy chicken is a mainstay dish I can always count on." —Recipe contributor Launa Shoemaker, Landrum, South Carolina
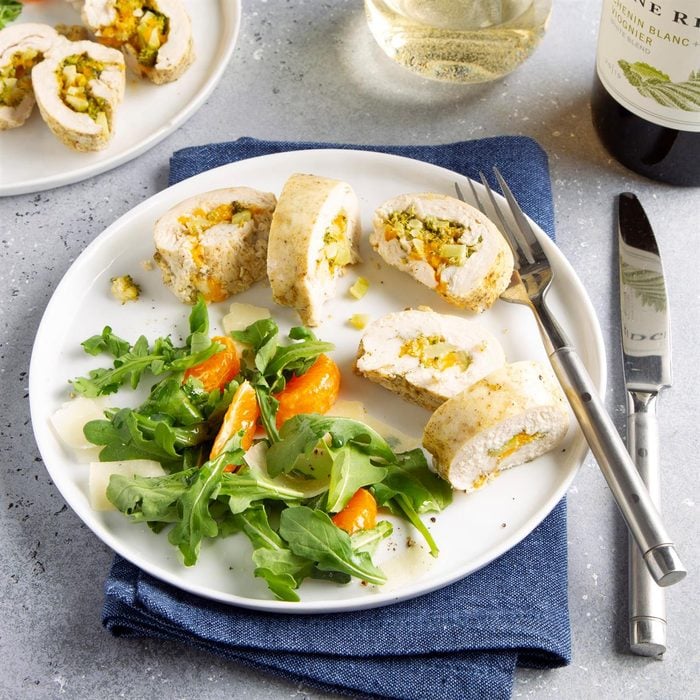
Broccoli-Stuffed Chicken
Total Time: 55 minutes
Main Ingredients: Boneless skinless chicken breasts, fresh broccoli, shredded cheddar cheese, chicken broth
Level: Intermediate
Use a meat mallet for this recipe, pounding the chicken until it's 1/4-inch thick. If you don't have one, use a rolling pin or the bottom of a skillet. After the chicken is finished cooking, we highly recommend thickening the pan juices with a
cornstarch slurry to make a flavorful gravy that takes this dish to the next level.
"I was born in 1936 to a family of eight. Much of our food came from our garden and the henhouse. Mother served fried chicken every Sunday, but sometimes she surprised us with this broccoli-stuffed chicken. No arguments then as to who got what piece of chicken!" —Recipe contributor Donald Laugherty, Connellsville, Pennsylvania
Coconut Curry Chicken
Total Time: 5 hours and 20 minutes
Main Ingredients: Chicken breasts, potatoes, coconut milk, chicken bouillon granules, cooked rice
Level: Intermediate
Slow-cooker chicken recipes are the best, and this one is no exception. The curry spices and coconut milk combine to create a delicious sauce, and you can customize the spice level by making your own
curry powder at home. Be sure to use a can of coconut milk instead of the cartons found in the refrigerated section. The latter has a higher water content, so it won't create a luscious, thick sauce.
"My husband and I love this coconut curry chicken recipe! It's a breeze to prepare in the slow cooker, and it tastes just like a meal you'd have at your favorite Indian restaurant." —Recipe contributor Andi Kauffman, Beavercreek, Oregon
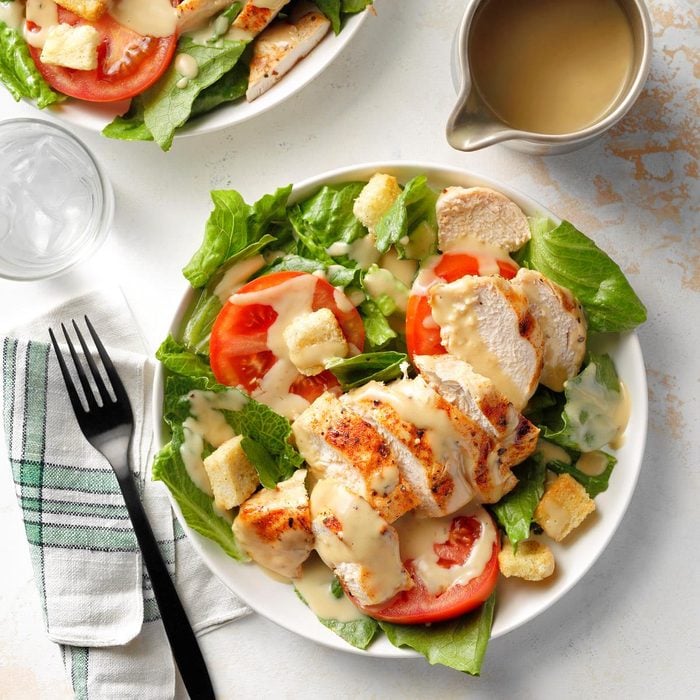
Herbed Chicken Caesar Salad
Total Time: 25 minutes
Main Ingredients: Chicken breasts, romaine lettuce, tomato, Caesar salad dressing
Level: Beginner
This
grilled chicken breast recipe is perfect for a light lunch or a healthy dinner. The chicken is spiced with an aromatic blend of basil, oregano, paprika, garlic salt and black pepper, and the grill adds an extra layer of smoky flavor. The chicken is fantastic when served hot off the grill, but also tasty when chilled and served cold.
"This chicken Caesar salad looks and tastes fancy but couldn't be easier to make. It's my husband's favorite dinner." —Recipe contributor Kay Andersen, Bear, Delaware
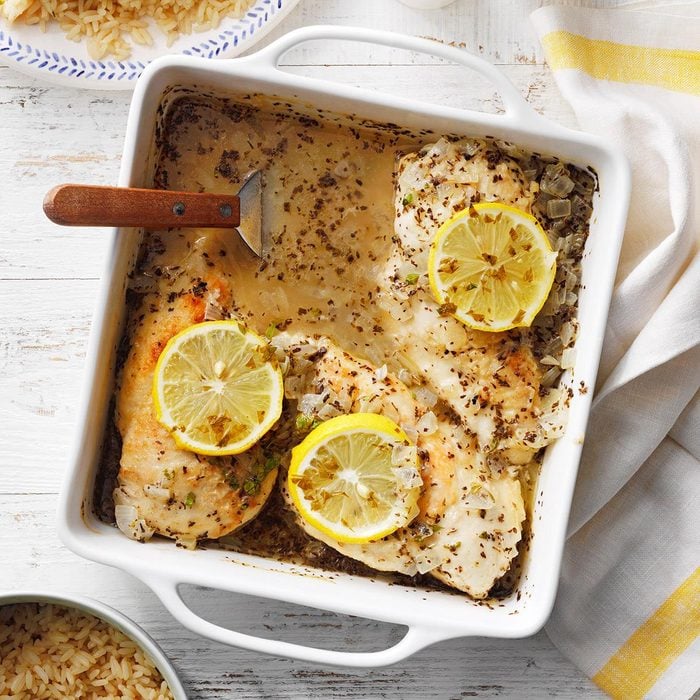
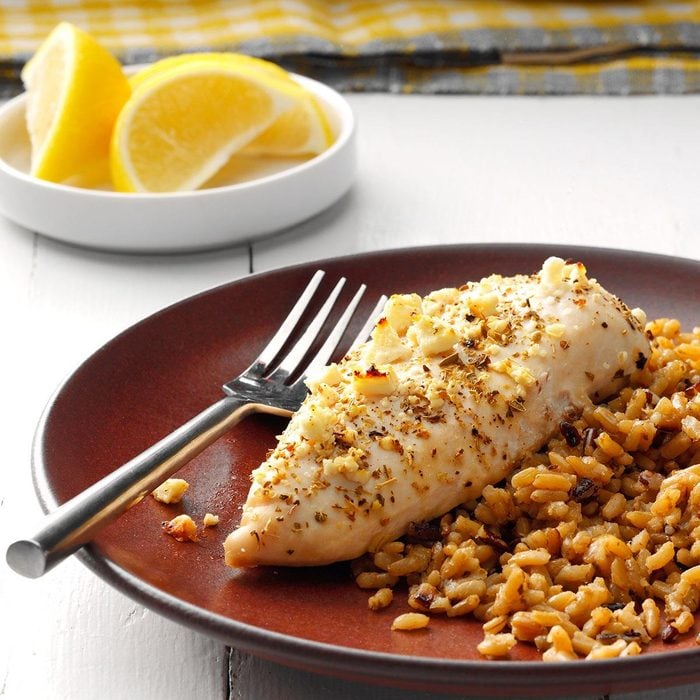
Baked Lemon Chicken
Total Time: 50 minutes
Main Ingredients: Boneless skinless chicken breasts, all-purpose flour, chicken broth, lemon juice, cooked rice
Level: Beginner
The combination of lemon juice, chicken broth, butter and herbs comes together to create an out-of-this-world sauce that pairs perfectly with chicken. We often serve this dish over white rice, but
cauliflower rice is an excellent choice for those looking for low-carb options.
"I found this baked lemon chicken recipe many years ago when my children were toddlers. I've changed it a little over the years to make it my own. Everyone in my family just loves it!" —Recipe contributor Aida Babbel, Bowen Island, British Columbia
Peanut Butter Chicken Skewers
Total Time: 30 minutes
Main Ingredients: Chicken breasts, creamy peanut butter, soy sauce, brown sugar, red cabbage
Level: Beginner
The idea of slathering peanut butter onto chicken might sound odd—but bear with us. Mixing peanut butter with soy sauce, ginger, chiles, sugar and lemon juice creates a sauce that's simultaneously savory, sweet and spicy. We baste the chicken skewers with the sauce as it cooks, but make extra so you can serve the cooked chicken with dipping sauce on the side.
"Most people associate peanut butter with snacks or desserts. This fantastic chicken skewers with peanut sauce recipe proves it also makes a mouthwatering sauce for chicken." —Recipe contributor Jeanne Bennett, North Richland Hills, Texas
Kentucky Grilled Chicken
Total Time: 45 minutes
Main Ingredients: Chicken breasts, Worcestershire sauce, hot pepper sauce
Level: Beginner
KFC makes its grilled chicken with a blend of herbs and spices, but we keep the marinade simple for our version (which we think tastes better than the original). You only need five ingredients—cider vinegar, canola oil,
Worcestershire sauce, hot sauce and salt—and four hours to let the marinade do its magic. It's fantastic for grilling chicken, but the marinade is amazing for roasted or sauteed chicken, too.
"This Kentucky grilled chicken is perfect for an outdoor summer meal, and my family thinks it's fantastic. It takes about an hour on the grill but is worth the wait. I use a new paintbrush to mop on the basting sauce." —Recipe contributor Jill Evely, Wilmore, Kentucky
Chicken Stuffing Bake
Total Time: 50 minutes
Main Ingredients: Chicken breasts, Swiss cheese, condensed cream of chicken soup, white wine or chicken broth, seasoned stuffing cubes
Level: Beginner
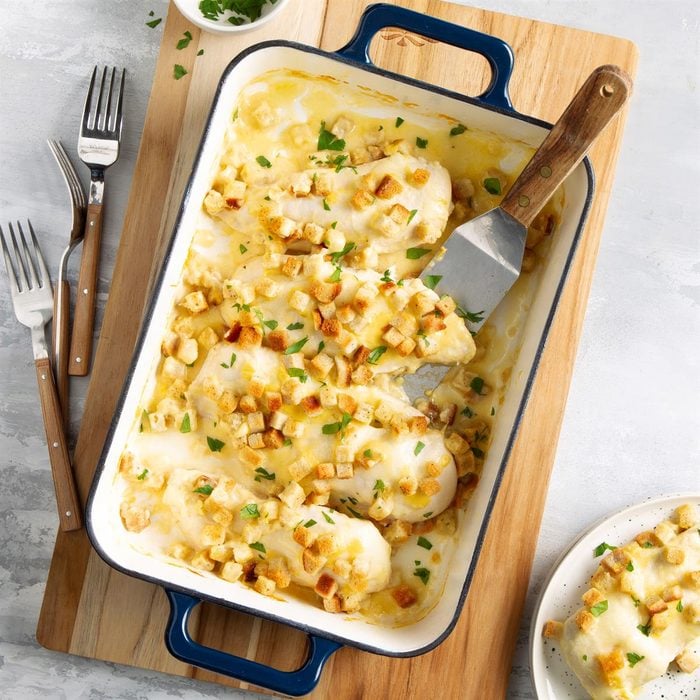
This chicken breast recipe has some serious Thanksgiving vibes, but it's easy enough to make as a weeknight dinner. We use seasoned bread cubes, but you could choose leftover stuffing if you happen to have it on hand. Feel free to add vegetables like broccoli, cauliflower or sweet potatoes to make a complete meal.
"At my bridal shower a few years ago, each guest brought a recipe card with their best dish. We've tried everyone's recipe, but this chicken stuffing bake is a favorite." —Recipe contributor Nicole Vogl Harding, Spokane, Washington
Mongolian Chicken
Total Time: 35 minutes
Main Ingredients: Chicken breasts, soy sauce, brown sugar, hoisin sauce, Mongolian Fire oil or sesame oil
Level: Beginner
Don't let the number of ingredients dissuade you from making this incredible chicken. The chicken, vegetables and sauce stir-fry in a single pan, and it cooks in only 15 minutes. The leftovers almost taste better the next day, so don't be afraid to double this recipe!
"This is a fun way to make chicken. Mongolian chicken has a lot of flavor and a bit of heat for good measure." —Recipe contributor Mary Ann Lee, Clifton Park, New York
Chicken Scampi
Total Time: 25 minutes
Main Ingredients: Chicken breasts, linguine, green onions, garlic
Level: Beginner
Scampi generally refers to shrimp, which is cooked in a rich garlic butter sauce and served over pasta. The sauce is so good, we figured we'd pair it with chicken and see what happened. The result is just as tasty as the seafood version, and it's a great dinner choice for anyone with picky eaters in the family.
"This chicken scampi recipe is so delectable that I'm often asked to double it when family members visit over the holidays. I also suggest preparing it with shrimp for a quick, convenient alternative that's also delicious." —Recipe contributor Janet Lebar, Centennial, Colorado
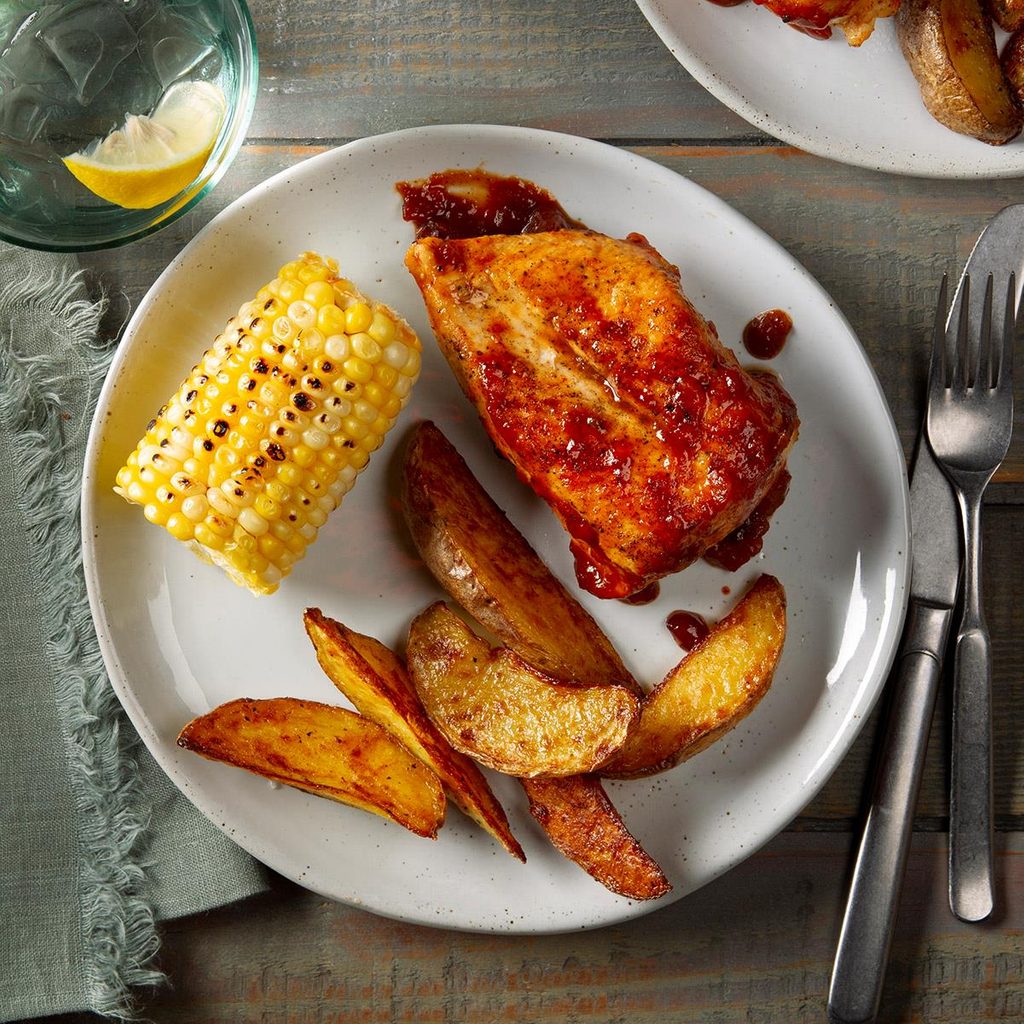
Applesauce Barbecue Chicken
Total Time: 20 minutes
Main Ingredients: Chicken breasts, applesauce, barbecue sauce, brown sugar
Level: Beginner
We love barbecue sauce on its own, but it gets even better when combined with applesauce, olive oil, brown sugar and chili powder. It's a brilliant way to celebrate barbecue flavors without having to fire up the grill. Serve this roasted chicken with side dishes like
baked beans,
cornbread, corn or
coleslaw.
"You only need a few ingredients to create this sweet and peppery chicken. The subtle flavor of apple makes this tender barbecue dish stand out from the rest." —Recipe contributor Darla Andrews, Farmers Branch, Texas
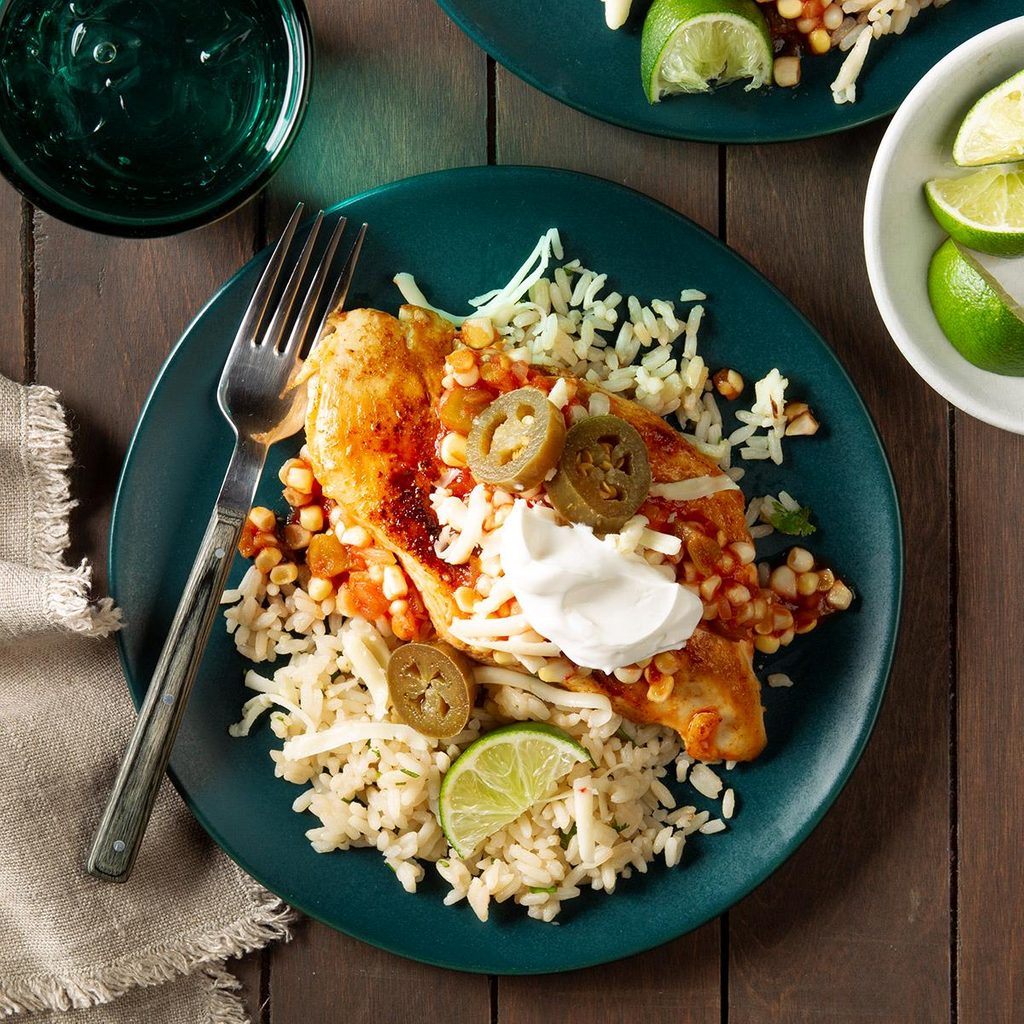
Southwest Smothered Chicken
Total Time: 30 minutes
Main Ingredients: Chicken breasts, corn, salsa, shredded pepper Jack cheese
Level: Beginner
Capture the flavors of the southwest with this smothered chicken breast recipe. The corn, salsa and pepper jack cheese come together to create the perfect seasoning for chicken, but the pickled jalapenos really make this dish shine. It tastes fantastic over rice, but we also love shredding the chicken and turning it into tacos.
"There's a party in every bite of this fiesta chicken dish. Let it spice up dinner tonight! If you're worried about the heat, simply reduce the amount of jalapenos." —Recipe contributor Debbie Schaefer, Durand, Michigan
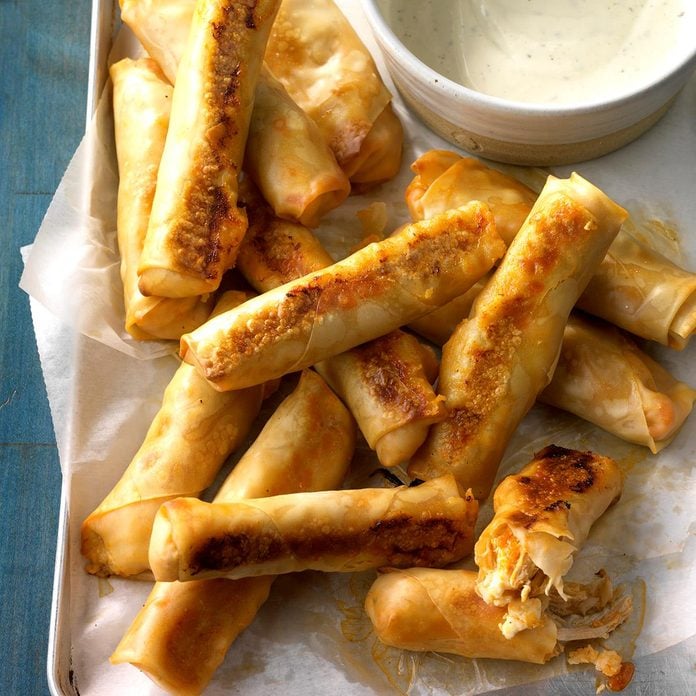
Buffalo Chicken Egg Rolls
Total Time: 3 hours and 35 minutes
Main Ingredients: Chicken breasts, ranch salad dressing mix, Buffalo wing sauce, egg roll wrappers
Level: Intermediate
This game-day appetizer has everything we love about chicken wings, all wrapped up in a crispy egg roll wrapper. You start by making the Buffalo chicken in the slow cooker, so you could easily turn this starter into a main meal by serving the cooked chicken as a healthier
egg roll in a bowl.
"One of my favorite slow-cooker recipes is this impressive buffalo chicken egg rolls appetizer. You can wrap the filling in egg roll wrappers and bake, or, for a bite-size version, use smaller wonton wraps." —Recipe contributor Tara Odegaard, Omaha, Nebraska
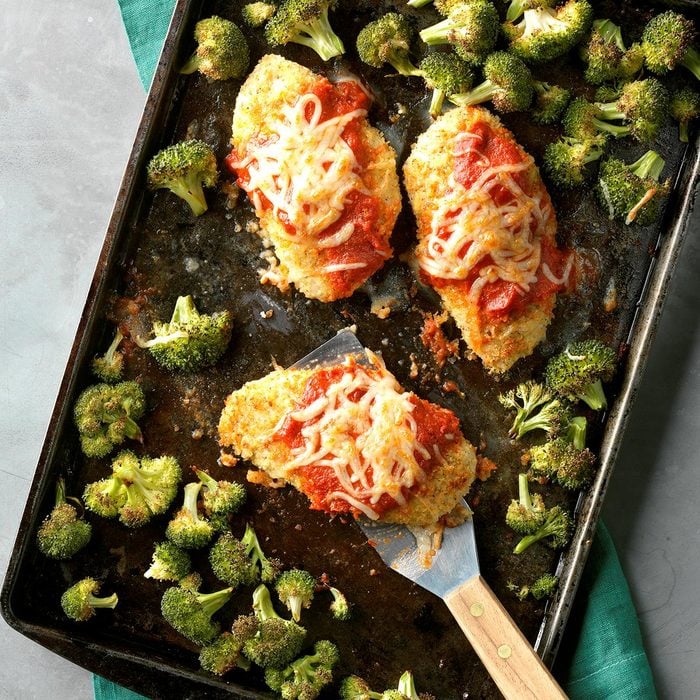
Sheet-Pan Chicken Parmesan
Total Time: 40 minutes
Main Ingredients: Chicken breasts, panko bread crumbs, frozen broccoli florets, marinara sauce
Level: Beginner
If you don't want to mess with pan-frying chicken for chicken Parmesan, this recipe is for you. It has all the flavors of the original, but we lighten it up by baking the chicken instead of frying it. You could easily make this dish in your air fryer, too.
"Saucy chicken, melty mozzarella and crisp-tender broccoli—all in one pan. What could be better?" —Recipe contributor Becky Hardin, St. Peters, Missouri
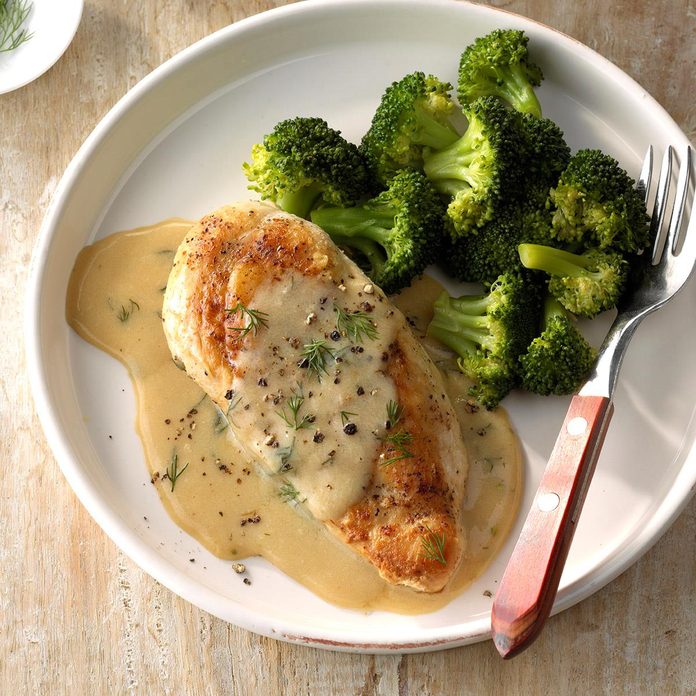
Chicken and Broccoli with Dill Sauce
Total Time: 30 minutes
Main Ingredients: Chicken breasts, broccoli florets, chicken broth
Level: Beginner
Chicken and broccoli is a classic pairing, and it gets even better when smothered in a zippy dill sauce. You'll only need the broccoli florets for this recipe, but that doesn't mean you should throw away the broccoli stems. Peel them and add the centers to
cheesy broccoli soup or add the chopped stems to stir-fries or slaw recipes.
"I've had this chicken and broccoli recipe for so many years, I don't remember when I first made it. Serve it with a side of couscous or rice for a complete meal, or add some sliced mushrooms or carrots for extra veggies." —Recipe contributor Kallee Krong-Mccreery, Escondido, California
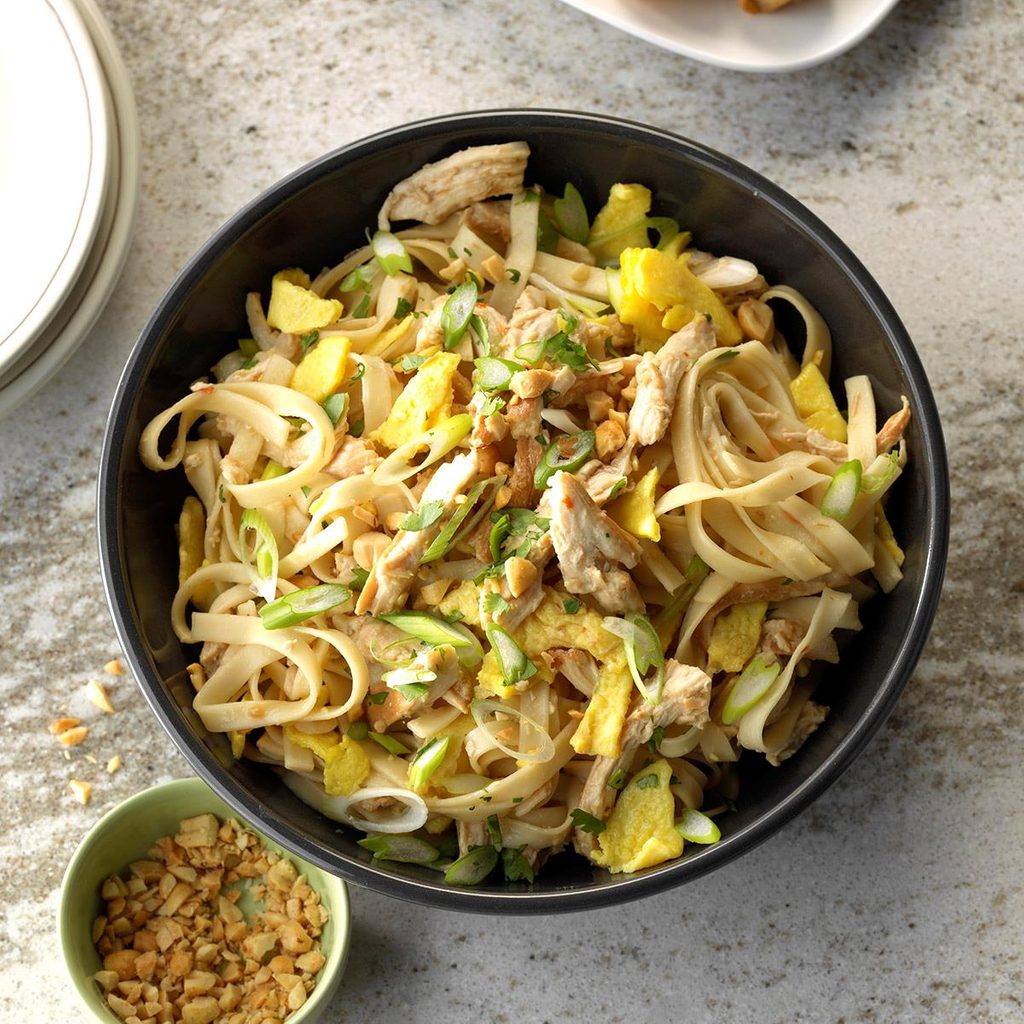
Slow-Cooker Pad Thai
Total Time: 4 hours and 20 minutes
Main Ingredients: Chicken breasts, brown sugar, soy sauce, lo mein noodles, salted peanuts
Level: Intermediate
Traditional pad thai recipes call for tamarind paste made from a tangy fruit that gives the dish its characteristic sweet and sour flavor. Our slow-cooker recipe uses lime juice instead, saving you from having to buy a jar if you don't often cook with this ingredient. You can serve the chicken over cooked lo mein noodles or soak a package of rice noodles to make a gluten-free version.
"I love pad thai, but I hate standing over a hot stir-fry, especially in summer. This slow-cooker version lets me keep my cool and enjoy pad thai too." —Recipe contributor Shawn Barto, Winter Garden, Florida
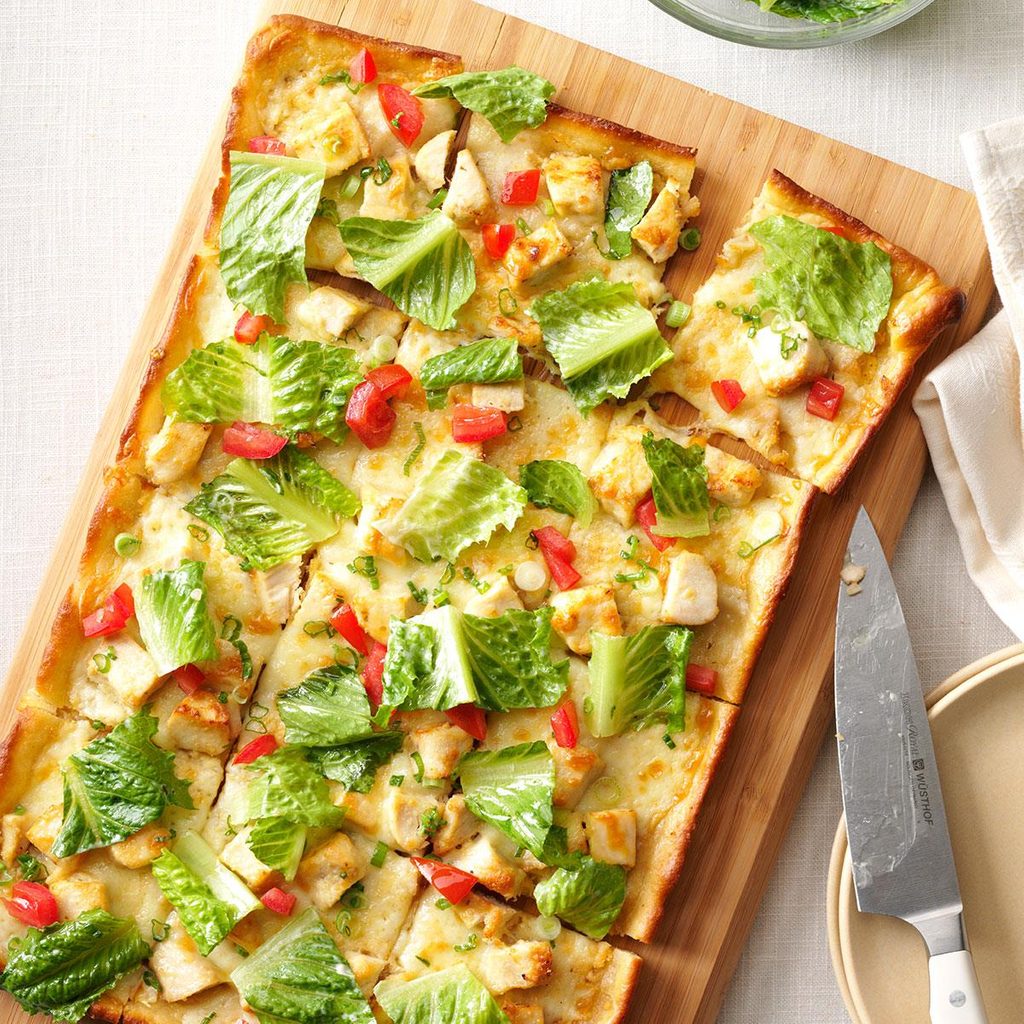
Chicken Caesar Pizza
Total Time: 30 minutes
Main Ingredients: Chicken breasts, pizza crust, Caesar salad dressing, romaine salad mix
Level: Beginner
Transform refrigerated pizza crust into a unique meal with this recipe, which takes everything you love about Caesar salad and turns it into a pizza-eating experience. The Caesar dressing is used instead of tomato sauce, infusing the chicken and the dough with a fun and different seasoning.
"Dressed greens on top of warm pizza may sound a little strange but trust me, it's fantastic." —Recipe contributor Tracy Youngman, Post Falls, Idaho
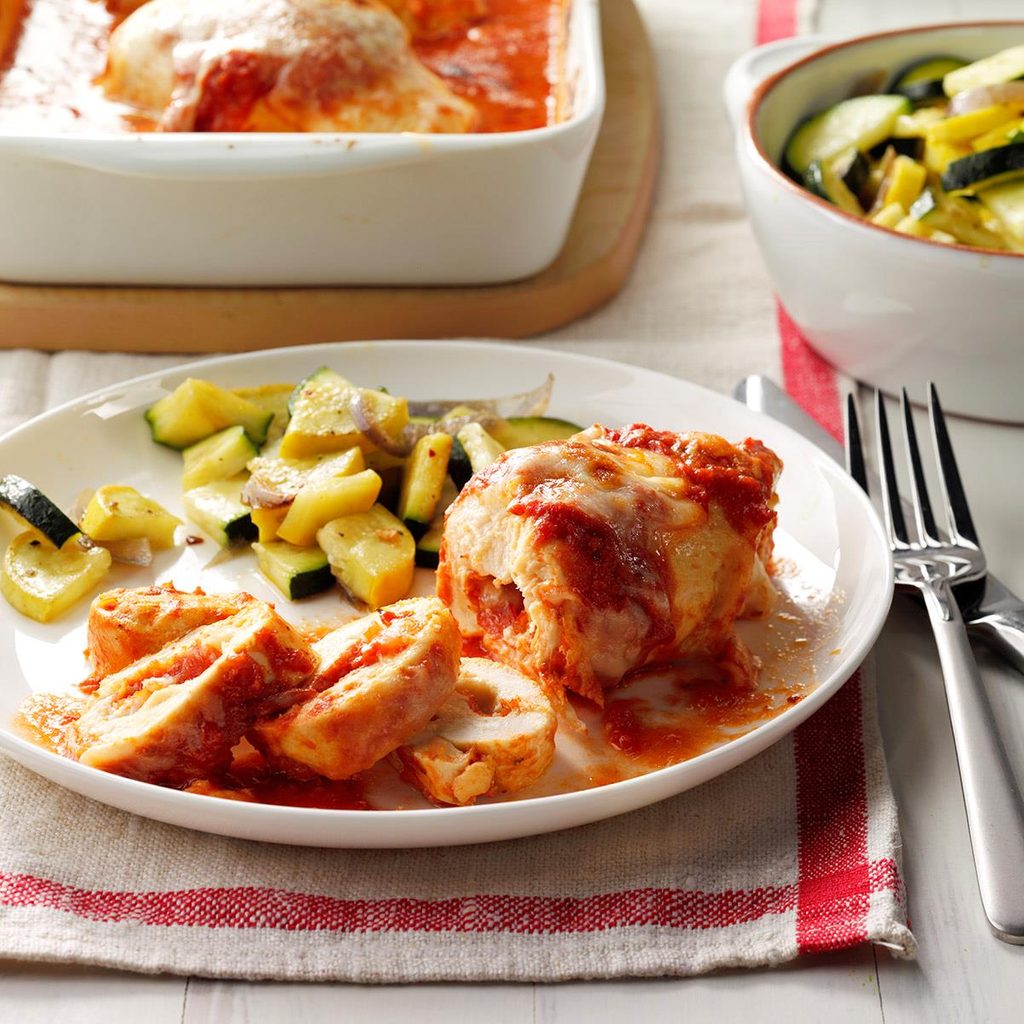
Pizza Chicken Roll-Ups
Total Time: 50 minutes
Main Ingredients: Chicken breasts, pepperoni slices, pizza sauce
Level: Beginner
Anyone with picky eaters in the house knows it can be difficult to make a meal enjoyed by the entire family. That's not a problem when pizza chicken is on the menu! If rolling the chicken sounds like too much work, you can layer the pizza sauce, pepperoni and mozzarella on whole chicken breasts instead.
"I love the chicken roll-ups my mom made for special occasions, filled with spinach and cream cheese. My own kids wouldn't eat those, so I came up with a pizza-flavored variety the whole family enjoys." —Recipe contributor Tanja Penquite, Oregon, Ohio
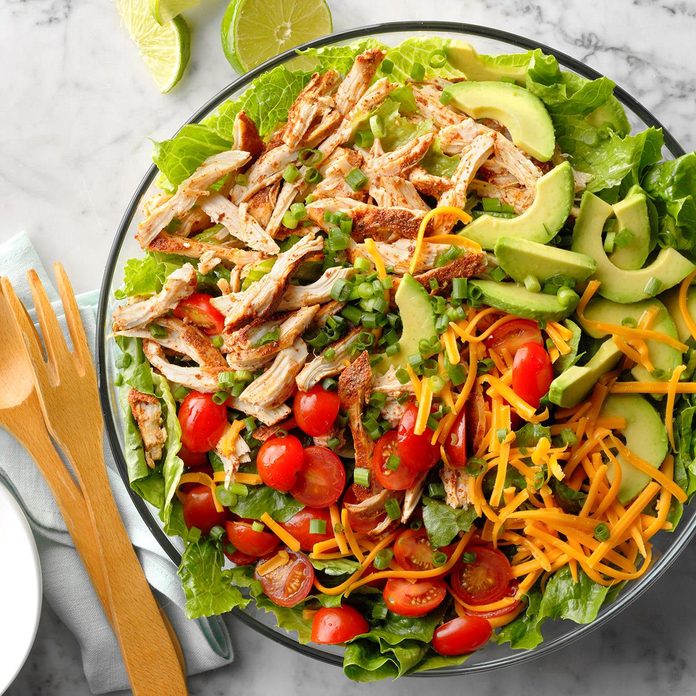
Slow-Cooker Chicken Taco Salad
Total Time: 3 hours and 10 minutes
Main Ingredients: Chicken breasts, chicken broth, romaine lettuce
Level: Beginner
If you're looking for a go-to shredded chicken recipe, this is the one to bookmark. The chicken is tossed with a ton of flavorful spices, and it's ready to shred after about four hours in the slow cooker. It's perfect for tacos, sandwiches, enchiladas, omelets or salads, so double the recipe and make enough for several meals.
"We use this super-duper chicken across several meals, including it in tacos, sandwiches, omelets and enchiladas. My little guys love helping to measure the seasonings." —Recipe contributor Karie Houghton, Lynnwood, Washington
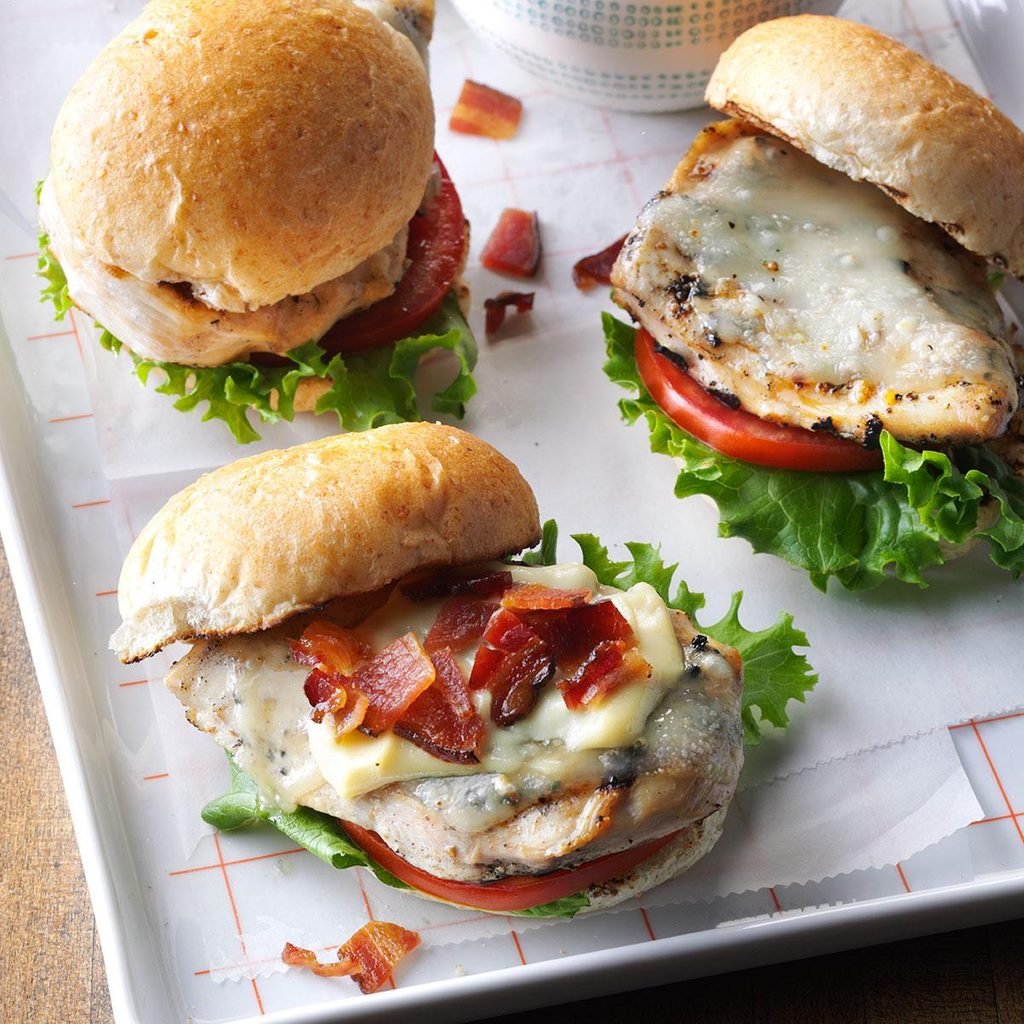
Bacon & Swiss Chicken Sandwiches
Total Time: 25 minutes
Main Ingredients: Chicken breasts, mayonnaise, Dijon mustard, Swiss cheese, hamburger buns
Level: Beginner
You can never have too many sandwich recipes in your back pocket, and this one is definitely a keeper. The Swiss cheese brings a sweet and nutty character while the bacon adds crunch and a salty, savory flavor. The real winner here is the sauce, an easy mixture of mayonnaise,
Dijon mustard and honey that's great for the sandwich, but also perfect for dipping fries.
"I created this chicken sandwich recipe based on a meal my daughter ordered at a restaurant. She likes to dip her sandwich in the extra honey-mustard sauce." —Recipe contributor Marilyn Moberg, Papillion, Nebraska
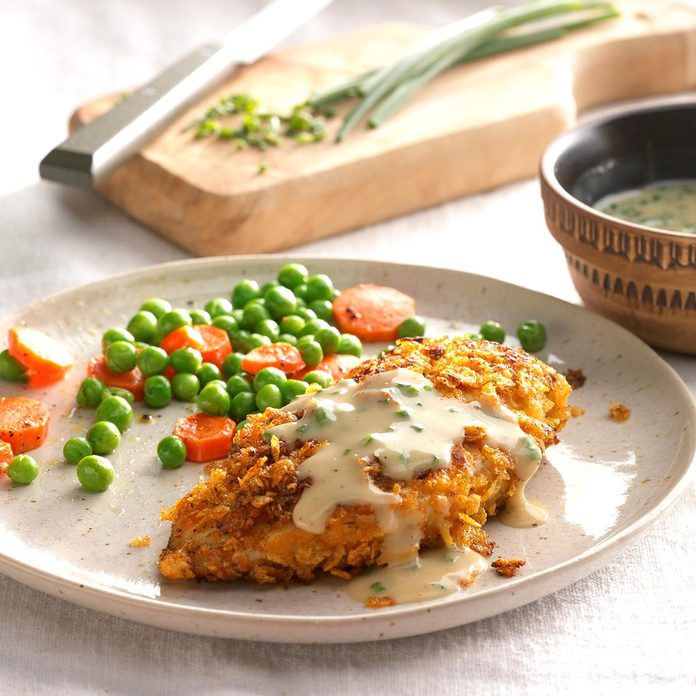
Country Chicken and Gravy
Tota Time: 30 minutes
Main Ingredients: Chicken breasts, cornflakes, evaporated milk, chicken broth
Level: Intermediate
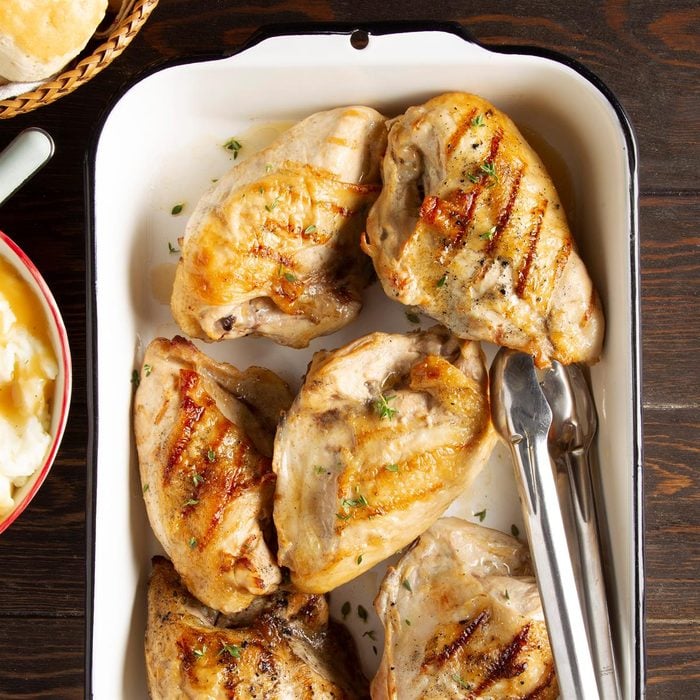
Plan a southern-style meal by serving this country chicken and gravy with
mashed potatoes, corn on the cob and
buttermilk biscuits. The chicken turns out so juicy and delicious, and the homemade gravy only takes about five minutes to make.
"Here's a lightened-up take on the classic southern comfort food dish chicken and gravy. This recipe has been a hit at our house since the first time we tried it!" —Recipe contributor Ruth Helmuth, Abbeville, South Carolina
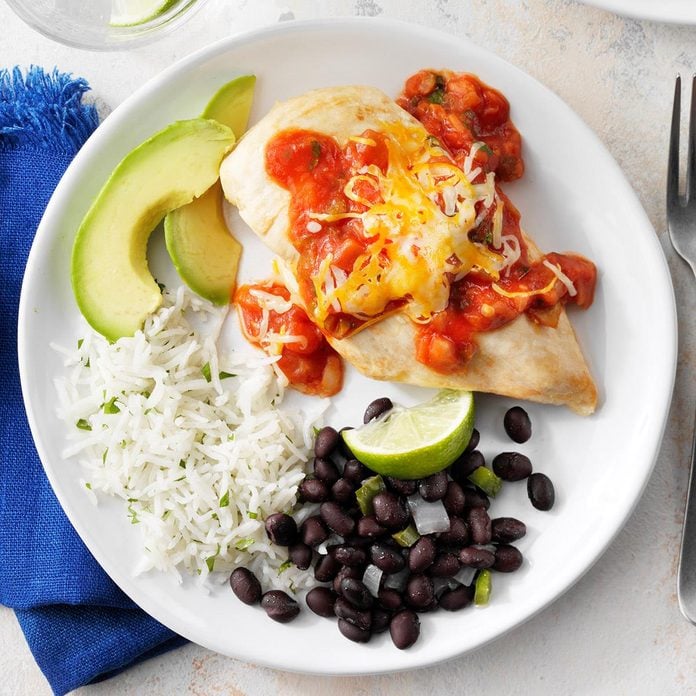
Simple Salsa Chicken
Total Time: 35 minutes
Main Ingredients: Chicken breasts, salsa, taco sauce, Mexican cheese blend
Level: Beginner
Sometimes, simple is best, especially when you're running short on time. This recipe is as easy as combining taco sauce and salsa, pouring it over the chicken and topping it with cheese. We like serving this chicken with a side of rice and beans or a salad, but you can pair it with any
vegetable side dish.
"My husband and I prefer our food a little spicier than our children do, so I created this baked salsa chicken recipe just for the two of us. It's now a regular menu item at our house." —Recipe contributor Jan Cooper, Troy, Alabama
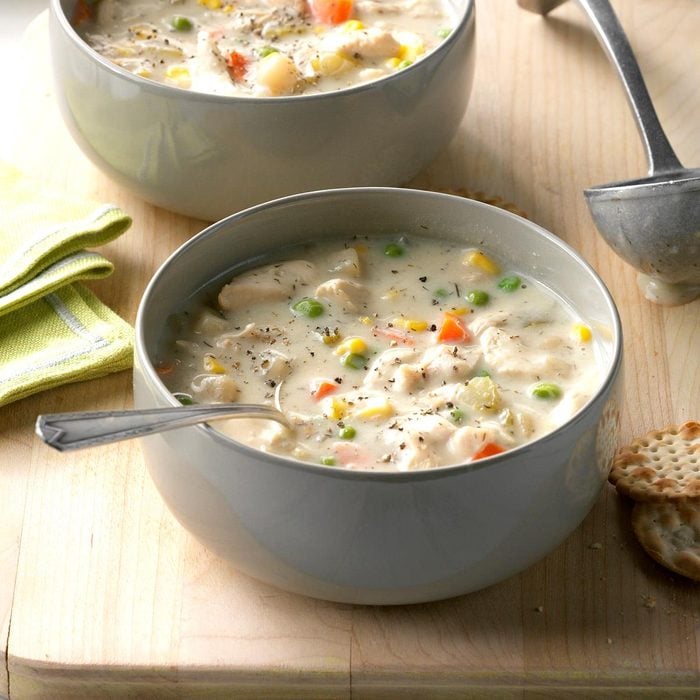
Chunky Creamy Chicken Soup
Total Time: 4 hours and 45 minutes
Main Ingredients: Chicken, onion, carrots, condensed cream of potato soup, half-and-half cream
Level: Beginner
This is one of those slow-cooker recipes that's infinitely customizable. It tastes great as written, but feel free to make a few ingredient swaps to use up what you have instead of going to the store. It's made with cream of potato soup, but cream of mushroom, chicken or celery work, too. Swap in other frozen vegetables if you aren't in the mood for peas and corn.
"I am a stay-at-home mom who relies on my slow cooker for fast, nutritious meals with minimal cleanup and prep time. I knew this recipe was a hit when I didn't have any leftovers and my husband asked me to make it again." —Recipe contributor Nancy Clow, Mallorytown, Ontario
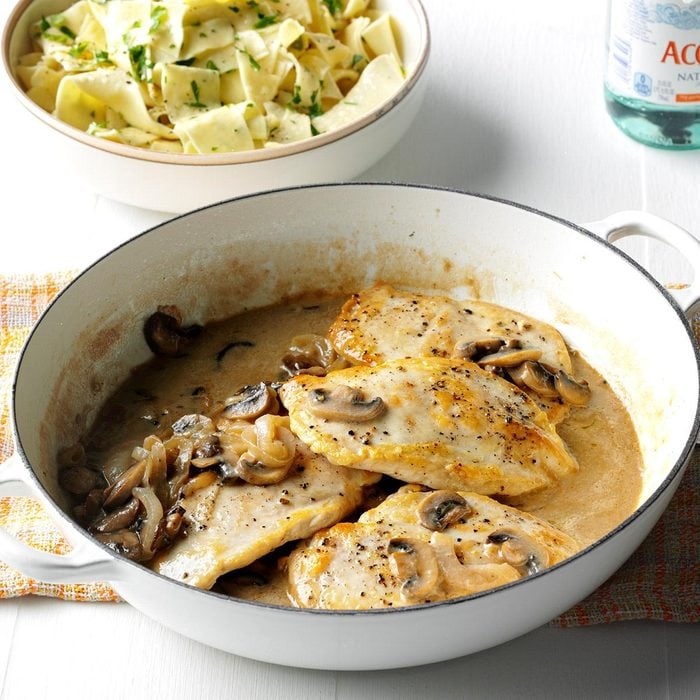
Contest-Winning Chicken with Mushroom Sauce
Total Time: 25 minutes
Main Ingredients: Chicken breasts, chicken broth, mushrooms
Level: Beginner
If you want to impress dinner guests with a fancy meal but don't want to spend all day prepping, pick up the ingredients for this chicken breast recipe. It only takes 25 minutes to make, but the mushroom sauce is fancy enough to be a restaurant dish.
"It looks impressive, but this mouthwatering chicken and mushroom sauce comes together in no time. I think its flavor rivals that of many full-fat entrees found in fancy restaurants." —Recipe contributor Jennifer Pemberton, Muncie, Indiana
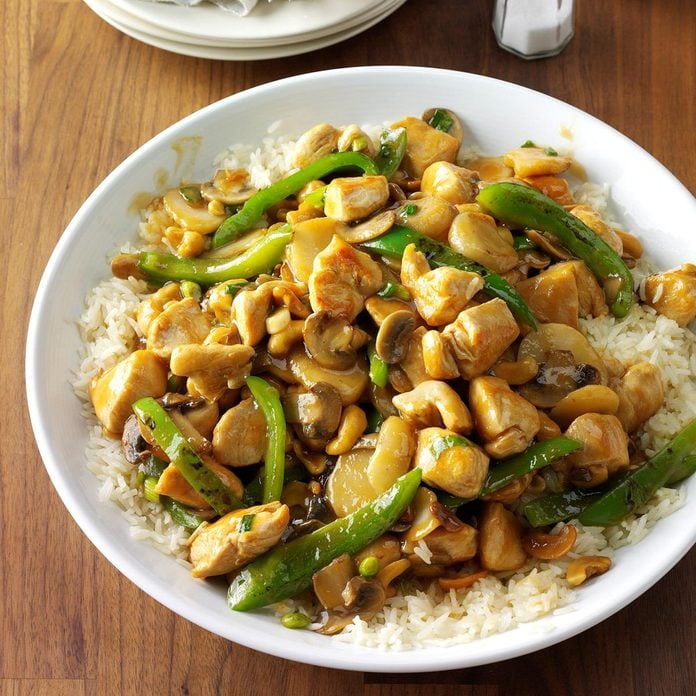
Cashew Chicken with Ginger
Total Time: 30 minutes
Main Ingredients: Chicken breasts, chicken broth, soy sauce, cashews, water chestnuts
Level: Beginner
Cashew chicken is a fantastic stir-fry dish featuring tender chicken swimming in a lightly sweet sauce. Between the tender-crisp vegetables and the chopped cashews, this dish has the perfect level of crunch. If you're making enough for leftovers, keep the cashews on the side until you're ready to serve to prevent them from getting soggy.
"There are lots of recipes for cashew chicken, but my family thinks this one stands alone. We love the flavor from the fresh ginger and the crunch of the cashews. Another plus is it's easy to prepare." —Recipe contributor Oma Rollison, El Cajon, California
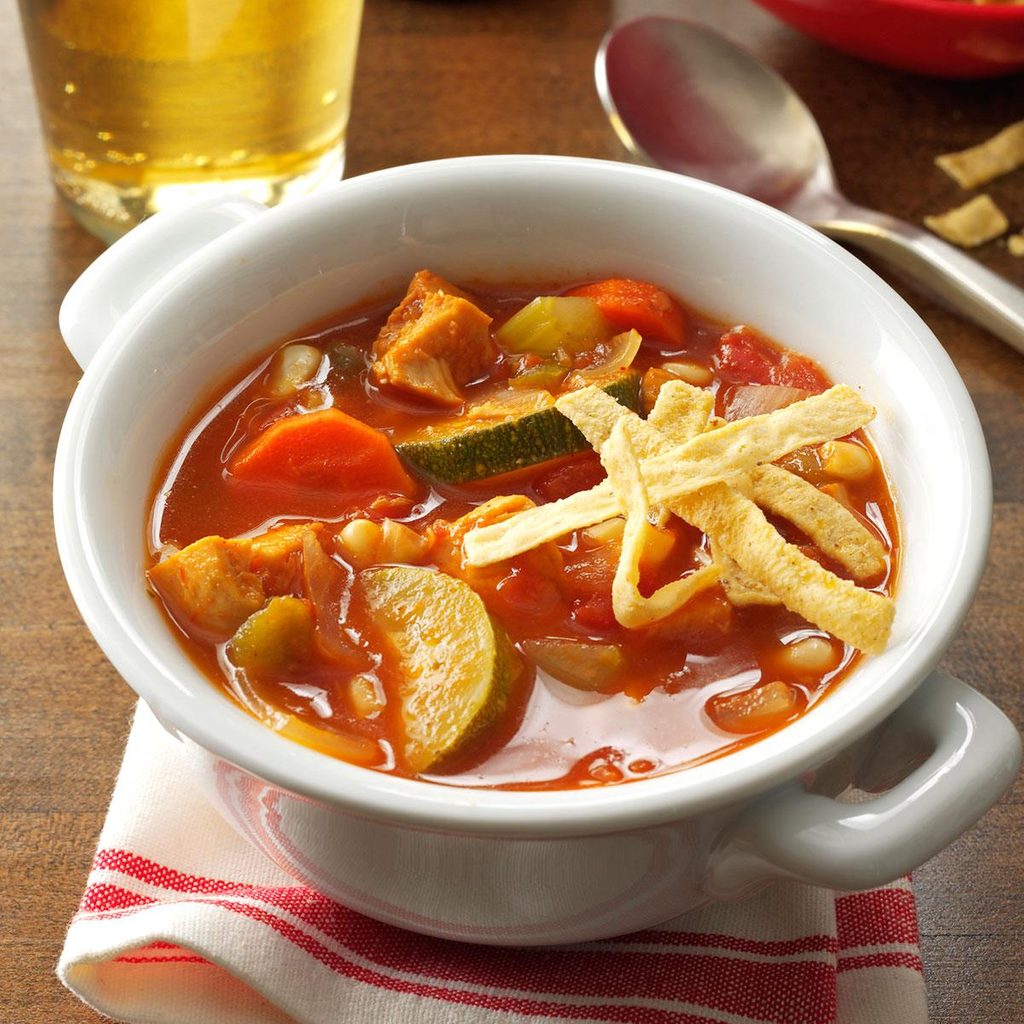
Zesty Chicken Soup
Total Time: 1 hour
Main Ingredients: Chicken breasts, onion, celery ribs, diced tomatoes, tomato sauce, salsa, green chiles, white corn
Level: Beginner
Most soups are made with broth instead of water, but you'll find that you don't need it with this recipe. The tomato sauce and salsa come together to create a zesty foundation, and the vegetables soak up all that flavor as they cook. Top it off with tortilla chips and some shredded
cheddar cheese for a meal that warms the heart and the belly.
"This spicy chicken soup is chock-full of chicken and vegetables. Best of all, it freezes nicely, making a second meal with little effort!" —Recipe contributor Gwen Nelson, Castro Valley, California
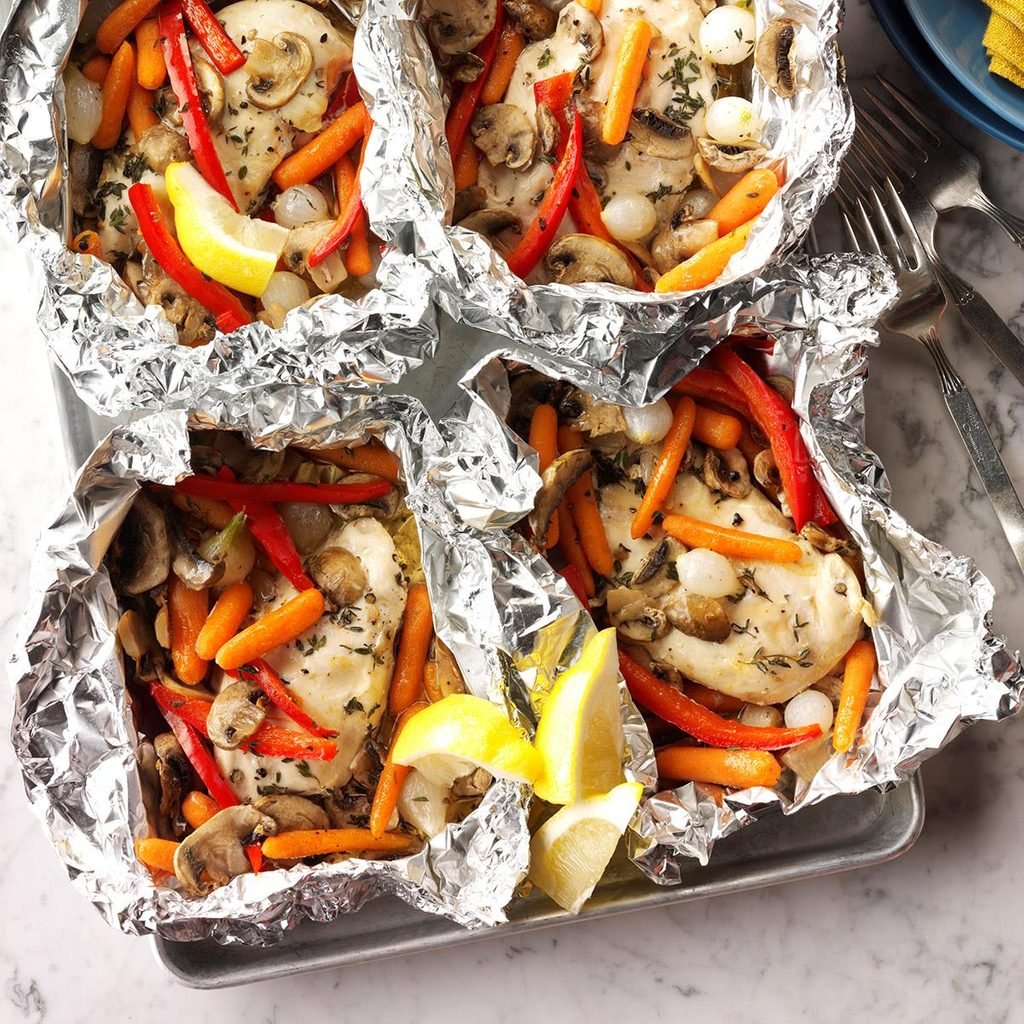
Chicken Veggie Packets
Total Time: 30 minutes
Main Ingredients: Chicken breasts, mushrooms, carrots, red pepper
Level: Beginner
Foil packets are an excellent option for cooking chicken breasts because they lock the moisture inside as the chicken cooks. If you're changing up the vegetables inside the packet, make sure they're cut so they'll finish in the same time as the chicken. Large chunks of potatoes wouldn't cook through, for example, whereas thinly sliced potatoes would be just fine.
"People think I went to a lot of trouble when I serve these packets. Individual aluminum foil pouches hold in the juices during baking to keep the herbed chicken moist and tender. The foil saves time and makes cleanup a breeze." —Recipe contributor Edna Shaffer, Beulah, Michigan
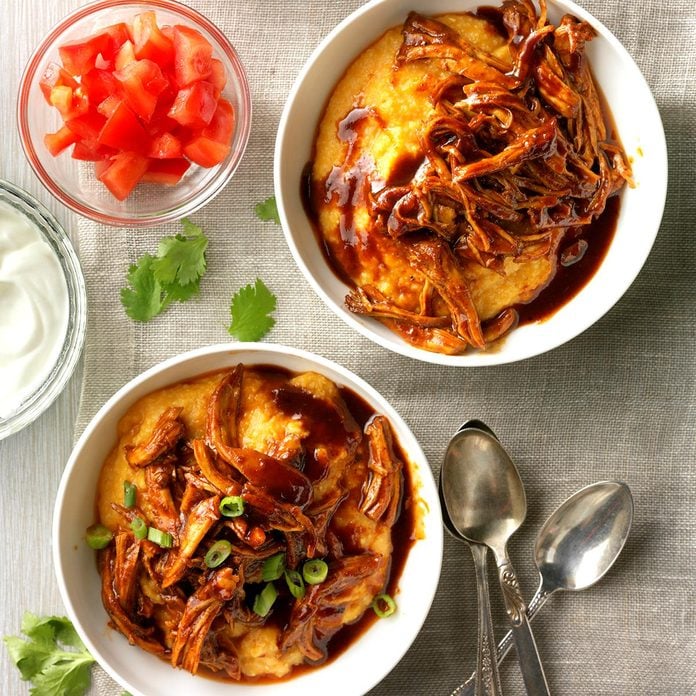
Shredded Barbecue Chicken over Grits
Total Time: 45 minutes
Main Ingredients: Chicken breasts, chicken broth, barbecue sauce, canned pumpkin, quick-cooking grits
Level: Beginner
This recipe has a fun ingredient that we don't often see in classic chicken and grits recipes:
canned pumpkin. The sweet addition balances perfectly against the rich grits and bold barbecue sauce, and the ancho chile pepper adds a welcome level of spice. This one is a keeper!
"There’s nothing like juicy meat served over creamy grits. And the pumpkin in these grits makes them taste like a spicy, comforting bowl of fall flavors. Your family will come running to the table for this one." —Recipe contributor Erin Renouf Mylroie, Santa Clara, Utah
Chicken Soup with Beans
Total Time: 6 hours and 20 minutes
Main Ingredients: Chicken, great northern beans, white corn, diced tomatoes and green chiles
Level: Beginner
This soup should be renamed "comfort in a bowl," because it looks like a warm hug as soon as it reaches the table. The chicken and beans are soft and savory while the corn brings a welcome burst of sweetness with every bite. If you can find it, use shoepeg corn in this recipe. It's sweeter than most corn varieties and really makes each bite pop.
"Loaded with classic southwestern flavors, this soup is so satisfying. If you like, crush lime-flavored tortilla chips into serving bowls before you ladle in the soup." —Recipe contributor Penny Peronia, West Memphis, Arkansas
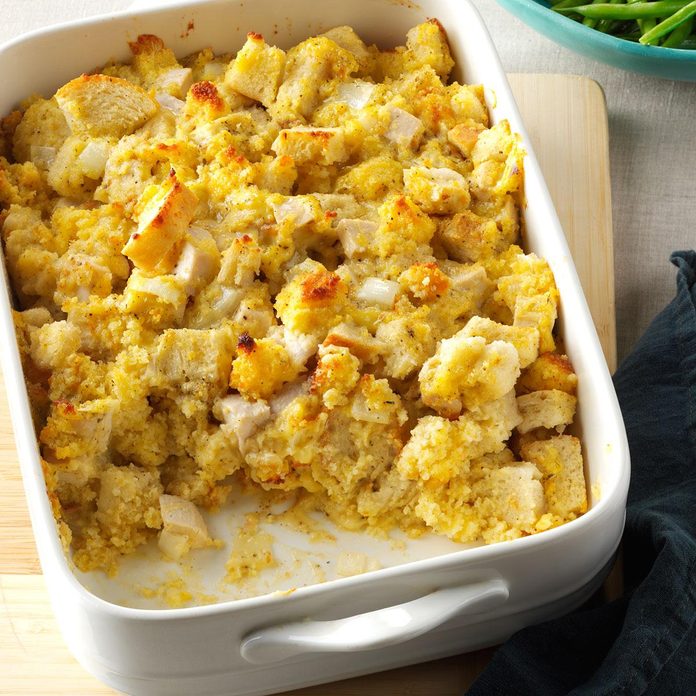
Cornbread Chicken Bake
Total Time: 1 hour
Main Ingredients: Chicken breasts, cubed cornbread, cream of chicken soup, chicken broth
Level: Beginner
We don't always end up with leftover cornbread—it's usually gobbled up pretty quickly! But when we do, we make this chicken casserole. The flavors are reminiscent of stuffing, but the cornbread and cream of chicken soup create a fabulous texture that's hard to beat.
"To make the most of leftover cornbread, try this hearty main dish casserole. It's moist, delicious and good on any occasion." —Recipe contributor Madge Britton, Afton, Tennessee
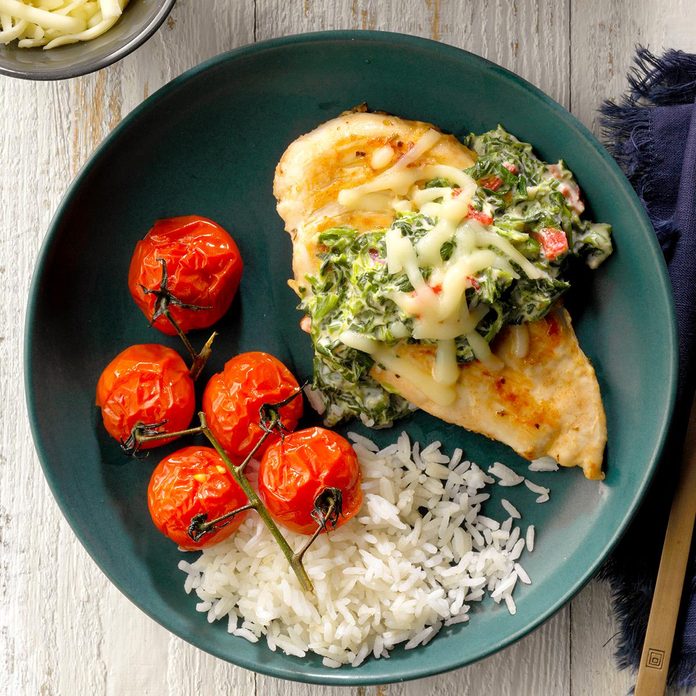
Chicken with Florentine Sauce
Total Time: 30 minutes
Main Ingredients: Chicken breasts, flour, chicken broth, whole milk, spinach
Level: Intermediate
Florentine sauce refers to a classic French dish made with spinach and Mornay sauce (a cheesy version of the
mother sauce bechamel). It's an elegant dish that—surprisingly—only takes 30 minutes to make. We use frozen spinach for ease, but you can easily swap in the fresh stuff. Just be sure to squeeze out the excess liquid after steaming it to prevent a watery sauce.
"Here is my very favorite chicken Florentine recipe. A creamy topping and pretty presentation make it elegant enough for company, but it’s also fast to fix on busy weeknights!" —Recipe contributor Julie Fitzgerald, St Louis, Missouri
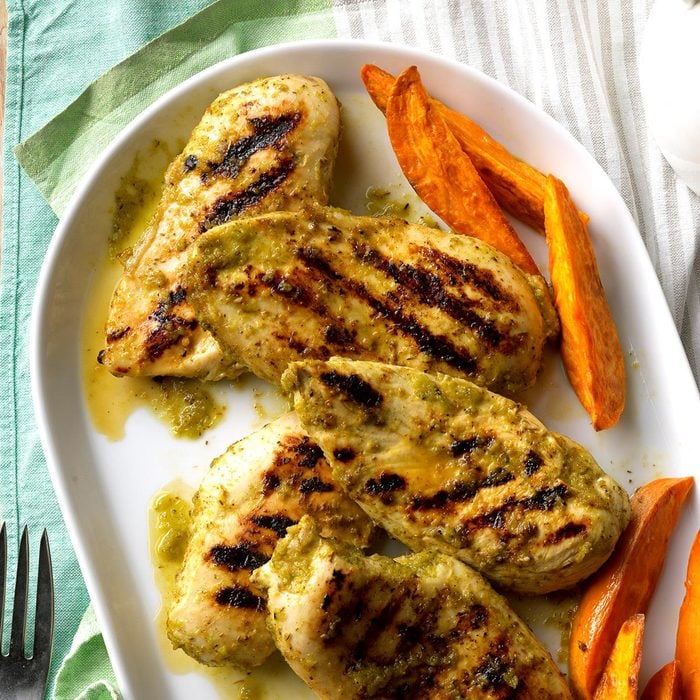
Caribbean Chicken
Total Time: 25 minutes
Main Ingredients: Chicken breasts, jalapeno peppers, onions
Level: Beginner
Caribbean food is known for being bold and spicy, and this chicken breast recipe holds to that standard. It's made with a sweet and spicy marinade that contains three jalapeno peppers. You may want to adjust the number of peppers based on your family's tolerance for heat, keeping in mind that individual peppers tend to vary in pungency and spice level.
"You'd be hard-pressed to find a marinade this flavorful at any store! Add or subtract the jalapenos to suit your crew's taste, and you'll be grilling a new family favorite before you know it." —Recipe contributor Rusty Collins, Orlando, Florida
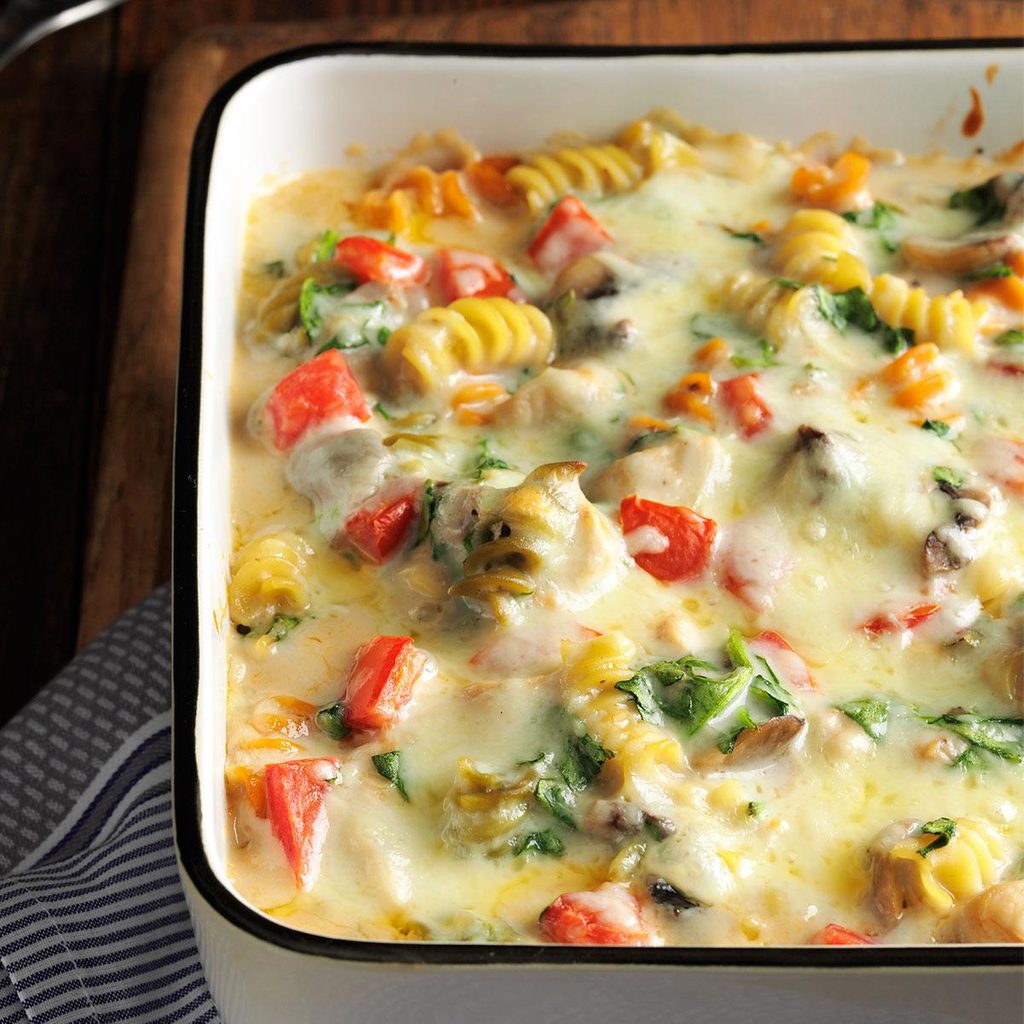
Fontina Chicken & Pasta Bake
Total Time: 40 minutes
Main Ingredients: Chicken breasts, spiral pasta, mushrooms, cream of mushroom soup, fontina cheese
Level: Beginner
Fontina is one of our go-to
melting cheeses because of its buttery, smoother texture and rich, creamy flavor. It pairs perfectly with chicken, especially when combined with mushrooms, spinach and tomato. This casserole can be frozen, but we recommend cutting it into individual portions first to make it easier to serve upon reheating.
"Eat it tonight, or freeze it for later. This cheesy casserole is still awesome months after you make it." —Taste of Home Test Kitchen
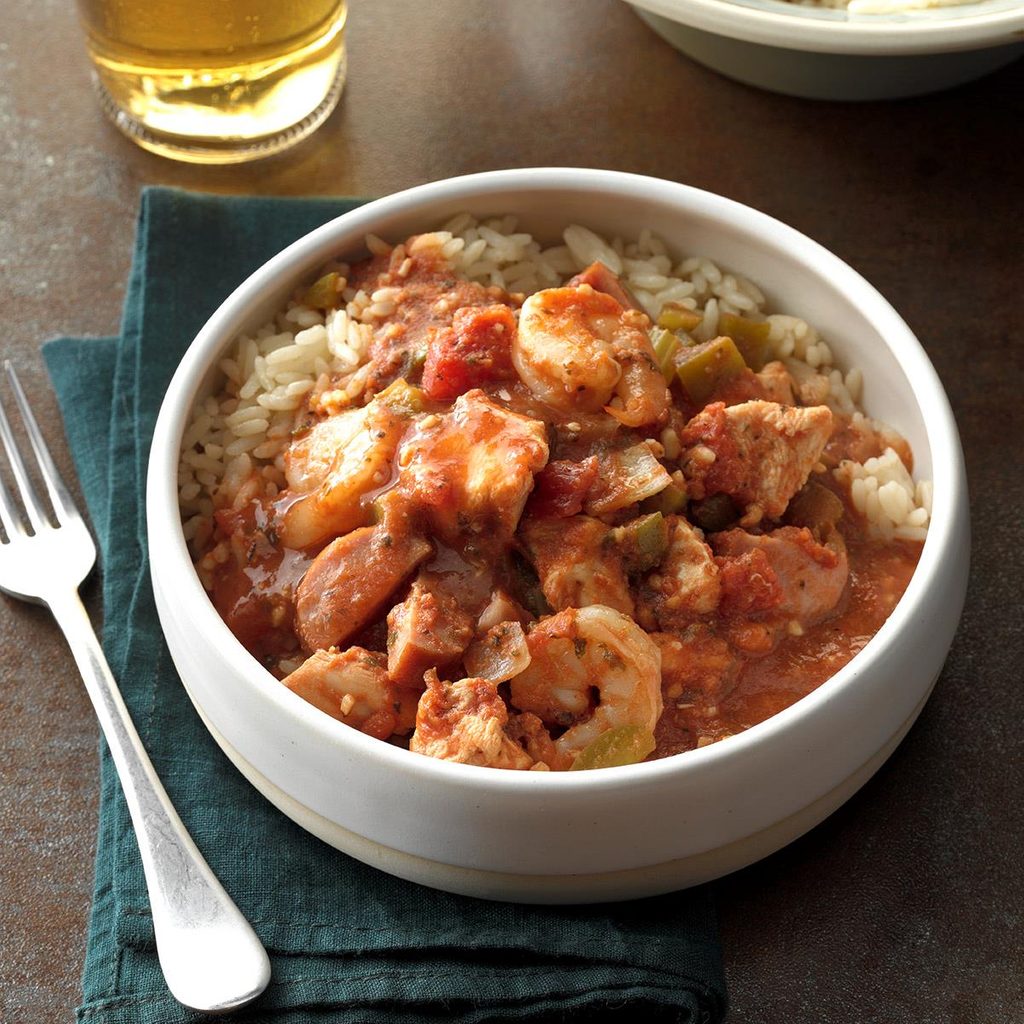
Forgotten Jambalaya
Total Time: 2 hours
Main Ingredients: Chicken breasts, diced tomatoes, tomato paste, smoked sausage, shrimp
Level: Beginner
You won't believe how easy this recipe is. Combine all the ingredients (except the shrimp) in a slow cooker and cook on low for four to six hours. About 15 minutes before serving, stir in the shrimp. The combination of juicy chicken, smoky sausage and sweet shrimp is absolutely perfect.
"During chilly times of the year, I fix this slow-cooker jambalaya recipe at least once a month. It’s so easy—just chop the vegetables, dump everything in the slow cooker and forget it! Even my sons, who are picky about spicy things, like this easy jambalaya." —Recipe contributor Cindi Coss, Coppell, Texas
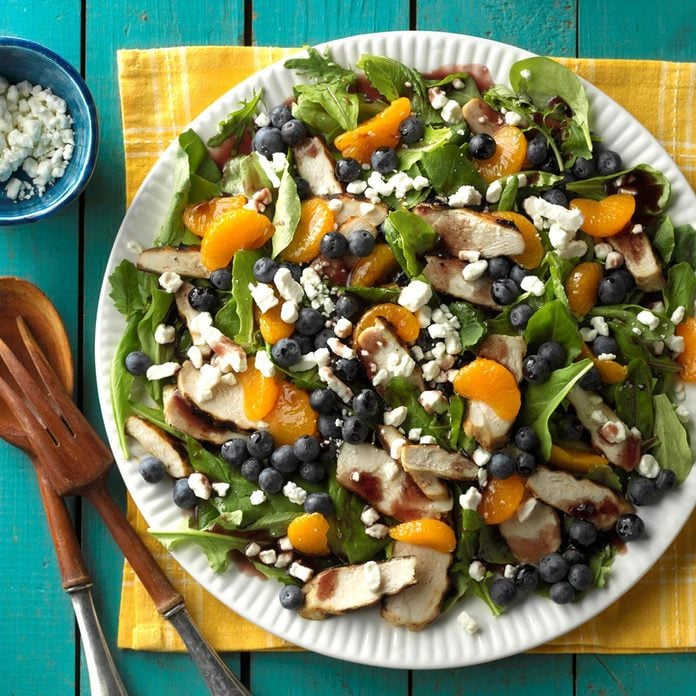
Grilled Chicken Salad with Blueberry Vinaigrette
Total Time: 30 minutes
Main Ingredients: Chicken breasts, blueberry vinaigrette, blueberry salad
Level: Beginner
Some say that we eat with our eyes first. If that adage is true, this recipe starts to satisfy as soon as it reaches the table. This refreshing salad is chock-full of colorful ingredients that taste as good as they look.
"We love adding grilled chicken to our salads in the summer, but the real star here is the vinaigrette made with blueberry preserves and maple syrup. This salad goes great with a fresh baguette and a frosty glass of minted lemonade" —Recipe contributor Susan Gauthier, Falmouth, Maine
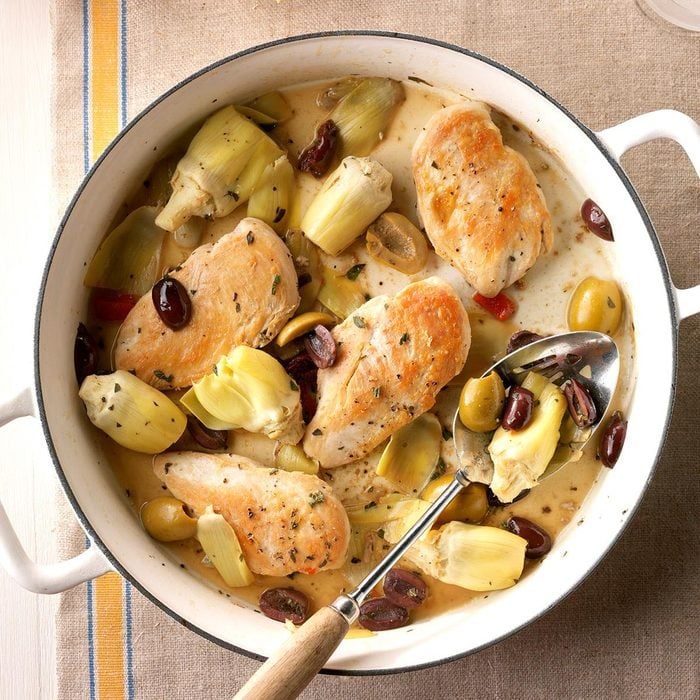
Chicken Artichoke Skillet
Total Time: 25 minutes
Main Ingredients: Chicken breasts, artichoke hearts, pimento-stuffed olives, Greek olives
Level: Beginner
This chicken breast recipe is packed with Greek flavors, from briny
olives to herbaceous oregano and bright lemon juice. And then, there are the artichokes. Artichokes contain an acid called cynarin that doesn't taste like much on its own, but it brings out sweetness in other ingredients. Put it together and this dish has it all.
"My fast chicken entree featuring artichokes and olives has real Greek flair. Seasoned with lemon juice and oregano, the stovetop chicken turns out moist and tender." —Recipe contributor Carol Latimore, Arvada, Colorado
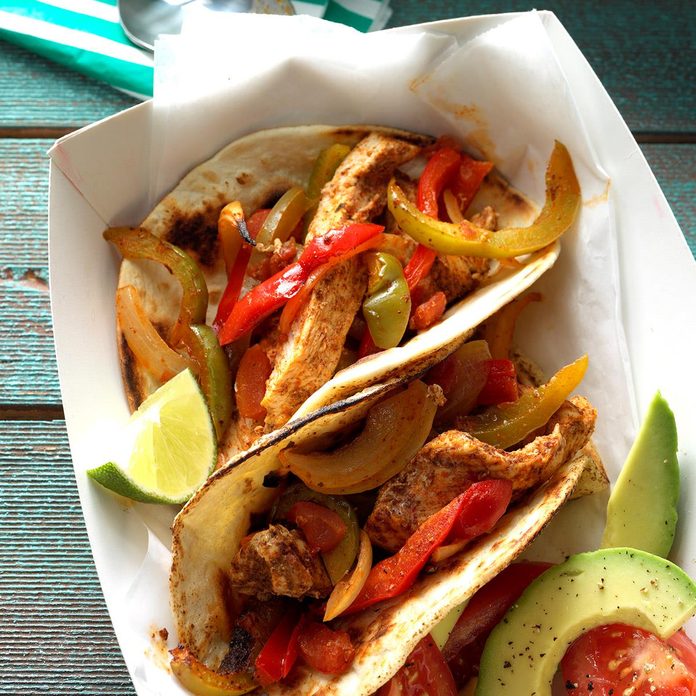
Baked Chicken Fajitas
Total Time: 35 minutes
Main Ingredients: Chicken breasts, flour tortillas, diced tomatoes, onions, green peppers
Level: Beginner
When you're in the mood for a sizzling platter of fajitas but don't want to make a mess on the stovetop, bake your fajitas instead. The chicken, vegetables and spices are combined in a single casserole dish, so it's just as easy to cook as it is to clean up.
"I can't remember when or where I found this oven-baked fajitas recipe, but I've used it nearly every week since. We like it with hot sauce for added spice." —Recipe contributor Amy Trinkle, Milwaukee, Wisconsin
Chicken Rice Bowl
Total Time: 10 minutes
Main Ingredients: Grilled chicken breast strips, instant rice, chicken broth, frozen corn, frozen peas
Level: Beginner
If you use a few ingredient shortcuts (like instant rice, precooked grilled chicken and frozen vegetables), this recipe takes only 10 minutes to come together. You could easily start by grilling fresh chicken breasts or swap in leftover rotisserie chicken, if you prefer. Either way, this quick meal is going to be delicious!
"This chicken rice bowl recipe is so easy to toss together on a busy weeknight, and I usually have the ingredients already on hand. I start sauteing the onion and pepper first, then I prepare the instant rice. If you like, top it with some shredded sharp cheddar cheese." —Recipe contributor Tammy Daniels, Batavia, Ohio
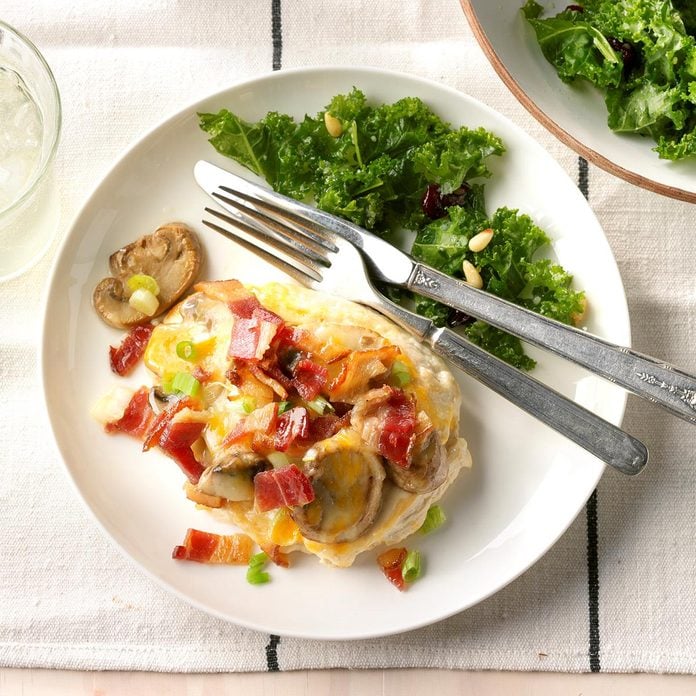
Smothered Chicken
Total Time: 20 minutes
Main Ingredients: Chicken breasts, mushrooms, Mexican cheese blend, bacon strips
Level: Beginner
We're not sure what we love most about this recipe: the moist chicken breasts, smoky bacon, savory mushrooms, melty cheese or the fact that it only takes 20 minutes to cook. This dish pairs well with any vegetable, but our favorites are roasted broccoli, sauteed kale or mashed potatoes.
"You can't go wrong when serving this speedy skillet creation. Top tender chicken breasts with mushrooms, bacon, green onions and cheese for a swift and savory sensation that's sure to become a family favorite." —Recipe contributor Penny Walton, Westerville, Ohio
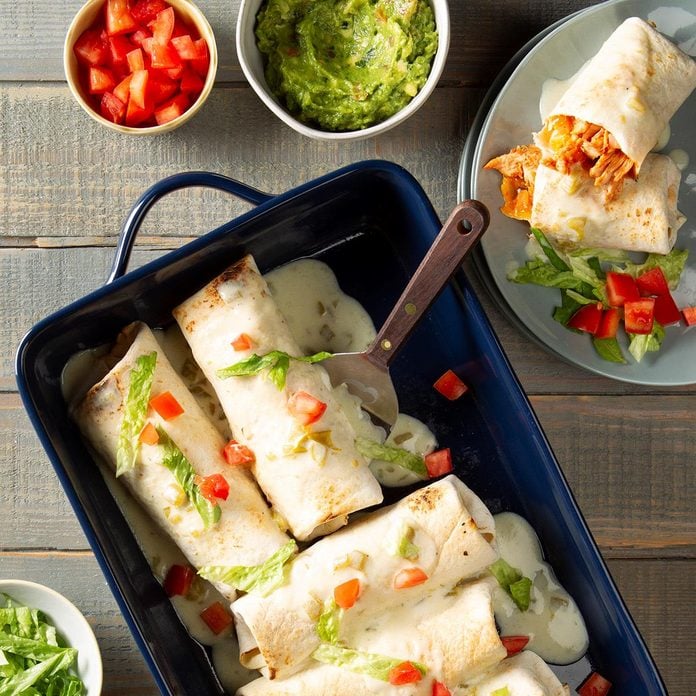
Baked Chimichangas
Total Time: 30 minutes
Main Ingredients: Shredded chicken, salsa, flour tortillas, chicken bouillon granules, green chiles
Level: Beginner
Typically, chimichangas are deep-fried burritos, but our baked version is healthier and simpler to make. After rolling the chicken mixture in flour tortillas, pop them into the oven for about 15 minutes to brown. Alternatively, you can spray the burritos with a little cooking spray and use the air fryer to crisp them up.
"My baked chimichanga recipe is healthier than a deep-fried version, but it's just as delicious. You can omit the chiles for less heat." —Recipe contributor Angela Oelschlaeger, Tonganoxie, Kansas
15-Minute Marinated Chicken
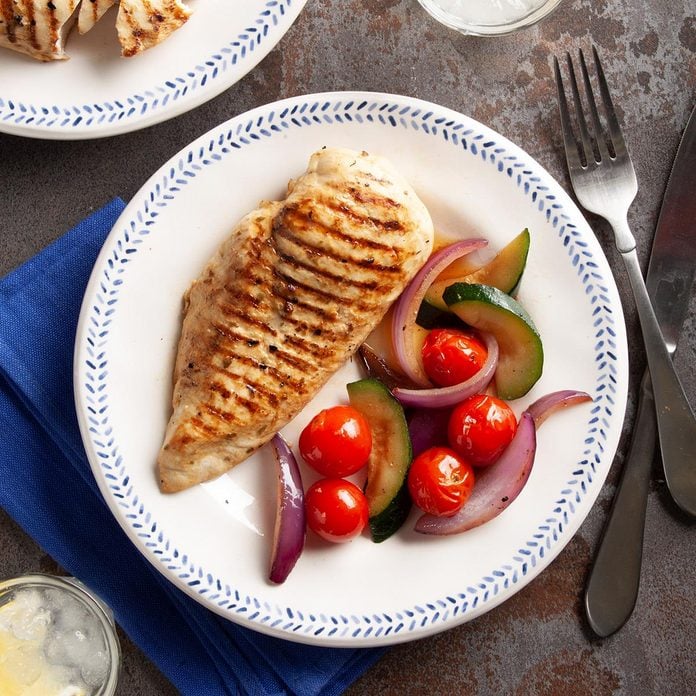
Total Time: 30 minutes
Main Ingredients: Chicken breasts, Dijon mustard, Worcestershire sauce
Level: Beginner
Most chicken marinades call for anywhere from four hours to overnight to let the marinade tenderize the meat. That requires planning ahead, which isn't always in the cards. Luckily, this chicken breast recipe only takes 15 minutes to create full-flavored goodness.
"Whenever I serve this grilled chicken to family and friends, which is quite often, I'm bound to be asked for the 15-minute marinade recipe. It's a fast and tasty meal that I'm happy to share with others." —Recipe contributor Pam Shinogle, Arlington, Texas
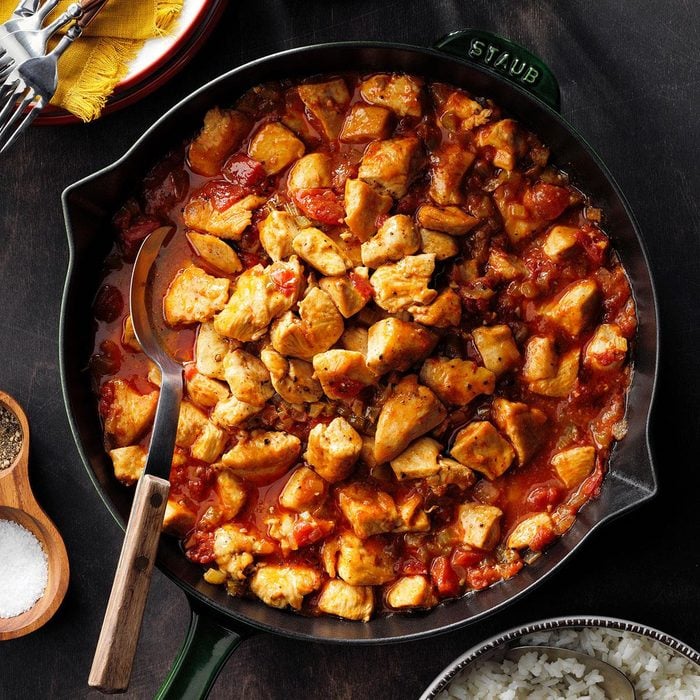
Chicken Creole
Total Time: 35 minutes
Main Ingredients: Chicken breasts, chopped onion, celery, green pepper, diced tomatoes
Level: Beginner
The difference between Cajun and Creole food is that the latter uses tomatoes, as seen in this fabulous spiced chicken and tomato dish. It tastes fantastic over rice, but we also love serving it with
grits or buttermilk biscuits.
"I like food that has a little zip to it, and this Creole chicken recipe hits the spot every time. It’s especially good served over rice." —Recipe contributor Dolly Hall, Wheelwright, Kentucky
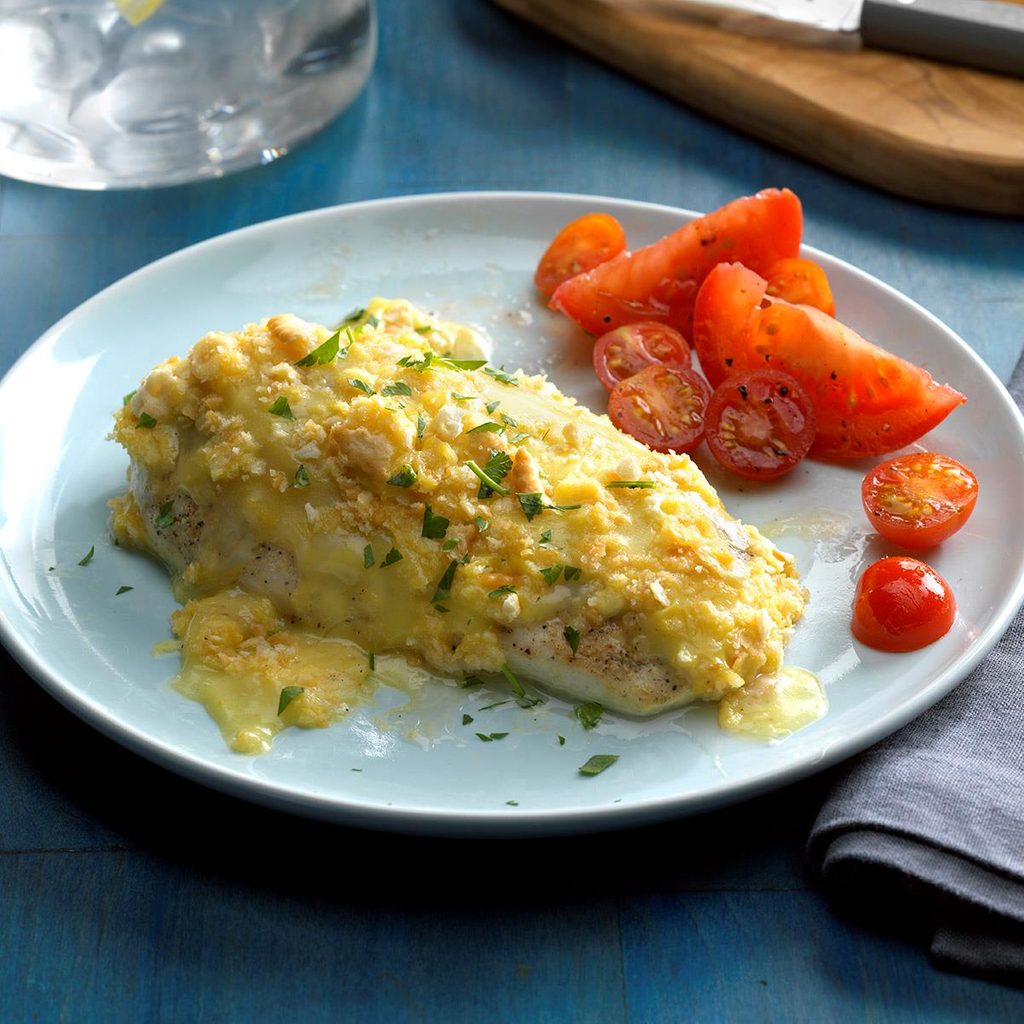
Makeover Swiss Chicken Supreme
Total Time: 45 minutes
Main Ingredients: Chicken breasts, Swiss cheese, cream of chicken soup, Ritz crackers
Level: Beginner
Chicken supreme doesn't have a well-defined history, but we know that it comes from traditional French cooking, where "supreme" referred to a boneless, skinless chicken breast. The sauce that tops the chicken was originally made from scratch, although most modern recipes use condensed cream of chicken soup.[/rms_recipe]
"Recipe contributor Stephanie Bell asked our test kitchen to lighten her family-favorite recipe. Even though this makeover recipe is slimmed down, it is still supreme. It has 560 fewer calories, 81 percent less fat and nearly 75 percent less sodium." —Taste of Home Test Kitchen
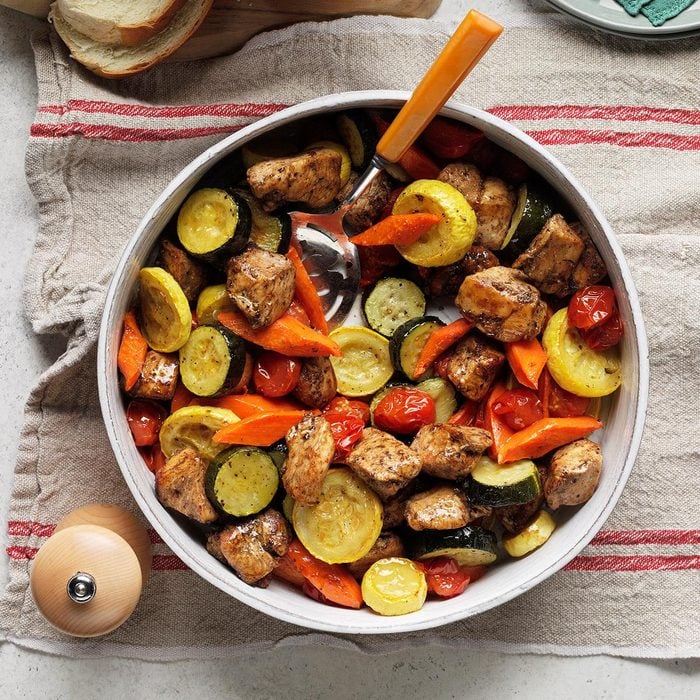
Kabobless Chicken and Vegetables
Total Time: 55 minutes
Main Ingredients: Chicken breasts, yellow summer squash, zucchini, carrots
Level: Beginner
We love chicken kabobs, but the idea of skewering all those ingredients on a weeknight is sometimes daunting. Luckily, this recipe has all the components of a good chicken and vegetable kabob with a fraction of the work. Serve with salad or rice, and you can't go wrong with a yogurt dipping sauce.
"As the primary caregiver for my grandma, I am trying to cook healthier for her. I am fascinated with Mediterranean cuisine. It is much easier to have chicken and vegetables off the kabob, which inspired this sheet-pan dinner." —Recipe contributor Chelsea Madren, Fullerton, California
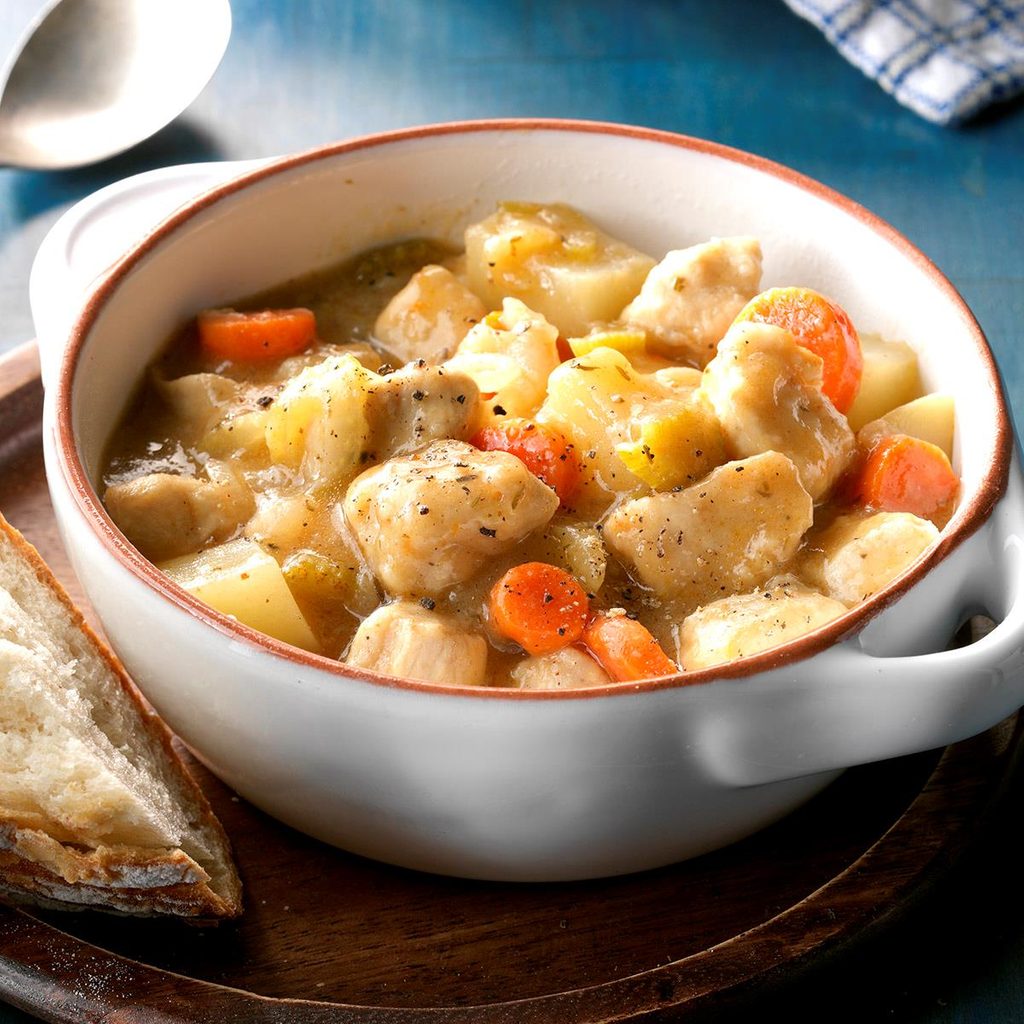
Skillet Chicken Stew
Total Time: 40 minutes
Main Ingredients: Chicken breasts, potatoes, chicken broth, ketchup
Level: Beginner
Beef or lamb stew usually get all the attention, but we love this version that uses chicken breasts instead. It's lighter but still has all the hearty characteristics of a good stew. The recipe turns out quite thick, so add a little extra chicken broth if you like your stew to be soupier.
"It's been 20 years now since I adapted this from a recipe for beef stew. We like it so much that, in all that time, I have never changed any ingredients or amounts—unless it was to double them!" —Recipe contributor Valerie Jordan, Kingmont, West Virginia
Air-Fryer Lemon Feta Chicken
Total Time: 25 minutes
Main Ingredients: Chicken breasts, feta cheese
Leevel: Beginner
This recipe requires only five ingredients, but they come together to create a burst of flavor. The feta brings a salty, briny character while the lemon has a nice tang to brighten the chicken. Add in some zippy black pepper and herbaceous oregano, and it's just perfect. As a bonus, it cooks in less than 25 minutes in the air fryer, so cleanup is easy.
"This bright, Greek-inspired chicken has only five ingredients—it's a busy-day lifesaver! And popping it into the air fryer makes it even easier." —Recipe contributor Ann Cain, Morrill, Nebraska
Amazing Slow Cooker Orange Chicken
Total Time: 5 hours
Main Ingredients: Chicken breasts, chicken stock, orange juice, Dijon mustard, brown sugar, soy sauce
Level: Beginner
Who needs takeout when a
chicken copycat recipe is just as easy to make at home? The sauce is made with orange marmalade, a fantastic fruit preserve made with citrus peels. The red pepper flakes bring quite a bit of heat, so scale the amount back if your guests aren't into spice.
"I love Chinese takeout food, but I know that it can be very high in sodium and fat. So I got to work at home and created a healthier version. Now I have peace of mind knowing what ingredients are in this homemade slow-cooker orange chicken." —Recipe contributor Barbara J. Miller, Oakdale, Minnesota
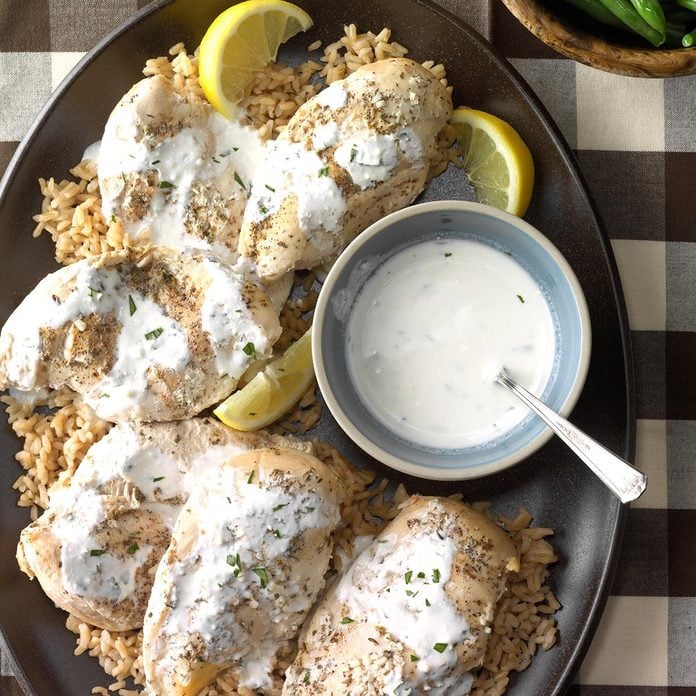
Flavorful Lemon Chicken
Total Time: 5 hours
Main Ingredients: Chicken breasts, chicken bouillon granules, sour cream
Level: Beginner
There are quite a few lemon chicken breast recipes out there, and for a good reason. Lemon's acidic flavor has a way of brightening up chicken, turning bland meat into a welcome pop of flavor. What we love about this recipe is the fabulous sour cream sauce and parsley sauce, which is so easy to make but adds an elegant touch to this slow-cooker recipe.
"This easy and delectable meal is bound to become a staple for your family. It's made with everyday ingredients. There's nothing complicated or fancy about this delicious recipe." —Recipe contributor Elizabeth Hokanson, Arborg, Manitoba
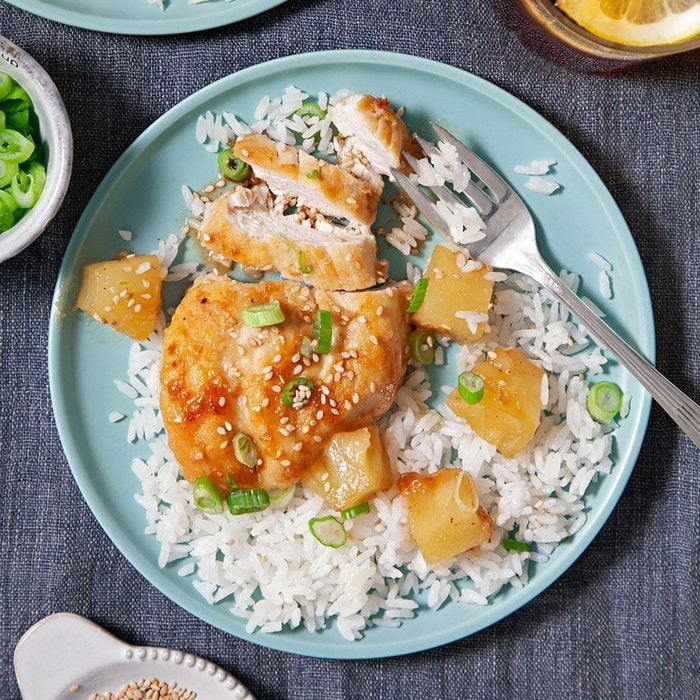
Chicken with Pineapple
Total Time: 20 minutes
Main Ingredients: Chicken breasts, pineapple chunks, honey, teriyaki sauce
Level: Beginner
The flavors in this chicken breast recipe will transport you to a tropical island, with a thickened pineapple and teriyaki sauce coating perfectly crisped chicken breasts. If you're looking to make this recipe gluten-free, try swapping almond for all-purpose flour.
"I'm always on the lookout for low-fat recipes that are scrumptious, too, like this pineapple chicken recipe. Quick-cooking chicken breasts get wonderful, sweet flavor from pineapple, honey and teriyaki sauce." —Recipe contributor Jenny Reece, Lowry, Minnesota
 Taste of Home
 Honey Chicken Stir-Fry
Total Time: 30 minutes
Main Ingredients: Chicken breasts, honey, soy sauce, frozen broccoli stir-fry blend
Level: Beginner
Go to Recipe
This one-pot meal is one of our favorite chicken breast recipes for busy weeknights. The chicken and vegetables cook together in a single nonstick skillet and the flavors of honey, garlic and soy sauce blend to make an incredible sauce. Serve it over rice to create a complete meal.
"I'm a new mom, and my schedule is very dependent upon our young son, so I like meals that can be ready in as little time as possible. This all-in-one chicken stir fry recipe with a hint of sweetness from honey is a big time-saver." —Recipe contributor Caroline Sperry, Allentown, Michigan
