Get ready to start a new holiday tradition. Dyeing Easter eggs is a snap when you use pantry staples like food coloring and vinegar. Not sure how to dye easter eggs? We'll take you through it, step by step.

How to Dye Easter Eggs

Updated Apr. 06, 2024
With Easter just a hop, skip and a jump away, it’s time to plan your Easter feast (check out our best Easter recipes to start), dig out the plastic grass and set up your Easter egg hunt.
Yes, many grocery stores stock egg-dyeing kits. But it’s just as easy to do at home with ingredients and tools you already have. Best of all, dyeing Easter eggs is a quick, fun activity that’s simple enough for kids of all ages. Let’s get started!
How to Dye Easter Eggs with Food Coloring
You don’t need much to start dyeing Easter eggs at home. Start with eggs and boiling or very hot water—heat up half a cup for every color you’ll use. Then gather your tools.
Supplies for Dyeing Eggs


- Food coloring: Liquid food color works best for dyeing eggs. Snag any brand and colors you love most.
- White vinegar: The second ingredient for homemade egg dye is plain white vinegar. You don’t want to use any other fancy vinegar options.
- Clear glasses: You can use any heat-safe cup, bowl or mug to dye Easter eggs, but clear glasses help you get a better idea of what color your dye is before giving your eggs the plunge.
Directions
Step 1: Make hard-boiled eggs
Before you break out the dye, you need to make hard-boiled eggs. To do this, place the eggs (as many as you like) in a saucepan and cover them with water. Make sure there’s about an inch of water covering the tops of the eggs. Then bring the water to a boil, take the pan off the heat, cover it, and let it sit for 12 to 15 minutes. Drain the pan and cool the eggs by running them under cold water.
And yes, you do want to hard boil the eggs before dyeing them. Boiling the eggs in water after dyeing them will cause the color to run off, and then you’ll be back to plain ol’ eggs again! Plus, when the eggs are hard-boiled, they are less likely to crack and cause a mess in your dye.
Editor’s Tip: Boil your water in an electric kettle to make quick work of it. If you don’t already have one, try out our pick for the best electric kettle.
Step 2: Prepare the dye
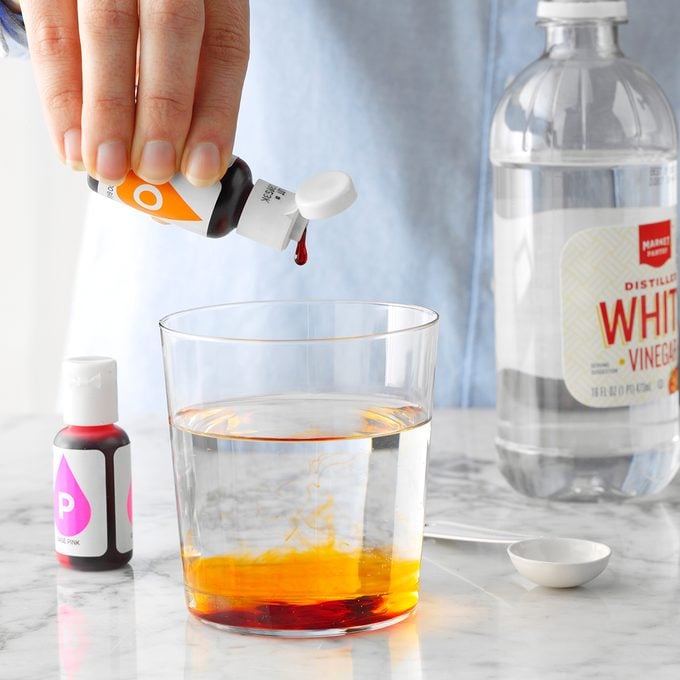
Making homemade egg dye with food coloring is super easy. Start by prepping a few heatproof mugs or bowls. You’ll want one for each color you plan to mix.
In each cup, pour in a half cup of boiling water, a teaspoon of vinegar and the food coloring of your choice. You’ll need between 10 and 20 drops of food coloring, depending on the shade and intensity of the color you’d like. Pale coloring will have a delicate finish, while darker colors will look bright and candy-like.
Experiment with mixing different colors together, too. You can create nearly any color using yellow, red and blue food coloring:
- Red + Yellow = Orange
- Red + Blue = Purple
- Yellow + Blue = Green
Step 3: Dye the Easter eggs
When the eggs are completely cool and your colors are mixed, the fun begins! Protect your work area with a tablecloth or newspapers, and set out the cups of dye. Also, grab paper towels to catch spills, and an empty egg carton for the finished product.
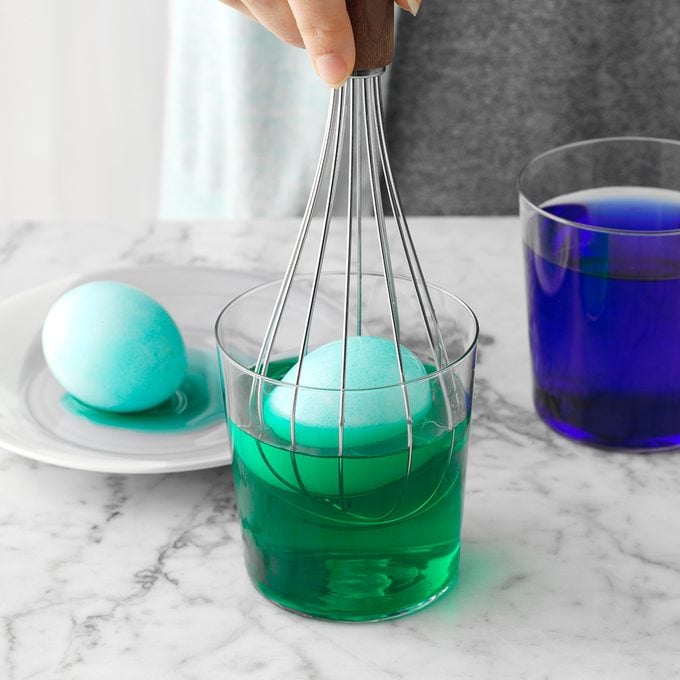
Using a wire egg holder, a whisk or just a spoon, submerge the eggs in the food coloring and allow to sit for 5 to 10 minutes to fully absorb the color. The longer they bathe, the more vibrant the finished color; you can tug them out of the bath periodically to check.
Editor’s Tip: If you don’t have an egg holder, use a whisk! Simply ease apart the wires of a whisk and slip the egg inside, then use the handle to dip the egg. This is especially handy when dyeing Easter eggs with little kids—less splashing and no roll-away eggs. Whatever you do, don’t use wooden utensils, as the wood will take on the color.
Step 4: Dry and store
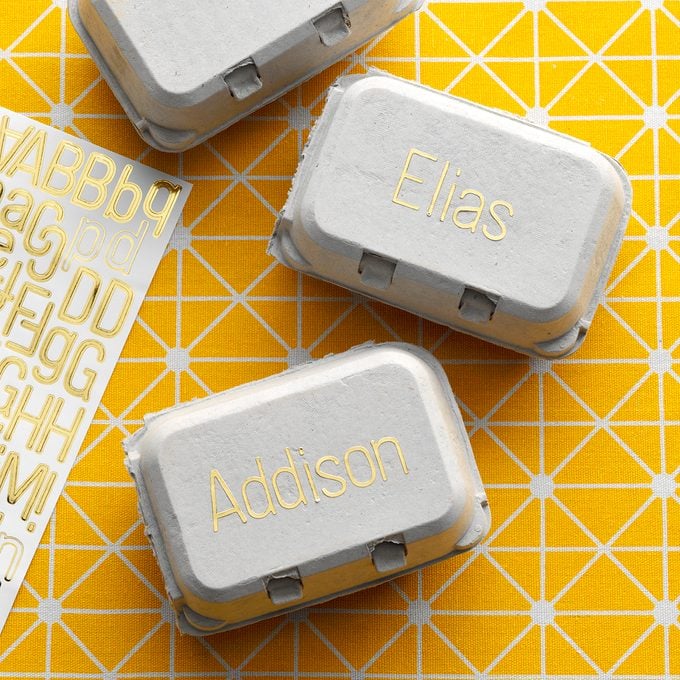
Remove the eggs from the dye and allow them to dry on paper towels, or right in the cardboard carton. Once the tops of the eggs are dry, flip them so the bottom can dry. Store in the fridge until you need them.
Editor’s Tip: Planning an Easter egg hunt? We suggest using plastic eggs or creating a very thorough map of your hiding places. You don’t want to come across a hidden egg weeks later—trust us.
Your Easter Egg Dyeing Questions, Answered
Decorating eggs can be easy, but trying a new method can also leave you with a lot of questions. We’ve got the answers!
Can you dye raw eggs?
Technically, you can dye raw eggs, but it’s risky. A raw egg is more likely to crack—and once cracked, it’ll ruin your whole batch of dye. It’s best to stick to hard-boiled eggs!
What do you do if an egg cracks?
If an egg cracks during the dyeing or drying process, it’s no big deal! The ingredients in this dye are safe to eat and won’t affect the flavor of your hard-boiled eggs.
Can you dye brown eggs?
Yes, you can dye brown eggs. The end result will be a bit more muted, but brown eggs will still take on color.
Are there other ways to decorate eggs?
You bet! Decorating Easter eggs isn’t just limited to food dye. There are all types of Easter egg decorating ideas, including using natural dyes, temporary tattoos, wax crayons and other craft supplies.
Research contributed by Lisa Kaminski, Taste of Home Editor
Here's What to Do With All Your Hard-Boiled Eggs After Easter
Smoked Salmon Egg SaladServed on croissants, these grown-up sandwiches offer a great way to use leftover Easter eggs. Salmon adds smoky flavor. —Cathy Tang, Redmond, Washington

Kale & Bacon Salad with Honey-Horseradish VinaigretteTotally scrumptious and packed with nutrition, this salad was my response to friends who asked how they could incorporate kale into their diets without sacrificing taste. It is also wonderful made with collard or mustard greens, prepared in the same fashion as the kale, or with a mix of spinach & arugula or watercress. Don't forget the hard-boiled eggs for extra protein. —Elizabeth Warren, Oklahoma City, Oklahoma

Avocado Egg Salad ToastI had a surplus of avocados after purchasing too many for an event. A few days later, I was making egg salad sandwiches for lunch and had the fantastic idea to use avocado to bind it together instead of traditional mayo. Not only was this version unbelievably delicious but the healthy fats in the avocado make this a much better option than the traditional mayo-laden version. —Shannon Dobos, Calgary, Alberta


Copycat Chick-fil-A Chicken SaladThis copycat Chick-fil-A chicken salad recipe is a spot-on take on the much-missed former fast-food item. Serve it as part of a copycat Chick-fil-A spread, or enjoy it whenever you want a solid chicken salad recipe.


Tuna Nicoise SaladTuna Nicoise salad is a perfect lunch for a weekend or even to make ahead for the work week. Our recipe is traditional with tuna, tomatoes and beans, but is easily adaptable to suit your tastes.

Cobb Salad SubWhen we need a quick meal to share, we turn Cobb salad into a sandwich masterpiece. Sometimes I substitute tortillas for the bread and make wraps instead. —Kimberly Grusendorf, Medina, Ohio

Judy's Macaroni SaladAfter finding this vintage macaroni salad recipe years ago, I tweaked the flavor and bumped up the pickles. Tuck this dill pickle pasta salad inside your picnic basket. —Elizabeth Kirchgatter, Maysville, Kentucky


Aunt Karen’s Shrimp SaladWhen unexpected company calls during the holidays, this shrimp salad is the perfect fit. It's quick to put together, too, leaving you more time to spend with your guests. — Karen Moore, Jacksonville, Florida

Cauliflower Potato SaladWhat is cauliflower potato salad? Well, it's just like regular potato salad, except cauliflower replaces the potatoes for a lighter end result.

Ham and Swiss Salad in a JarHome cook Stacy Huggins from Valley Center, California, sent us a great recipe for a ham and Swiss salad, and we turned it into this lunchbox-friendly version. —Taste of Home Test Kitchen

Curried Egg SaladA curry kick gives this egg salad big appeal. We love it when the weather gets warm. —Joyce McDowell, West Union, Ohio

Veggie Nicoise SaladMore and more people in my workplace are becoming vegetarians. When we cook or eat together, the focus is on fresh produce. This salad combines some of our favorite ingredients in one dish—and with the hard-boiled eggs and kidney beans, it delivers enough protein to satisfy those who are skeptical of vegetarian fare. —Elizabeth Kelley, Chicago, Illinois

Gluten-Free Potato SaladIn college, my best friend and I debated whose mom made the best potato salad. Turns out they were almost identical! Even though I've since tweaked our recipe, this gluten-free potato salad still takes me home again. —Ellie Martin Cliffe, Milwaukee, Wisconsin

Campfire Cheese Hash Brown PacketsDining by the campfire? This easy packet of potatoes, bacon and cheese makes a terrific hash. We like to serve it with eggs and fresh pico de gallo. —Gina Nistico, Milwaukee, Wisconsin


Bacon ‘n’ Egg SandwichesI came across this unique grilled combo when I was digging in my mom's recipe box. The crisp bacon, hard-boiled eggs and crunchy green onions make these cozy sandwiches look impressive when company drops by for lunch. Best of all, they're a snap to assemble. —Ann Fuemmeler, Glasgow, Missouri

Spinach Salad with Warm Bacon DressingThis spinach salad with warm bacon dressing proves that it's not difficult to get through an entire bag of spinach if it's dressed in a tangy, mustardy, brown-sugar bacon vinaigrette. Customize this classic salad with any toppings you like.

Classic Egg SaladEgg salad is a refreshing, tasty change from lunchmeat or peanut butter sandwiches. The touch of mustard and lemon juice gives it extra zip. —Annemarie Pietila, Farmington Hills, Michigan

Red Potato and Egg SaladThis flavorful red potato salad recipe with egg is the perfect side for summer cookouts. The red potatoes really dress it up. —Margaret Blomquist, Newfield, New York

Chef SaladThis gorgeous combination of garden veggies, hard-boiled eggs, deli turkey and ham is perfect for lunch or dinner. Customize your chef salad with different vegetables and salad dressings.

Make-Ahead Hearty Six-Layer SaladThis salad is an all-time favorite. I reach for the recipe whenever I need a dish to pass. It is easy to make, can be assembled ahead of time and looks marvelous. —Noreen Meyer, Madison, Wisconsin

Barbecue Chicken Cobb SaladI turned barbecue chicken into a major salad with romaine, carrots, sweet peppers and avocados. That’s how I got my family to eat more veggies. —Camille Beckstrand, Layton, Utah

Dilly Potato & Egg SaladEveryone has a favorite potato salad, and this is mine. As a young bride, I was eager to learn how to cook and make things that my husband would love. I combined my mom's and his mom's recipes, and this potato and egg salad the delicious result. —Angela Leinenbach, Mechanicsville, Virginia

Pesto Egg Salad SandwichesFor a casual springtime meal with a twist, boil up some eggs and dinner will be done presto. —Tenley Haraldson, Fort Atkinson, Wisconsin

Grandma’s Spinach SaladThis hearty spinach salad with mushrooms is packed with protein and draped in an aromatic celery seed vinaigrette. You can prep a batch and store it in the fridge for quick lunches.

Easy Macaroni SaladPass it at a potluck, unwrap it at a picnic or bust it out at a barbecue; this easy macaroni salad is perfect as a side for the summer grilling season.

Egg Salad with Cream CheeseA tangy twist on a lunchbox favorite, this creamy egg salad is packed with flavor and texture.

Classic Cobb SaladMaking this salad is a lot like putting in a garden. I plant everything in nice, neat sections, just as I do with seedlings. —Patricia Kile, Elizabethtown, Pennsylvania

Originally Published: April 04, 2022