Looking for some cake inspiration? Try our top-rated Bundt pan recipes.
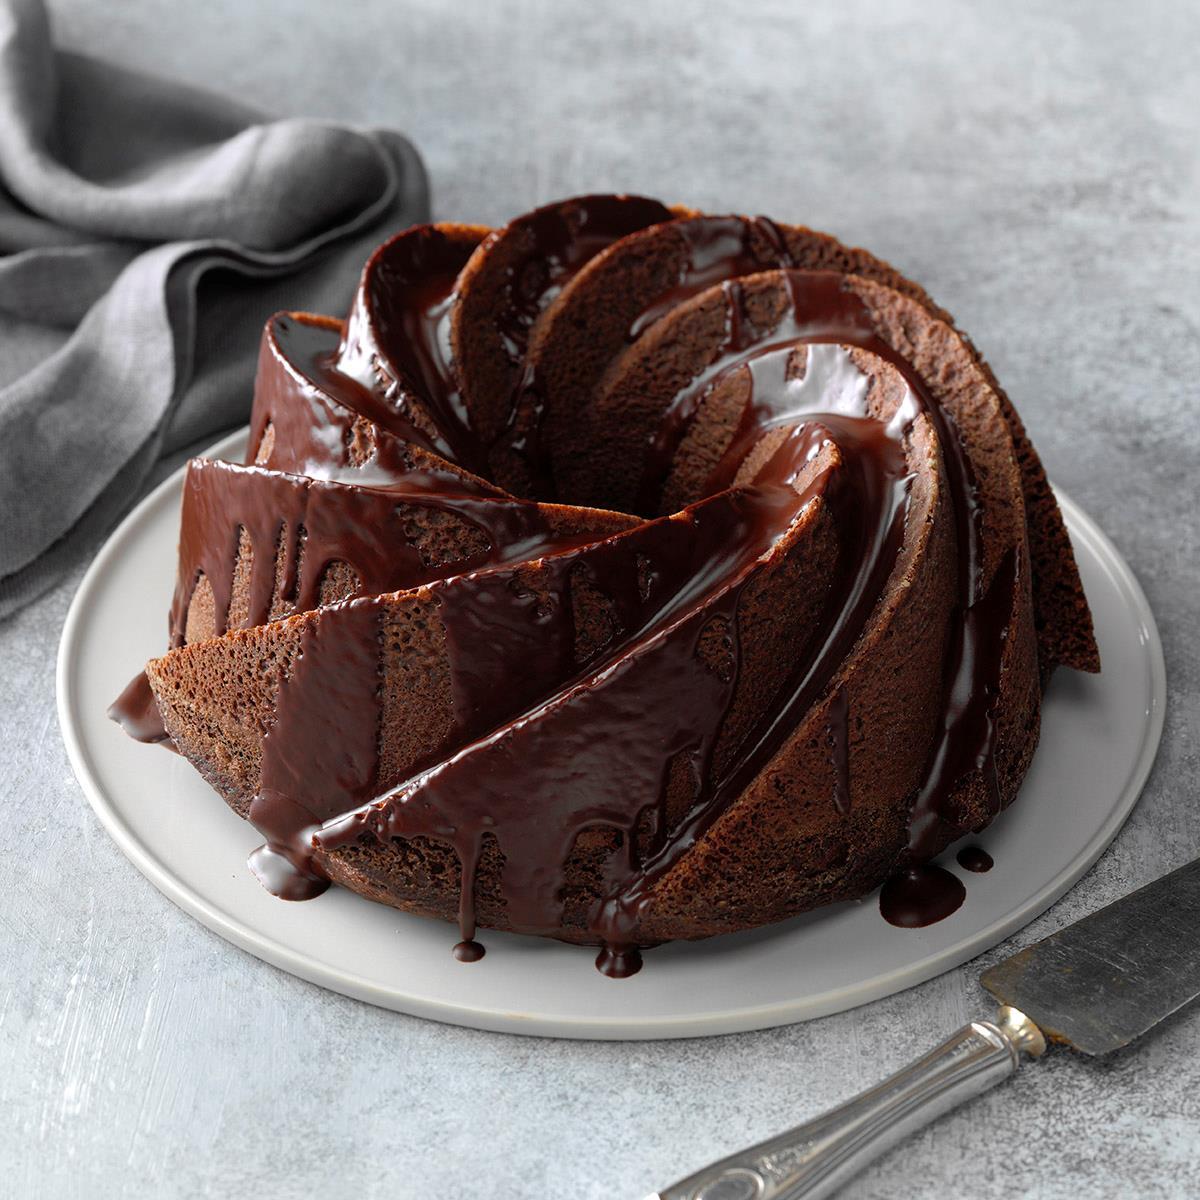
Chocolate Comfort Cake
This moist and delicious chocolate cake is usually the first dessert to go. People even eat the crumbs. It’s always my top choice for holiday dinners. —Ellen Riley, Murfreesboro, Tennessee
Go to Recipe
Heavenly Praline CakeA moist Bundt cake and generous frosting are filled with the fabulous flavor of caramel. The candied pecans are almost a dessert by themselves!—Jennifer Rodriguez, Midland, Texas
Grandma's Carrot CakeMy grandma was very special to me. She had a big country kitchen that was full of wonderful aromas any time we visited. This was one of her prized cake recipes, and it continues to be a favorite from generation to generation. —Denise Strasz, Detroit, Michigan
Decadent Fudge CakeEveryone loves the rich flavor in this decadent cake made with four types of chocolate. —Anna Hogge, Yorktown, Virginia
Swiss-Onion Bread RingMy pull-apart bread recipe is crisp and golden on the outside, rich and buttery on the inside. Thanks to store-bought dough, this cheesy bread is a cinch to make. —Judi Messina, Coeur d'Alene, Idaho
Lemon Pound CakeCitrus trees grow abundantly in California, and I'm always looking for new recipes which use the fruit from the orange and lemon trees in my yard. This lemon pound cake is one of my favorites! My mother passed this recipe down to me. —Richard Killeaney, Spring Valley, California
Cinnamon Monkey BreadIs it possible for four kids to cook together without total chaos in the kitchen? Yes, with the right recipe! This cinnamon roll monkey bread is a favorite with my bunch. They get to "play" as they roll pieces of refrigerated biscuit dough into balls. —Lisa Combs, Greenville, Ohio
Citrus-Raspberry Coffee CakeOrange and lemon beautifully complement the raspberry flavor in this dense cake. Add a dusting of confectioners’ sugar for a pretty finishing touch. —Pat Harlow, Cataldo, Idaho
Bacon Pull-Apart BreadI made this tender and tasty bread for my husband, and he just loved it! When I'm out of bacon, I substitute bacon bits. —Terri Christensen, Montague, Michigan
Chocolate Almond CakeFluffy white homemade frosting tops this rich chocolate almond cake. Sliced toasted almonds on top add a little crunch. —Sherri Gentry, Dallas, Oregon
Buttermilk Pound CakeThis buttermilk pound cake has a superior texture that is equally moist, tender and light. The recipe is your new go-to for serving with fruit or tea, or on its own as a snack.
Surprise Monkey BreadWhen my neighbor hosts brunch, she always asks that I make this monkey bread recipe. I also make a savory version with garlic and cheese for dinner. —Lois Rutherford, Elkton, Florida
Butter Pound CakeWhether garnished with fresh berries and sprigs of rosemary or just served plain, this rich Bundt cake is fabulous. It bakes to a beautiful golden brown and it's definitely a keeper! —Edgar Wright, Silver Spring, Maryland
Peppermint Bundt CakeWith its pretty pink layer and fabulous mint flavor, this Peppermint Bundt Cake is a great holiday dessert. Because I work full-time, I like the convenience of starting with a cake mix. —Lisa M. Varner, El Paso, Texas
Chimichurri Monkey BreadThe herby goodness of my favorite sauce shines in this nostalgic bread recipe that comes together quickly thanks to refrigerated biscuits. Serve warm as an appetizer with marinara for dipping, or as a side to an Italian entree. —Eden Dranger, Los Angeles
Almond Apricot Coffee CakeThe nutty aroma and delicate fruit flavor make this cake special enough to serve to company. Strawberry or raspberry preserves can be used as a tasty variation. —Sharon Mensing, Greenfield, Iowa
Chocolate Monkey BreadWe enjoy this chocolate monkey bread Bundt as we open gifts on Christmas, but it's impossible to resist at any time of year. —Heather Deterding, Odenton, Maryland
Ginger-Walnut Tube CakeMy husband, Ken, loves this Bundt cake with its bits of crystallized ginger. Feel free to drizzle it with a lemony glaze. —Nancy Zimmerman, Cape May Court House, New Jersey
Cinnamon Apple Cider Monkey BreadI use the cold-weather staple apple cider—plus apples and more cinnamon—to turn plain cinnamon rolls into monkey bread. My boys love the sticky sweetness. —Kelly Walsh, Aviston, Illinois
Ginger-Glazed Lemon BundtTangy ginger, tart lemon and puckery cranberries make this melt-in-your-mouth cake as crisp—and gorgeous—as autumn. —Taste of Home Test Kitchen
William Tell’s Never-Miss Apple CakeI bake my family-favorite Bundt cake to usher in fall every year. It looks so luscious that eating one piece is nearly impossible. —Jamie Jones, Madison, Georgia
Caramel-Pecan Monkey BreadThe kids will get a kick out of pulling off gooey pieces of this delectable monkey bread. It's hard to resist a caramel-coated treat. —Taste of Home Test Kitchen
Pear Bundt CakeNext time you make cake from a mix, try my easy and delicious recipe. The pears and syrup add sweet flavor and prevent the cake from drying out. And since there's no oil added to the batter, this tender fall-perfect cake is surprisingly low in fat. —Veronica Ross, Columbia Heights, Minnesota
Patriotic Gelatin SaladAlmost as spectacular as the fireworks, this lovely salad makes quite a "bang" at our July Fourth meal. It's exciting to serve, and our guests loved the cool fruity and creamy layers. This salad really added to my patriotic theme. —Sue Gronholz, Beaver Dam, Wisconsin
Surprise Carrot CakeA cousin gave me this carrot cake recipe. It's a wonderful potluck pleaser with its "surprise" cream cheese center. My husband and our two young children love it, too! —Lisa Bowen, Little Britian, Ontario
Pizza Monkey BreadIf you love pizza, you’ll love pizza monkey bread. This kid-friendly recipe features layers of garlic-seasoned biscuits, marinara sauce, pepperoni, mozzarella and Parmesan cheese. It’s a fun pull-apart bread appetizer for the holidays, potlucks or tailgate parties.
Chocolate Zucchini Cake with Custard SauceThe minute I can get my hands on zucchini, I start making this light and luscious cake. For years it was an often-ordered dessert at my sister's deli. —Peggy Linton, Cobourg, Ontario
Buttery Bubble BreadHomemade bread can be time-consuming, difficult and tricky to make. But this fun-to-eat monkey bread, baked in a fluted tube pan, is easy and almost foolproof. If I'm serving it for breakfast, I add some cinnamon and drizzle it with icing. —Pat Stevens, Granbury, Texas
Choco-Scotch Marble CakeThis recipe was given to me many years ago by a friend. Teaming chocolate with butterscotch for a marble cake makes it more flavorful and colorful than the usual chocolate-vanilla combination. This rich family favorite is very moist and keeps well.
-Pam Giammattei, Valatie, New York
Veggie Pull-Apart BreadA bread machine hurries along the dough-making process, but chopped vegetables, bacon and cheese make the buttery wreath unforgettable. —Christi Ross, Guthrie, Texas
Black Raspberry Bubble RingI first made this pretty bread years ago for a 4-H project. It helped me win grand champion for my county and took me to the Ohio State Fair. It takes some time to make, but I pull out this recipe anytime I want a breakfast or dessert that will really impress. —Kila Frank, Reedsville, Ohio
Spinach Dip Pull-ApartsEven picky eaters who don't like to eat spinach will dig into these tasty little bites. — Kelly Williams, Forked River, New Jersey
Breakfast Apple CakeBaked in a pretty tube pan and drizzled with icing, this breakfast cake will be a highlight of your holiday menu. I adapted the recipe from one of my grandmother's. —Shaunda Wenger, Nibley, Utah
Onion-Garlic Bubble BreadI've relied on this bread recipe often over the years. Frozen dough hurries along the golden pull-apart loaf. It's wonderful with Italian dishes, especially spaghetti and lasagna. —Charlene Bzdok, Little Falls, Minnesota