If it’s Thanksgiving morning and you’re reading this with a frozen turkey on the counter, let me put your fears to rest. I can teach you how to cook a frozen turkey! I’ve done it—and it’s not as hard as it sounds.
The first thing you need to accept is cooking a turkey the traditional way isn’t an option. You can defrost the turkey if there’s enough time. But at this point, don’t you just want a fully cooked and delicious turkey on the table? Let’s get started.
Cook Times for Frozen Turkey
For this tutorial, I based all my cooking times on using a 12-pound turkey. If yours is larger, plan to take about 50% longer than the usual roasting time.
Here’s how much time you’ll need, based on USDA guidelines:
- 8- to 12-pound turkey: 4 to 4-1/2 hours
- 12- to 14-pound turkey: 4 1/2 to 5-3/4 hours
- 14- to 18-pound turkey: 6 to 6-3/4 hours
- 18- to 20-pound turkey: 6-3/4 to 7-1/2 hours
- 20- to 24-pound turkey: 7-1/2 to 7-3/4 hours
Food Safety and Cooking a Frozen Turkey
It’s safe to roast a frozen turkey, but you shouldn’t try to fry or grill one. You want to make sure the breast reaches 165º and the legs and thighs reach 170 to 175°. The other important temperature to take is inside the cavity. It also needs to reach 165º or you risk contaminating the rest of the bird when you carve it.
Ingredients
- 1 frozen turkey (12 to 14 pounds)
- 2 tablespoons olive oil
- 2 teaspoons salt
- 1 teaspoon pepper
Tools
Directions
Step 1: Thaw turkey in the oven
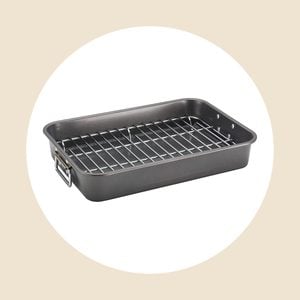
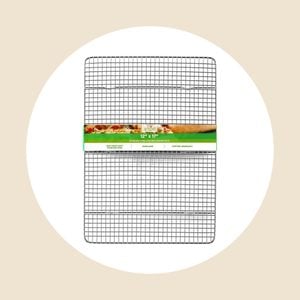
To start, unwrap the frozen turkey and place it on a rack in a shallow roasting pan. Don’t worry about pulling out the bag of giblets; we’ll talk about that later. If you don’t have a rack, use something like a cooling rack to lift up the bird so hot air can circulate around it. Don’t worry about the taste either, no flavor is sacrificed if you are making a frozen turkey or one that’s already thawed.
Set the oven to 325ºF and pop the bird in for 2 hours. Don’t even think about peeking!
Step 2: Season and continue to cook
After the turkey has cooked for 2 hours, take a look at the bird. The drumsticks and thighs should read around 100°. The breast should be thawed about an inch or so, but will still be frozen past that.
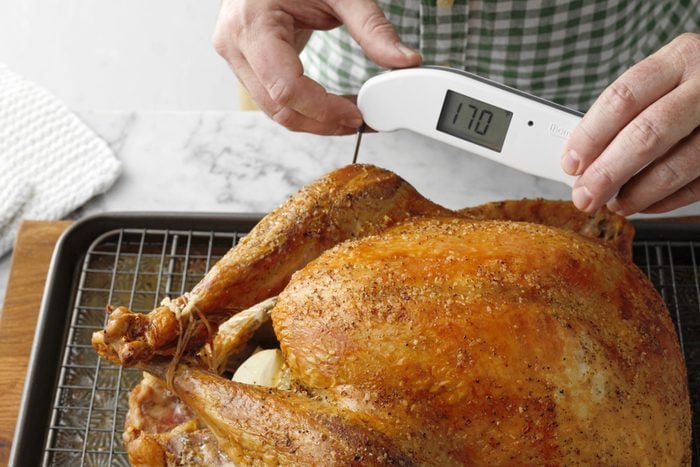
It’s best to check the turkey’s temperature using an instant-read thermometer. To do this, insert the pin of the thermometer into the thickest part of the thigh (or drumstick or breast), being careful not to come into contact with the bone.
You can also season the turkey now. Brush the outside with oil and rub on an ample amount of salt, pepper and dried herbs. Place the turkey back in the oven and roast at 325° for another 30 minutes, or longer if you have a larger bird.
Step 3: Remove the giblets
Check to see if you can get the bag of giblets out of the neck or cavity of the turkey. The cavity will still be partially frozen, so if the bag is in there, don’t try to force it out. Also, if there is liquid or ice in the cavity, remove it but don’t pour it over the turkey; reserve it for making from-scratch gravy. Return the turkey to the oven.
Test Kitchen Tip: You shouldn’t cook stuffing in your turkey, whether the bird is frozen or not.
Step 4: Check the temp
Let the turkey cook for 1 more hour. At this time, the thighs and legs should be around 130 to 150º and the breast will be around 50 to 60º. Brush with additional oil before returning to the oven for another 60 to 90 minutes.
Step 5: Finish roasting
The turkey should be nearly done about 4-1/2 to 5 hours after you start. Again, the breast should reach 165º and the legs and thighs should reach 170 to 175°. Once you’ve reached those temperatures, remove the bird from the oven.
Step 6: Let rest
 TMB Studio
Like any large cut of meat, the turkey should rest once it’s finished roasting. This will allow the juices to redistribute through the turkey. The resting time depends on how large it is—the heavier the turkey, the longer you should let it sit.
I like to let my turkey rest 30 minutes before carving. Don’t worry, it will still be hot by the time it gets to the table! You’ll find that the slices will be much juicier and easier to cut after the bird has rested. And don’t cover the turkey with foil while it rests—all you’re doing is trapping steam and making the skin soggy. Here are a few pros and cons of cooking turkey in a bag.
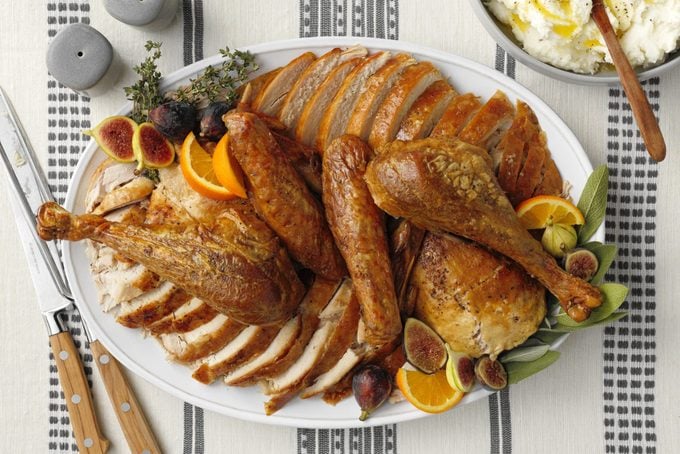
Step 7: Carve the turkey
ⓘ
Need help slicing your juicy, golden spoils? Check out our best turkey carving tips.
Try Our 30-Minute Thanksgiving Recipes
Quick Green Beans with BaconThese green beans make for such an easy side dish. They're light and smoky, which sets you up perfectly for the main event. Fresh beans lend a crisp, bright flavor to your Thanksgiving meal.
Chive Smashed PotatoesNo need to peel the potatoes in these chunky mashed potatoes. Chive and onion cream cheese is an easy way to get in more of that rich flavor.
Sweet Potato Biscuits with Honey ButterServed with cinnamon-honey butter, these sweet biscuits can fit into any part of your day. Looking for a light breakfast? How about a sweet treat after dinner? These airy and fluffy biscuits will warm your heart.
Special Creamed CornThis special creamed corn is just that. It's rich, dense and creamy, making it the perfect accompaniment to any meat you might have on the table.
Sweet ‘n’ Tangy CarrotsSweet potatoes usually steal the show for their savory but dessert-like role. But with an irresistible brown sugar-mustard sauce, these simple carrots will grab people's attention.
Moist Pumpkin SconesFor a nice breakfast, dessert or even a sweet appetizer, these cozy pumpkin scones go great with your coffee. They taste like fall with a delectable sugar glaze on top.
Maple-Glazed Green BeansThis savory side dish is packed with fall flavors. With dried cranberries, bacon and a bourbon-maple glaze, these green beans are sweet, tangy and savory.
Pumpkin Cheese BallEven though it looks like a pumpkin, you might not be able to tell that the secret ingredient actually is pumpkin! This lends a sweet flavor to the cream cheese and cheddar mixture, while also giving it a nice harvest color.
Garlic-Ginger Turkey TenderloinsIf you're in the market for a quickly thrown together entree that is still just as moist as a whole baked turkey, boy do I have the dinner for you. Ginger and brown sugar flavor the sauce that spices up the turkey as it bakes.
Cranberry FluffThis fluffy fruit salad gets its sweet-tart flavor from cranberries and whipped cream. It's not as sweet as other fluffs, which makes it a lighter side dish option.
Hurry-Up BiscuitsThe name doesn't lie, these hurry-up biscuits are done is just half and hour. They are soft, are quick to prep and only have five ingredients.
Apple Maple Pecan SaladA well-made salad has a good taste and a pleasing crunch. This one with cabbage, apples and pecans gets high marks in both, with extra points for color contrast.
Skillet Sausage StuffingTo make this quick and moist stuffing, dress up a package of stuffing mix with pork sausage, mushrooms, celery and onion. You can even use breakfast sausage!
German-Style Cabbage and BeansThis pretty cabbage dish is prefect for a potluck. Just double the recipe and everyone will fawn over the savory and smoky side dish.
Pumpkin & Cauliflower Garlic MashDid you know you could make mashed potatoes out of pumpkin and cauliflower? It's still just as creamy as traditional mashed potatoes, but with a bit of sweetness from the pumpkin that makes it memorable.
Spinach, Apple & Pecan SaladWhen you don't have your usual salad fixings on hand, give this light and tangy salad a try. With cranberries and bacon, it has the smoky sweetness of a
Thanksgiving dinner without any of the heaviness, making it a great starter dish.
Triple Mash with Horseradish Bread CrumbsThese triple mashed potatoes have rutabaga and parsnips, along with the zip of horseradish. Topped with breadcrumbs, they go great with any meat.
Cheese & Garlic BiscuitsThese buttery, savory biscuits go with just about anything. They resemble Red Lobster's Cheddar Bay Biscuits but are made at home instead of at the restaurant.
Festive Cranberry Fruit SaladA fruit salad is a nice light option to offer guests. It comes together quickly, so whip it up in the morning and store in the fridge until dinner.
Roasted Green Beans with Lemon & WalnutsThe walnuts in this dish make them more fall-centric than your usual roasted green beans. With a hint of lemon zest, they're bright with a delightful crunch.
Merry Berry SaladDried cranberries, crunchy apple chunks and toasted almonds dress up this crisp green salad. It's drizzled with a sweet-tart dressing that's a snap to blend.
Simple Lemon Parsley PotatoesThanksgiving dinner usually includes mashed potatoes, but why not give these chopped and roasted potatoes a try? With only four ingredients, they take to any other flavors on the table.
Taste-of-Fall SaladThis sweet and savory salad has pears, pecans and cinnamon to really capture the feeling of fall. With a mustard and cheese dressing, the flavors meld in an artful way.
Dill & Chive PeasDill, chives and lemon-pepper seasoning make these peas pop. This combination of seasonings gives a nice tanginess that you don't normally find with peas.
Garlic-Roasted Brussels Sprouts with Mustard SauceThis creamy mustard sauce really makes these Brussels sprouts stand apart from the rest. Did you know that Brussels sprouts are part of the mustard family? So it only makes sense that this combination works so well!
Creamy Cranberry SaladYou can't go wrong with a cranberry salad on Thanksgiving. This one has a fun assortment of fruits like pineapple and apple. With a creamy marshmallow coating and some crunchy almonds, it's the perfect sweet side.
Bacon-Stuffed MushroomsThese bubbly treats use only five ingredients. The tender mushroom caps have a smooth cream cheese filling that's offset by some smoky bacon and green onion.
Triple Cranberry SauceOrange juice, marmalade and zest make this cranberry sauce a triple threat. Allspice adds just the right amount of spice to this sweet and tart dish.
Delicious Apple SaladA little bit sweet, a little bit savory, this apple fluff salad is a fun side for your Thanksgiving menu. Toss everything together and refrigerate until ready to serve.
Green Beans AmandineCrunchy almonds, butter and lemon juice really work together to bring out the natural earthiness of green beans. It's an easy recipe to throw together.
Cranberry Oatmeal CookiesDotted with cranberries, orange zest and vanilla chips, these cookies are colorful and tasty. You can use flavored cranberries if you're looking to give them an extra boost.
Green Bean BundlesThese aesthetically-pleasing bean bundles are a sight to behold. Who could resist one of these elegant packages?
Perfect Winter SaladThis salad is colorful and textured with a nice creamy dressing to tie it all together. Dried cherries give it a nice pop of winter.
Grandma’s Cranberry StuffWith oranges and walnuts, this cranberry stuff is sweet and crunchy. This simple recipe is a great complement to any roast pork, ham, turkey or chicken.
Mushroom and Spinach SauteMushrooms and spinach come together for a super fast side. Double or triple this recipe if you're serving a crowd for Thanksgiving.
Gruyere Mashed PotatoesGruyere cheese and chives take mashed potatoes to a new level. They're rich and cheesy but not too heavy.
No-Fuss RollsWith only four ingredients, these rolls are ready in no time. They're great with herb butter or jam.
Chive Buttered CarrotsThis reliable side dish pairs well with any entree, especially turkey. With just five ingredients, the chive butter really complements the carrots' natural sweetness.
Marinated OlivesFor a simple Thanksgiving appetizer you can make in advance, it doesn't get any easier than these marinated olives. Whip 'em up in five minutes and store in the fridge for up to two weeks.
Hot Spinach Apple SaladWith a light sweet-tangy dressing, the spinach doesn’t wilt and the apples retain their crunch. This balanced salad is served hot.
Caramel Pumpkin DipNeed a sweet snack for guests to nibble on as they wait for the turkey to finish cooking? This easy pumpkin dip will certainly do. Serve with vanilla wafers, graham crackers or apple slices.
Easy Onion Crescent RollsHere's an easy way to dress up a tube of crescent roll dough. These golden bites are topped with french fried onions for some crunch and flavor.
Sausage-Stuffed Acorn SquashAcorn squash gets the sweet and savory treatment when stuffed with sausage, onion, spinach and cranberries to make this cozy side dish fit for a Thanksgiving feast. Cooking the squash in the microwave is an easy solution to speed up the process.
Best Curried Pumpkin SoupA quick pumpkin soup will be a welcome addition to your Thanksgiving table. Serve it before or with the main course.
Harvard BeetsAdd a pop of color to your Thanksgiving meal with these pretty beets. They come together in just 15 minutes.
Mashed CauliflowerIf you're looking for a break from your usual mashed potatoes, this mashed cauliflower is just as flavorful and satisfying. It's a great way to incorporate veggies for kids and adults.