


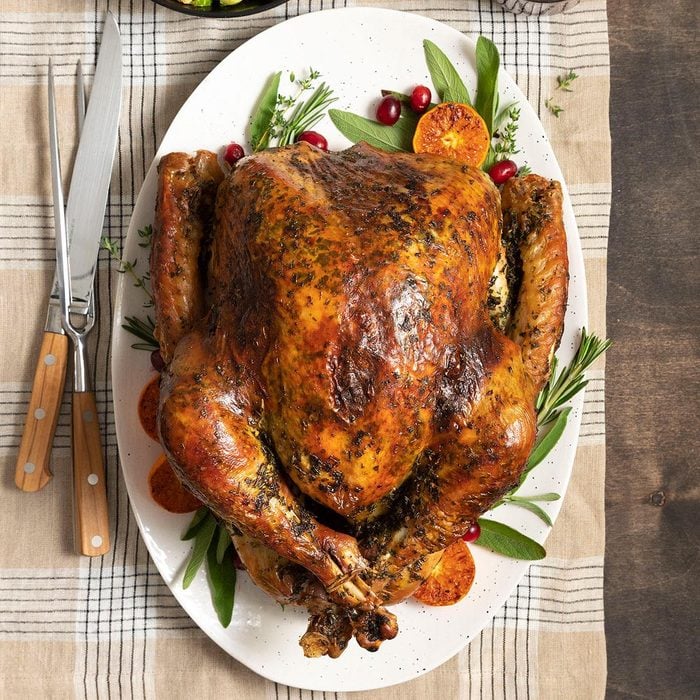
This turkey brine recipe is our secret weapon during the holidays. It does require a little preparation—you’ll want to get it started 24 to 48 hours before the big meal—but the process is well worth it. There are just so many benefits to using a brined turkey recipe, starting with full-flavored, seasoned meat that’s oh-so juicy (even if you happen to overcook it). As a bonus, the bird cooks more quickly, freeing up the oven for other traditional Thanksgiving recipes.
The brine itself is shockingly easy to make. Simply dissolve salt and sugar in heated water. Then, stir in sage, rosemary and thyme, followed by some cold water to bring the mixture back to room temperature. From there, submerge the turkey, and let the brine work its magic.
What is brining?
Brining is the process of submerging meat (like turkey) into a saltwater solution. Why do it? For starters, brining adds flavor to turkey to season it from the inside out. But the salt in a turkey brine recipe does some pretty cool things in the background. It tenderizes the turkey by dissolving some of the meat’s protein. Meanwhile, the salt causes the muscle fibers to unravel and swell. Put it all together, and the cells retain more moisture than usual—so much moisture that it can’t all evaporate during cooking. Isn’t science great?
Wondering about wet brine vs. dry brine? Learn all about it in our guides for how to brine a turkey and how to dry brine turkey.
Turkey Brine Ingredients
- Turkey: This turkey brine recipe is ideal for a 14- to 16-pound turkey. Don’t brine turkeys labeled as kosher, enhanced or self-basting, as these products already contain added salt.
- Salt: Salt is the key ingredient that helps turkey meat retain moisture as it cooks. It won’t make your turkey taste too salty unless you accidentally over-brine it. (More on how long to brine turkey in a minute.)
- Brown sugar: Brown sugar adds richness and helps the skin caramelize to a gorgeous golden brown.
- Herbs: Aromatic sage, rosemary and thyme add herbaceous flavor and complexity.
- Water: You’ll want to divide the water into two additions: 2 quarts of water to dissolve the salt and sugar, and 2 quarts of cold water to bring the brine to room temperature. Pouring hot brine over turkey can lead to bacteria growth, so it’s important to ensure it’s cool.
- Herb butter: This component isn’t part of the actual brine, but it adds incredible flavor in our brined turkey recipe. We create a flavored butter with butter, olive oil, parsley, sage, rosemary, thyme and garlic. Rubbing it underneath the skin makes the bird self-basting, and using it over the skin promotes even browning.
Directions
Step 1: Dissolve the salt and sugar
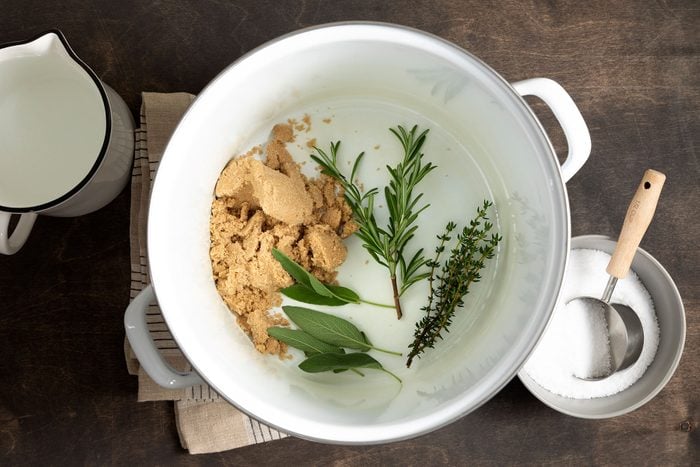
In a stockpot, stir together the salt, brown sugar, sage leaves, thyme sprig, rosemary sprig and 2 quarts of water. Bring the mixture to a boil. Cook, stirring occasionally, until the salt and sugar are dissolved. Remove the mixture from the heat, and add the cold water to cool the brine to room temperature.
Editor’s Tip: Can you make the brine ahead of time? Sure! Store it in the refrigerator in a covered stockpot or a large container for up to five days.
Step 2: Prepare the turkey
Remove the turkey from the packaging, and set aside the neck and giblets for make-ahead turkey gravy. Using your fingers, gently loosen the skin from the turkey breast, legs and thighs.
Step 3: Brine the turkey
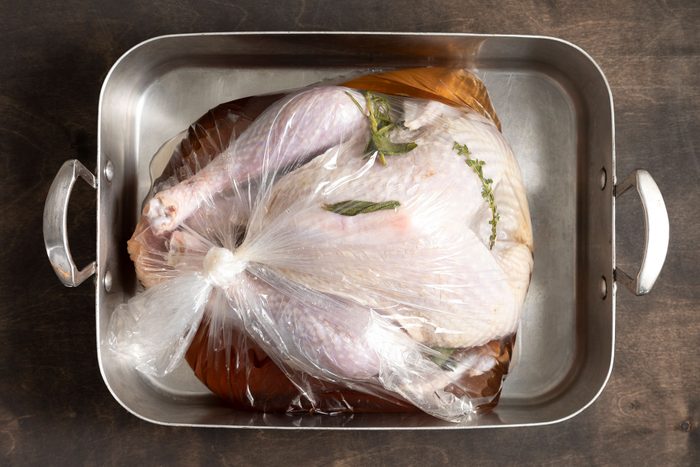
Place a turkey-size oven roasting bag inside a second roasting bag. Place the turkey in the bag, and transfer it to a deep pan (like a stockpot or a roasting pan). Carefully pour the cooled brine into the bag with the turkey. Squeeze out as much air as possible, and seal the inner bag. Then, seal the outer bag. Carefully turn and rotate the bag to coat the turkey.
Brine the turkey in the refrigerator for 12 to 24 hours, turning occasionally.
Editor’s Tip: If you decide to spatchcock the turkey, cut it before submerging it in the brine.
Step 4: Remove the turkey from the brine
Preheat oven to 450°F. Drain and discard the brine. Rinse the turkey to remove excess salt, and pat the turkey dry with paper towels.
Editor’s Tip: You can brine turkey in advance and let it sit, uncovered, in the refrigerator for an additional 24 hours. This dries out the exterior to produce the crispest turkey skin.
Step 5: Make the herb butter
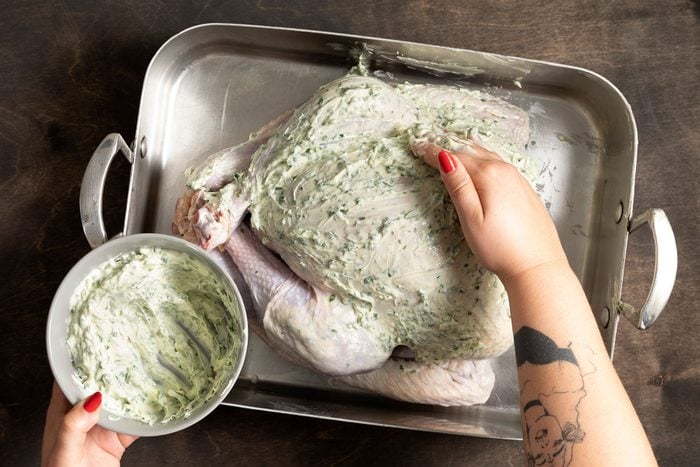
Place the softened butter, olive oil, parsley sprigs, sage leaves, rosemary leaves, thyme leaves, garlic cloves, salt and pepper in a food processor. Process until smooth.
Rub half of the herb butter under the turkey skin, using your hands to spread it evenly over the breast, leg and thigh meat. Rub the remaining butter mixture over the skin. Tuck the wings behind the turkey, and tie the legs together with a piece of butcher’s twine. Secure the skin to the underside of the breast with toothpicks. This protects the skin from shrinking, which would expose the breast meat to high heat that could dry it out.
Editor’s Tip: Transfer the herb butter to a pastry or piping bag to make it easier to distribute underneath the turkey skin.
Step 6: Roast the turkey
Place the turkey, breast side up, on a rack set in a roasting pan. (The rack promotes airflow by keeping the turkey off the bottom of the pan. If you don’t have a rack, you can use vegetables and other aromatics, such as onions, carrots, celery, garlic and herbs.)
Roast at 450° for 30 minutes to brown the skin. Reduce the oven setting to 325°. Roast for 2 hours and 30 minutes to 3 hours longer, until a thermometer in the thickest part of the thigh meat reads 180°, basting twice during the final 30 minutes of cooking. You can cover the turkey loosely with aluminum foil if it browns too quickly.
Editor’s Tip: Keep in mind that brined turkeys cook faster than unbrined turkeys. Determining how long to cook a turkey depends on several factors, which is why we recommend using a meat thermometer.
Step 7: Rest and carve
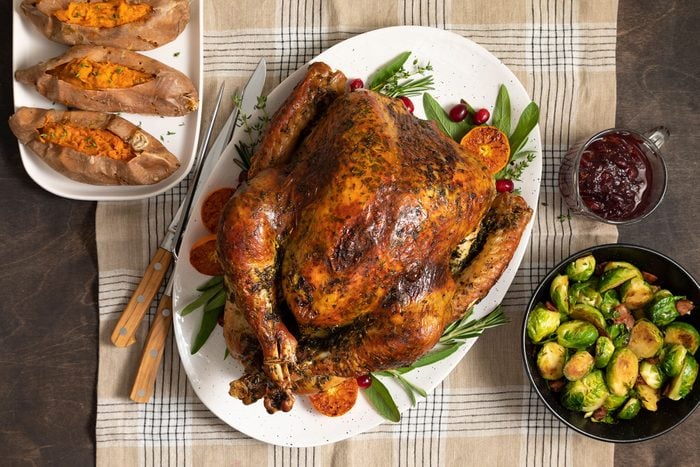
Remove the turkey to a serving platter. Cover and let stand for 20 minutes before carving.
Editor’s Tip: Our guide on how to carve a turkey will help you feel ultra-confident about carving the bird.
Turkey Brine Variations
- Use aromatics: Aromatics add a punch of flavor and aroma to the meat. Use a mix of your favorite fresh herbs, or include chopped aromatic vegetables like onions, celery and/or garlic.
- Include some zest: Citrus peels contain aromatic oils, so adding orange, lemon or lime zest gives the brine a fresh boost.
- Change up the spices: Spices are a fantastic way to amp up a brine’s flavor. Try juniper berries, coriander or fennel, or holiday spices like cinnamon, allspice or nutmeg.
- Add depth: Create complexity by adding a little apple cider, Dijon mustard or Worcestershire sauce to the brine.
- Use a little alcohol: Alcohol can help carry the brine’s flavors so it penetrates more deeply into the meat. Add 1 tablespoon of strong alcohols like vodka or brandy, or 1/4 cup of flavorful alcohols like rum or gin. Feel free to add even more when working with weaker alcohols like wine, sherry or beer.
- Switch the sweetener: We use brown sugar for its rich flavor, but all sugars will promote browning on the skin. If you don’t have brown sugar on hand, consider using white sugar, molasses or honey.
How to Store Turkey Brine
Excess brine can be stored in an airtight container in the refrigerator for up to five days. We don’t recommend reusing brine, so discard it after removing the turkey.
The brining turkey should also be stored in the refrigerator. If there’s no room in the fridge, use an ice-filled cooler and a probe thermometer to ensure the brine’s temperature never goes above 40°.
Turkey Brine Tips
How long should you brine turkey?
Brine turkey for about one hour per pound. For most turkeys, that should be somewhere in the 12- to 24-hour range. Over-brined meat can be salty, and it can develop a mushy, spongy texture. You can soak the turkey in cold water for an hour to pull out the excess salt, but there is no way to improve the texture. If you’re not ready to cook the turkey after 24 hours, it’s best to remove it from the brine anyway. It can sit in the refrigerator, uncovered, for an additional 24 hours.
What is the formula for brine?
We use a ratio of 1/2 cup salt for every quart of water in this brined turkey recipe. Making a brine with 4 quarts of water (and 2 cups of salt) should be enough for a 16-pound turkey. You can always mix up a little extra brine if it doesn’t cover the bird.
What should I brine my turkey in?
You can brine a turkey in a large stockpot or turkey-size oven roasting bags. There are pros and cons of cooking turkey in a bag, but we love that these bags are large enough to fit a whole turkey and a gallon of brine.
Do I rinse a turkey after brining?
It’s a good idea to rinse a turkey after brining it. We generally recommend against washing your turkey because it can lead to bacterial spread. That said, brined turkey can be a little salty. Giving it a quick wash removes excess salts from the surface so the turkey tastes perfectly seasoned. Just be sure to sanitize the sink and surrounding area when you’re done.
Can you make gravy from brined turkey drippings?
Yes, you can make gravy from this brined turkey recipe. Brined turkey drippings are saltier than drippings from unbrined birds, though. Use a turkey gravy recipe that calls for adding salt at the end so you can taste the gravy before adding any extra salt.
