


It’s entirely possible that cheese straws are one of the most underrated party snacks. They’re flaky, savory and often the most poppable appetizer on the table because their crispy and light texture reminds us of cheese snack crackers. Luckily, they’re easy to make on your own, and the homemade version is infinitely more delicious than store-bought snacks. Our recipe for cheese straws folds cheddar cheese and a pinch of cayenne into a soft dough. Then, you just roll it out, slice it up and bake!
Set out homemade cheese straws at your next get-together, and learn a whole new meaning for the expression “the last straw.” Hopefully, you’ll be lucky enough to grab the last straw for yourself!
Ingredients for Cheese Straws

- Butter: Whether salted or unsalted, butter is the reason these cheese straws bake up so flaky and crispy. It should be softened just enough to make it easy to blend but not so much that it’s melting. If you forgot to take the butter out of the fridge ahead of time, you can still soften butter quickly.
- Cheddar cheese: Either mild or sharp cheddar will give the cheese straws lots of savory flavor. It’s best to grate your own cheese if you can, because it’ll blend more smoothly into the dough than store-bought cheese.
- Flour: All-purpose flour pulls the butter and cheese together into a workable dough.
- Salt: A half teaspoon of salt is enough to make the cheese straws more flavorful. You can also sprinkle a flaky type of salt over the straws before baking them for an attractive finish.
- Cayenne pepper: Don’t worry, these cheese straws aren’t fiery! Just a pinch of cayenne brings a hint of chile pepper flavor—and color, too. Of course, if you like things a little spicy, you can bump up the amount of cayenne.
Directions
Step 1: Combine the butter and cheese
Preheat the oven to 350°F. In a large bowl, use a hand or stand mixer to beat the butter until it’s light and fluffy. Beat in the cheese until blended.
Step 2: Make the dough
Whisk the flour, salt and cayenne pepper in a small bowl. Stir into the cheese mixture until a dough forms.
Step 3: Roll and slice
Use a rolling pin to roll out the dough into a 15×6-inch rectangle. Cut the dough into 30 cheese straws, each 6 inches long.
Editor’s Tip: We use a bench scraper to help push the sides of the dough into place and cut the straws, but you can use a pizza cutter or knife instead. Try this technique to help keep each of the cheese straws the same size: Begin by cutting the dough rectangle into six equal portions. Then cut each portion into five strips for a total of 30 straws.
Step 4: Transfer the cheese straws to the baking sheet
Gently place the strips 1 inch apart on ungreased baking sheets.
Editor’s Tip: You can line the baking sheet with parchment to make it easier to move the baked straws. If any cheese straw pieces tear as you transfer them, just push the dough back together with your fingers.
Step 5: Bake
Place the baking sheet in the oven, and bake the cheese straws for 15 to 20 minutes, until they’re lightly browned. Let the straws rest on the baking sheet for five minutes, then move them to a cooling rack to cool completely.

Cheese Straws Variations
- Swap in different cheeses: As good as cheese straws are with cheddar, they’re also quite tasty when made with an equal amount of other types of cheese like Parmesan, Swiss, pepper jack, smoked Gouda or blue cheese.
- Add seasonings: Add chopped fresh herbs like dill, rosemary, chives or thyme. A few teaspoons of dried herbs or spice blends of your choice can be added, too. Try giving them some heat with chili powder, smoky ancho chili powder or more cayenne. Or mix a packet of dry onion soup mix into the cheese dough.
- Try bacon-cheese straws: Cheese and bacon is the ultimate pairing! Fold 1/2 cup cooked, diced bacon into the cheese dough before rolling and slicing.
- Make cheese squares: Cutting these cheese straws into squares will make them seem more like homemade Cheez-Its. After rolling the dough into a rectangle, use a knife and a ruler to slice the dough into small squares. Move the squares to the baking sheet, and prick the tops with the tines of a fork. Consider adding five to seven minutes to the bake time to make sure they’re baked through, keeping an eye on them as they go.
- Try decorative shapes: Instead of rolling the dough into a rectangle, put the cheese straw dough into a piping bag fitted with a large open star tip. Pipe out the cheese straws into 6-inch lines. (You can draw lines on your parchment to use as a guide.) Or, load the dough into a cookie press: Use a plate with a large shape like a flower or swirl. Press out the cheese straw shapes, and bake, adding a few extra minutes as needed to bake the shapes through.
How to Store Cheese Straws

The cheese straws are delicate, so choose an airtight container with enough room to gently layer them inside. Keep them sealed and stored at room temperature for up to three days.
Can you freeze cheese straws?
Yes, you can freeze cheese straws! This is a fantastic way to have them ready to throw in the oven for surprise visitors or your next party. Roll out the dough, then slice and arrange the cheese dough pieces on a baking sheet as directed. Pop them in the freezer until they’re solid, then transfer them to a freezer-safe food storage container. Keep the straws in the freezer for up to three months. Next time you need an appetizer recipe, bake the cheese straws from frozen, adding a few minutes to the bake time.
Cheese Straws Tips

How do you keep cheese straws crispy?
Cheese straws will have a crispy, light texture after they’re baked to a light-brown color and allowed to cool. However, when they’re stored in an airtight container, they tend to soften and lose some of that crispiness. To fix this, just arrange the cheese straws on a baking sheet, and pop them in a 350° oven for about five minutes. Don’t leave them unattended—they could burn if baked too long.
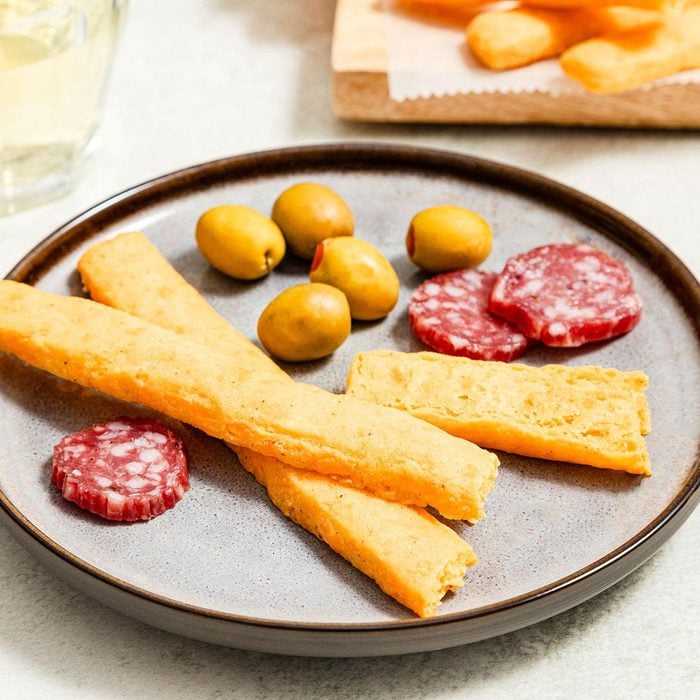
What can you serve with cheese straws?
These cheese straws are perfect for a charcuterie board or butter board. They also make an elegant addition to spread of New Year’s Eve finger foods and appetizers. Cheese straws are tasty for casual, midday snacking or serving with savory brunch dishes like quiche. When you’re looking for an appetizer to set out before a big holiday meal—particularly one that won’t spoil any appetites—cheese straws are a great choice because they’re easy to make in advance.