When I brought home this spiralizer, my teenage son laughed and started pointing at various other gadgets I’d purchased over the years, only to come to discover that the best way to make, say, a cherry tart isn’t with a pastry tart maker, but with a regular tart pan and a great cherry tart recipe. But then I used the spiralizer to whip up a crispy batch of homemade curly fries. That’s when the young know-it-all in my house had to admit he was quite off base!
Deep-Fried vs. Baked Curly Fries
First things first: if you want your homemade curly fries to turn out just like the ones you get Arby’s, you’ll want to go with deep frying as your mode of cooking. Before you get started, please check out this guide for how to deep fry because it’s really useful (especially the thing about water and oil not mixing…you don’t have to tell me twice).
If you just can’t see yourself deep-frying your curly fries, then by all means, you can bake ’em. Preheat your oven to 450°!
Pro Tip: The important thing is to decide how you’ll cook the fries before you take your spiralizer to a potato. You don’t want your prepped potatoes sitting for too long before you cook them because they start turning brown pretty quickly.
How to Make Curly Fries with a Spiralizer
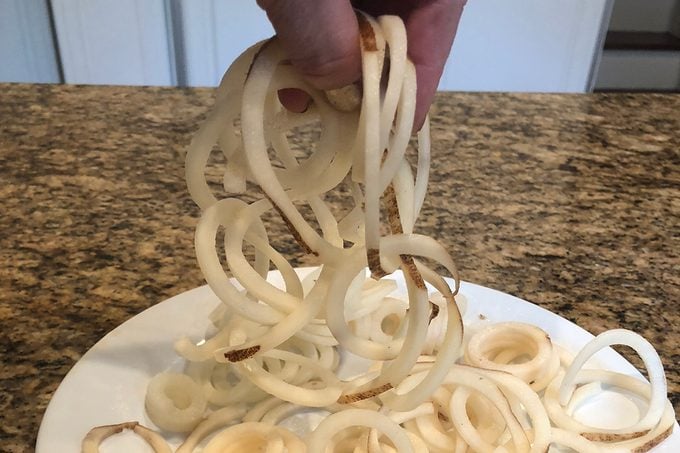
Wash a nicely sized russet potato (the bigger the better so that you can get as many fries as possible out of a single potato). Leave the skin on because it has all the potato’s nutrients. Using a medium-sized spiralizer plate (not the skinny spaghetti size, but slightly larger…you know, curly fries size!), spiralize that potato, catching it in a bowl.
 Taste of Home
Snip the spirals to manageable size
What you’ll likely end up with is a couple of super-long curly strands of potato. You’ll want to snip them into several-inch-long pieces. You’ll also end up with some tiny crescent-shaped potato pieces, which fry up nicely too. Fill the potato bowl with water. The water will absorb the surface-starch, which is what would otherwise turn your prepped potatoes brown.
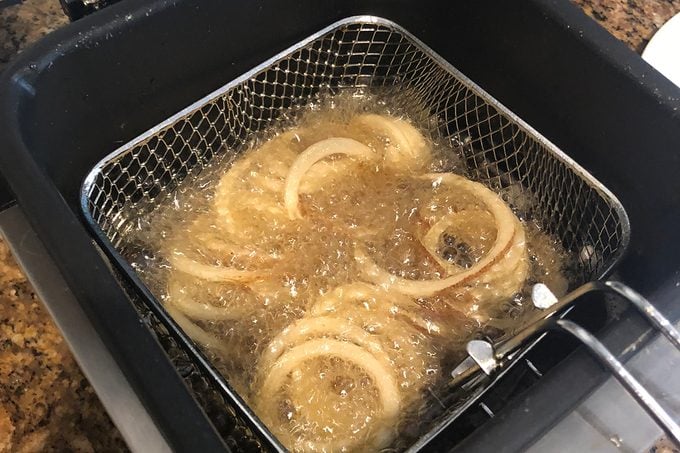
Heat your oil
I’d like to suggest my own personal fries-friendly blend of oil: 1/3 corn/canola oil, 1/3 olive oil and 1/3 peanut oil. This combo cooks the fries effectively while imbuing them with a subtle flavor that I believe requires no salt (although I use salt just the same because…fries). See all our recommended oils for deep frying.
Pro Tip: Plan to bake instead? Drizzle fries with olive oil; then sprinkle with your seasoning. Toss to coat. Arrange in a single layer on baking pans coated with cooking spray. Bake 20-25 minutes or until lightly browned, turning once.
 Taste of Home
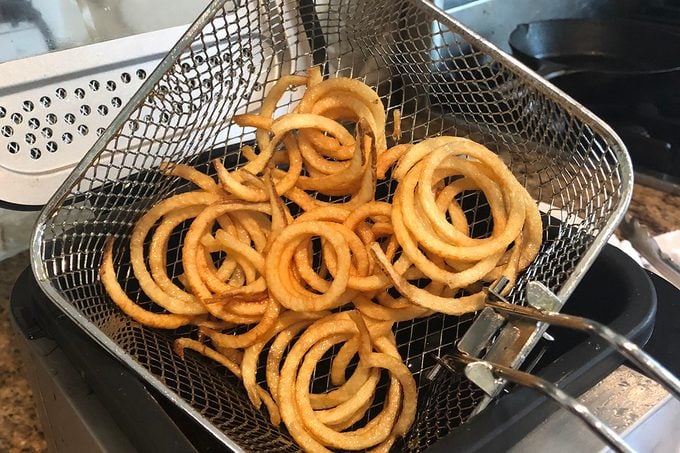
Fry in small batches
You don’t want to crowd the oil because that can interfere with the golden-brown color you’re probably looking for. To make life easier, use a basket (or a strainer, if you don’t have a fries basket). Use tongs to shift them around once they start turning brown. It should take about 10 minutes for your fries to get golden and crispy. At that point, take them out and drain them on paper towels.
 Taste of Home
Salt/season while they’re still warm
Your seasoning will stick better while your curly fries are still warm. Also, go ahead and season them while they’re draining because that will save you on clean-up. In addition to good ol’ kosher salt, here are some seasonings you can consider:
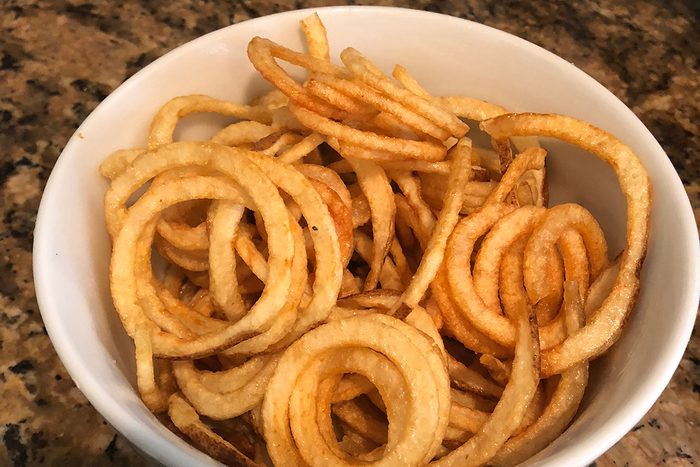
Enjoy your golden-brown goodness! If all my spiralizer were capable of making were curly fries, I’d say it was well worth the price (under $40) and the space it takes up (about a foot of horizontal cabinet space).
Recipes for People Who Really Love Fries
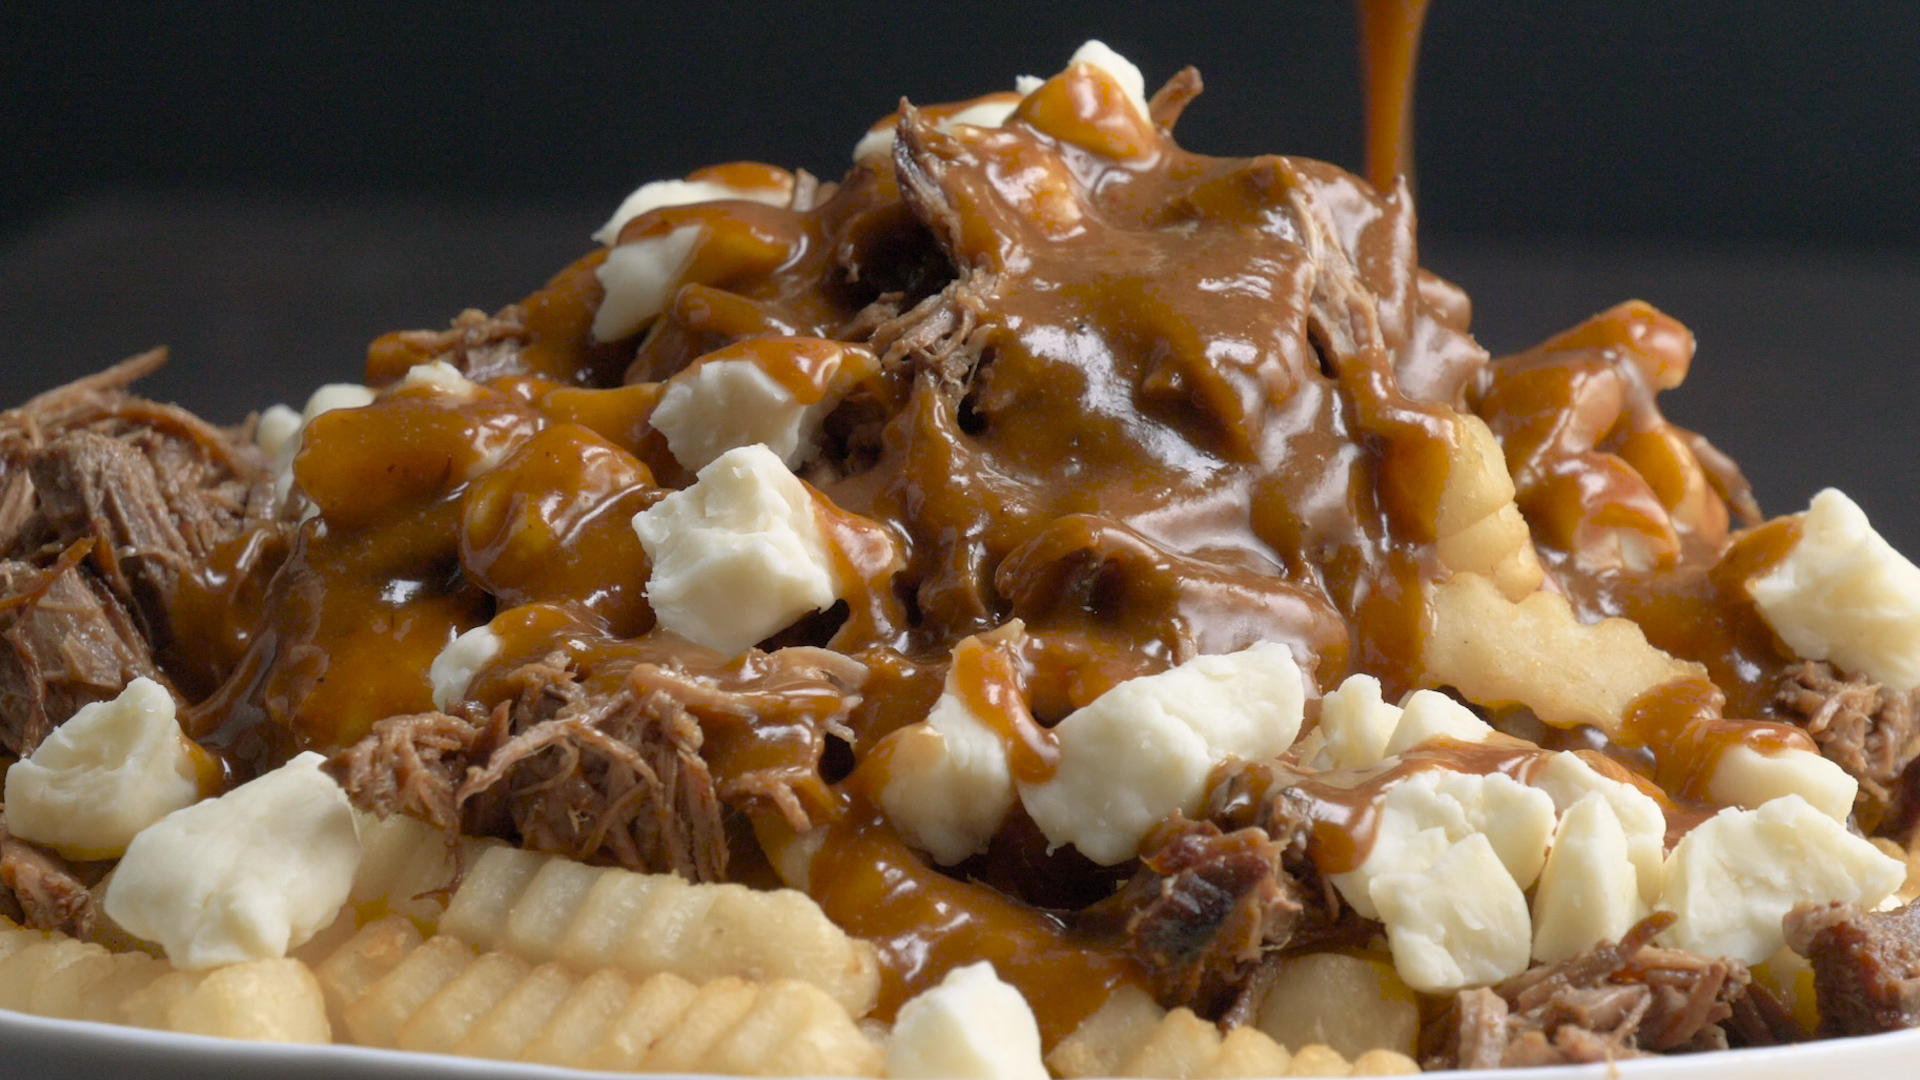
Short Rib Poutine
This dish combines the hearty, spicy flavors of my beloved slow-cooker short ribs with my all-time favorite comfort food: fries and gravy. With a little prep in the morning, it's just about ready when I come home from work (plus, the kitchen smells amazing!). If you are sensitive to spice, reduce the amount of Sriracha chili sauce. —Erin DeWitt, Long Beach, California
Also check these
best frozen sweet potato fries when you're looking for an easy side to go with weeknight dinners.
Go to Recipe
BBQ Chicken Waffle FriesThis is one of those dishes that sounds so wrong but tastes so right! Trust me—barbecue chicken leftovers are fantastic with the fries. We like it with lettuce, tomato and pickle, but you can add almost any toppings you like. —Janet Telleen, Russell, Iowa
Garlic-Chive Baked FriesYes, you
do want fries with that—especially these crispy, golden fries, full of garlic flavor and just a little bit of heat. —Steve Westphal, Wind Lake, Wisconsin. Find out the secret technique for making
crispy oven-baked fries.
French Fry CasseroleKids love this casserole because it combines two of their favorite fast foods. And I like the fact that I can whip it up with just a few ingredients and little prep time. It's a win-win for all! —Karen Owen, Rising Sun, Indiana
Cheese FriesI came up with this recipe after my daughter had cheese fries at a restaurant and couldn't stop talking about them. She loves that I can fix them so quickly at home. Plus, the frozen fry packets can be refrigerated and reheated. —Melissa Tatum, Greensboro, North Carolina
Loaded Waffle FriesMake any dinner fun with my Loaded Waffle Fries, topped with a savory blend of cheese, scallions and bacon. I copied this family-favorite recipe from a local restaurant, and it's great with hot dogs, burgers or by itself. —Jeffrey Viccone, Decatur, Illinois
If you're a fan of loaded fries you can also try making
animal style fries from In-N-Out.
Parmesan Potato WedgesI recommend serving these Parmesan potato wedges alongside a salad for a light lunch or serving them as a side dish with a chicken or beef entree. —Beth Ask, Ulster, Pennsylvania
Baked Chops and Cottage FriesConvenience items like frozen vegetables, cottage fries and a jar of cheese sauce make it a snap to assemble this comforting pork chop supper. It's a simple one-dish meal. —Gregg Voss, Emerson, Nebraska
Baked Sweet Potato FriesI can never get enough of this baked sweet potato fries recipe! Even though my grocery store sells them in the frozen foods section, I still love to pull them out of my garden and chop them up fresh! —Amber Massey, Argyle, Texas
Waffle Fry NachosMy husband and two grown sons really enjoy these fun nachos—they can devour a platter of them in no time. They're also fun to make when friends come over. —Debra Morgan, Idaho Falls, Idaho
Reuben Waffle Potato AppetizersI love Reubens, so I turned the classic sandwich into a fun appetizer with corned beef and sauerkraut on waffle fries. —Gloria Bradley, Naperville, Illinois
Curried Sweet Potato WedgesSweet potatoes roasted with curry and smoked paprika delight everybody at our table. The mango chutney makes a tangy dip. —Simi Jois, Streamwood, Illinois
Ultimate Pastrami SandwichesThis peerless pastrami sandwich was adapted from a menu favorite at Primanti Bros. Restaurant in Pittsburgh. We took the basic ingredients—grilled cold cuts, cheese, fried potatoes and tomatoes—and created a tasty replica that includes our version of their secret coleslaw topping. —Taste of Home Test Kitchen
Oven FriesI jazz up these baked french fries with paprika and garlic powder. Something about the combination of spices packs a punch. The leftovers are even good cold! —Heather Byers, Pittsburgh, Pennsylvania
Cheesy Chili FriesMy family is all about chili fries, but restaurant versions pile on the calories. For a healthier approach, bake the fries and serve them with green onions and avocado. —Beverly Nowling, Bristol, Florida
Potato Wedges with Sweet & Spicy SauceI'm a small-business owner, so most of my recipes are a result of not having time to run to the store, and doing with what's on hand. Here's a perfect example. Dip these wedges in anything. —Dana Alexander, Lebanon, Missouri
Steak and Fries SaladThis is a very popular dish at restaurants in central Pennsylvania. Prepared sweet-and-sour dressing is good on this salad, too. —Nancy Collins, Clearfield, Pennsylvania
Two-Tone Potato WedgesBetter than french fries, these tasty potatoes have just the right touch of garlic and Parmesan cheese. This is the only way my daughter will eat sweet potatoes, and she loves 'em!. —Marie Nicolau Schumacher, Larchmont, New York
Parmesan-Romano Potato WedgesI taught my nieces to make these easy, cheesy oven-baked potatoes. When the whole family comes over, we triple the recipe—and have no leftovers. —Ann Brown, Niles, MI