How to Make Strawberry Jam

Updated: Mar. 12, 2024
This step-by-step guide makes it easy to learn how to make strawberry jam.
I remember the first time I made jam. I was intimidated. It seemed so much more science-y than I was used to in the kitchen. I was afraid that, if I made a mistake, it wouldn’t just taste bad, but I’d give someone food poisoning!
I always tell newbies that 90 percent of the work is preparation. That includes getting all of your tools ready and arranged where you want them, plus prepping the produce. That last 10 percent is the actual processing—the part people think is mysterious and intimidating—so, really, you’re already more ahead of the game than you think. I teamed up with Lead Test Cook Nick Iverson to make a batch and show you how easy it really is. So go, grab your fresh-picked strawberries and let’s get started.
Want to keep your strawberries fresh for longer? Check how to freeze strawberries so that you’ll preserve their quality, nutritional value and most importantly, flavor.
How to Make Strawberry Jam
Ingredients:
- 2 quarts strawberries, washed and stemmed
- 1 package (1-3/4 ounces) powdered fruit pectin
- 6-3/4 cups sugar
Tools:
- Colander, cutting board, paring knife (for prepping the berries)
- Empty large bowl and potato masher (for mashing berries)
- Glass bowl (to hold measured sugar)
- Water bath canner with rack (for processing)
- Large saucepan (for cooking jam)
- Tongs (for removing hot empty jars from water bath)
- Canning funnel (for transferring jam to jars)
- Can lifter (for moving hot jars)
- Cooling rack (for cooling processed jam)
- Measuring cups
- Oven mitts
- Paper towels
- Ladle
- Large spoon
Step 1: Set up your station
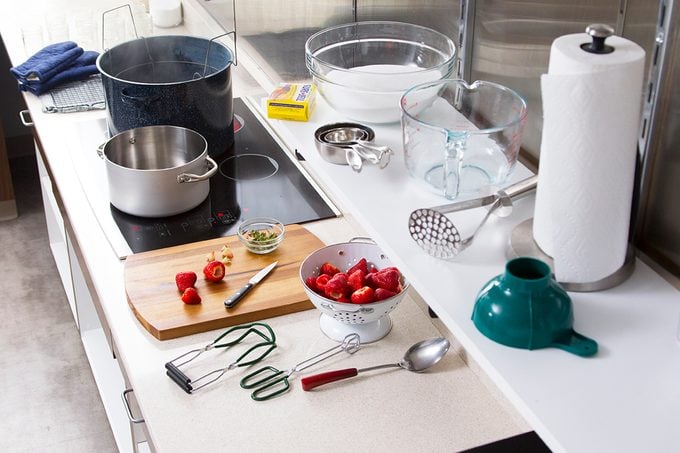
Set out all your tools and ingredients. Place canner rack in bottom of canner and fill about halfway with clean, warm water. Add clean empty jars (upright) to the canner. Start heating the water to bring to a boil (this takes a long time, so start it first thing).
Editor’s Tips:
- Since the jars are processed for 10 minutes, they don’t need to be sterilized first, but they do need to be hot. Keeping them in the water bath as it’s brought to a boil heats them up and doesn’t feel like an extra step. They can also be run through a cycle in the dish washer to get them nice and hot.
- Canning lids simply need to be washed in warm soapy water prior to use. In the past, they needed to be heated in hot water prior to use, but leading manufacturers have deemed that unnecessary.
Don’t make these common canning mistakes.
Step 2: Crush berries
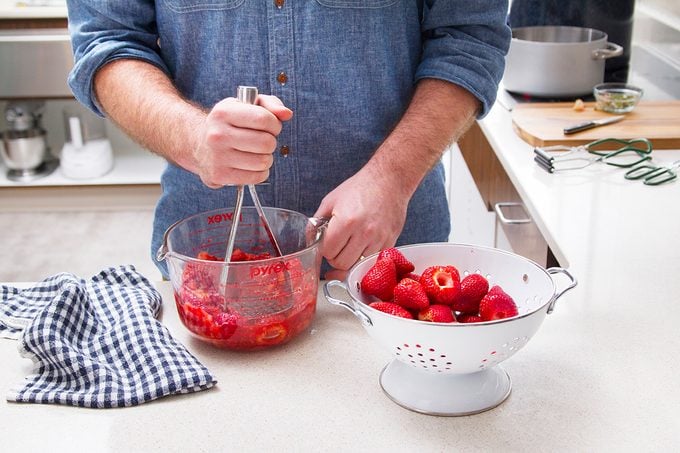
Using a potato masher, crush berries, one layer at a time, until they measure exactly 4-1/2 cups. One layer at a time ensures they’re evenly crushed. Add to large saucepan.
Step 3: Add pectin
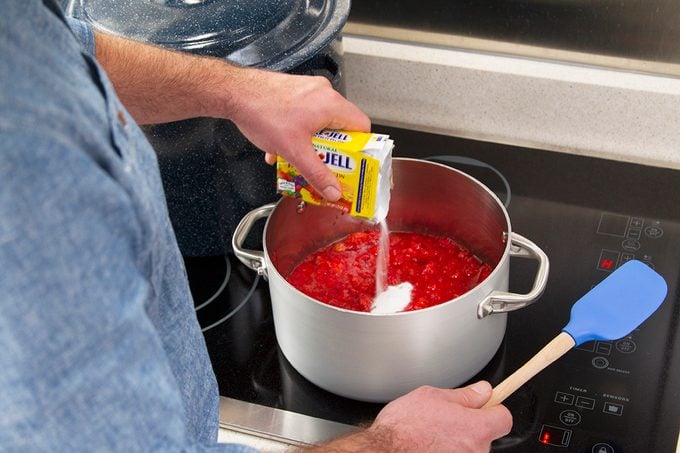
Stir pectin into crushed berries and quickly bring to a rolling boil over high heat, stirring frequently. (Prolonged boiling can break down the pectin.)
Editor’s Tip: Some people like to add 1/2 teaspoon butter or margarine at this step to reduce foam that forms when the mixture is boiled. It’s not necessary and can cause an off-flavor in jam that’s stored for a long time.
Step 4: Add sugar

Stir in sugar and return to a rolling boil. Boil for 1 minute, stirring constantly.
Step 5: Skim foam

Remove saucepan from the heat. Skim off foam with a large spoon; discard foam.
Editor’s Tip: This isn’t for food safety. If left, the foam that would be at the top of each jar can become slightly gray and visually unappealing.
These are grandma’s favorite canning recipes.
Step 6: Fill jars

Wearing oven mitts, carefully remove jars from water bath canner using tongs. Drain all water back into the canner. Arrange jars on cooling rack. (Do not attempt to dry jars. Some moisture is ok.) Using a canning funnel, ladle hot berry mixture into jars leaving 1/4-inch unfilled at the top, known as headspace.
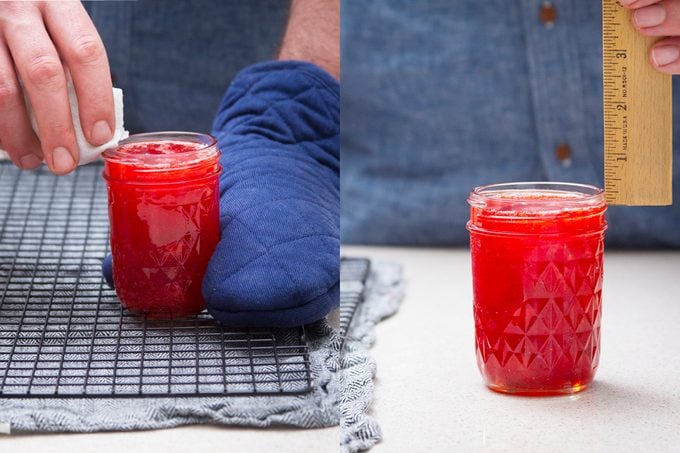
Wipe rims with a damp paper towel to clean away any drips and ensure a tight seal.
Place lids on jars and screw bands on “fingertip tight.” If too loose, jam will escape during processing. If too tight, air can’t vent properly during processing and jam may become discolored during storage.
Editor’s Tip: Leaving headspace at the top of the jar allows the jam to expand when heated and also helps to creates a vacuum to seal the jars.
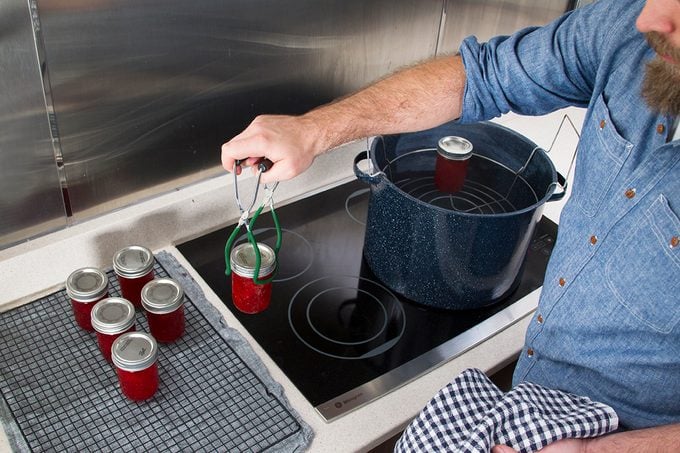
Step 7: Process jam
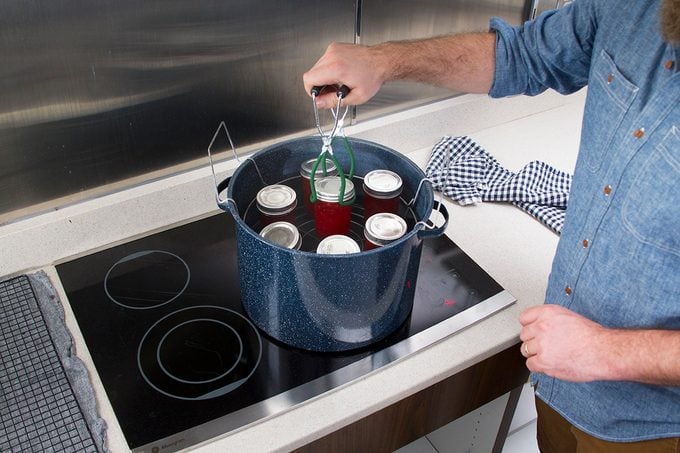
Using a jar lifter or gloved hands, carefully arrange jars in rack above water in canner. Lower the rack into the water, cover and return to a vigorous boil. Boil, covered, for 10 minutes. Carefully remove jars to a cooling rack using a jar lifter.
Editor’s Tips:
- After lowering the rack into the water, there should be 1-2 inches of water above the tops of the jars. If there isn’t, add more boiling water to the canner.
- If the water stops boiling at any time during the 10 minute processing time, return the water to a boil, start your timer over and boil for 10 minutes.
Step 8: Cool jam
Allow the jam to stand, upright, for 12-24 hours while the lids seal and the jam sets up (the jam will appear very thin right after processing). Don’t tighten the rings or press down on the lid while the jars are cooling (pressing down on the lid is really tempting—don’t do it!). You’ll hear a satisfying ‘pops’ as the lids seal.
After the jars have cooled, make sure the lids have sealed: Press the center of the lid with your finger. If it springs up when you take your finger off, the jar is not sealed–store unsealed jars in the refrigerator or re-seal within 24 hours using a new, clean, hot jar and a brand new lid. Follow the same processing directions.
Remove the rings from sealed jars (they aren’t necessary to hold the seal and an be used for more canning. Label the jars with contents and date. Store sealed jars upright in a cool dry place for up to 1 year.
What is the difference between jam and preserves?
The main difference is texture! Jam, jelly and preserves are all made from a combination of fruit and pectin, but jelly uses just the juice, jam uses crushed fruit and preserves use entire chunks of fruit.
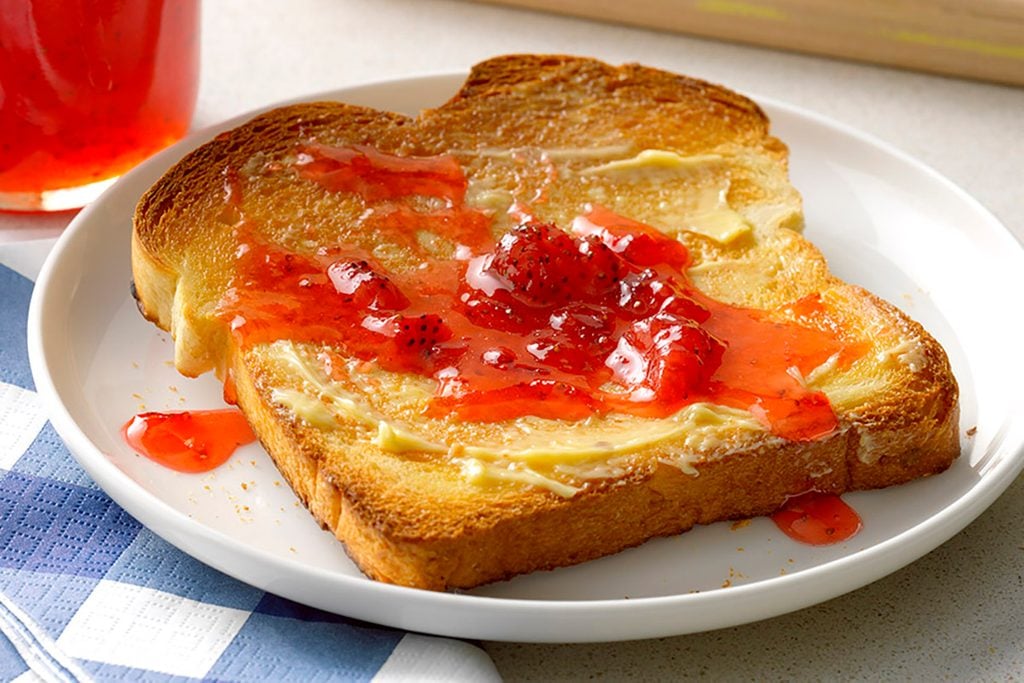
Use your strawberry jam in one of these tasty recipes.
Does strawberry jam need pectin?
Yep. Strawberries are naturally low in pectin, so you need to add some in order for the jam to set. Without pectin, your jam would be a jiggly mess.


Originally Published: April 15, 2019