


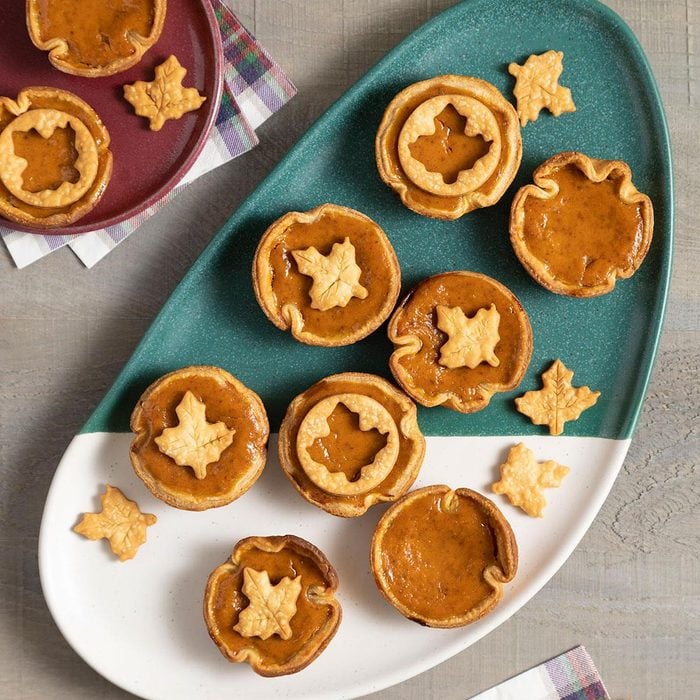
If you’re looking for a few bites of heavenly fall flavor, look no further than our mini pumpkin pies. Of all the wonderful pumpkin dessert recipes, these are so simple to prepare. We start these pumpkin pie tarts with refrigerated premade pie crust sheets and a quick filling. Then we assemble them and bake them off in a regular muffin tin.
Maybe you’re thinking about fall entertaining or holiday baking, or maybe you’re just in the mood to whip up a treat packed with the cozy autumn aromas. Whatever the case, these mini pumpkin pies are a perfect option. Bake up a batch of delicious, rich, perfectly-sized bits of sweet fall flavor.
Ingredients for Mini Pumpkin Pies
- Refrigerated pie crust sheets: Premade pie crust sheets are a flaky, buttery, wonderful option when you’re short on workspace or time, or if you just don’t enjoy making pastry from scratch. Because baking should spark joy! All you have to do is unroll the dough on a floured surface, and press it into your pie pans.
- Canned pumpkin: This is the silky smooth, creamy magical ingredient that will bring your mini pumpkin pies to life! If you’re new to baking with pumpkin pie and you run into some confusion while grocery shopping, just remember: Canned pumpkin, pumpkin puree and solid-pack pumpkin are all the same thing. They’re 100% steamed and pureed pumpkin, plain and without any additives. (Just skip anything labeled “pumpkin pie mix!”)
- Evaporated milk: Pumpkin pie has a custardy and dense texture, a thick and creamy consistency, and a rich flavor. This is in part achieved by using evaporated milk.
- Spices: It’s not fall baking without fall spices! The flavors of cinnamon, ginger and cloves wrap you up in a big warm hug and play a crucial role in developing the flavors of classic pumpkin pie. Your entire kitchen and home will smell heavenly once these spices start working their magic in the oven.
Directions
Step 1: Prepare the pie crust
Preheat the oven to 425°F. Coat 16 cups in a muffin tin with cooking spray. Lightly flour your work surface, then unroll each pie crust. Roll each to 1/8-inch thickness. Using a floured 4-inch round cutter, cut out 16 circles, rerolling the scraps if necessary. Press the circles into the prepared muffin cups.
Editor’s Tip: After sprinkling your workstation with flour, be sure to cover your hands with some flour, as well. This will prevent the dough from sticking to your hands as you work with it. Keep a small bowl of flour nearby as you prepare the tartlets so that you can conveniently reapply as needed.
Step 2: Prepare the pumpkin filling
Whisk together the pumpkin, milk, sugar, eggs, salt and spices in a large bowl until everything is blended and smooth. Then, fill each pie crust with filling.
Editor’s Tip: Use a cookie scoop coated with cooking spray to fill each pie crust cup. This will ensure consistent filling and, as a result, consistent baking—a perfect tin of mini pumpkin pies every time!
Step 3: Bake the pumpkin pie tarts
This is a two-step process, so be sure to read carefully! First, bake the prepared tarts for 15 minutes. Then, reduce the oven temperature to 350°, leaving the tarts in the oven. Continue baking them until a knife inserted in the center comes out clean, 25 to 30 minutes.
If desired, top each mini pumpkin pies with miniature marshmallows, and bake them for two to three minutes longer, just until lightly browned. Allow the tartlets to cool for five minutes or so before handling them.
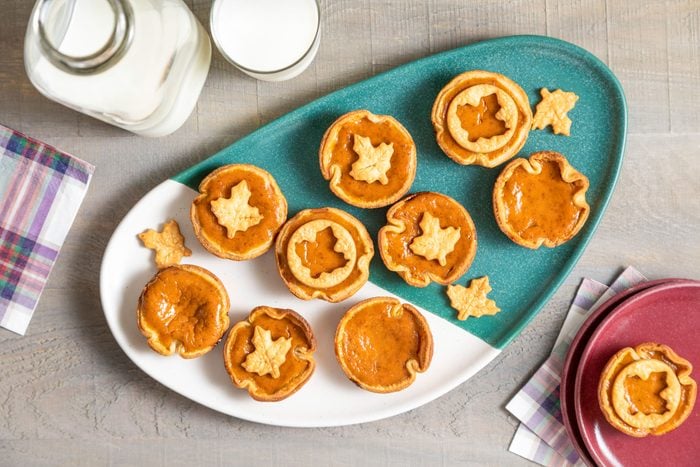
Step 4: Let mini pumpkin pies cool
Carefully run a knife around the sides of each muffin cup to loosen the tarts. Let the pumpkin pie tarts cool in the muffin tin on wire racks before removing them.
Step 5: Prepare the decoration
If desired, roll the remaining crust to 1/4-inch thickness, then cut out leaves using 1-1/2 to 2-1/2-inch cookie cutters. Place the leaves on a baking sheet, and bake the cutouts until they’re golden brown, 8 to 10 minutes.
Editor’s Tip: While this step is totally optional, it’s a beautiful way to finish your tartlets. And why not put a pretty little bow (or leaf) on top of your tartlets to show off each masterpiece you’ve created!
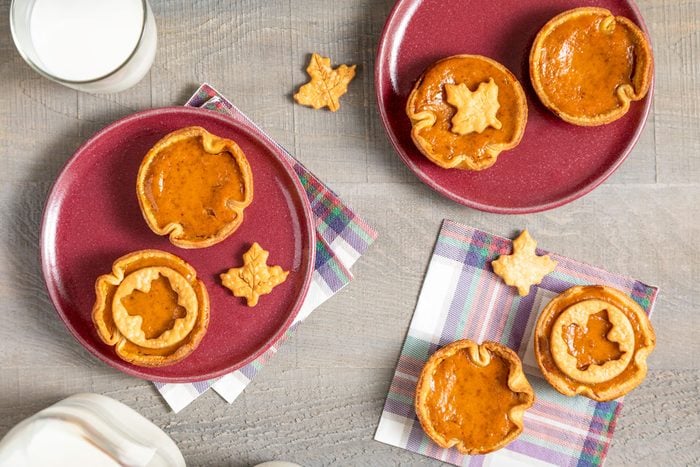
Step 6: Decorate the mini pumpkin pies
Arrange the leaf cutouts on top of the cooled tarts. Enjoy the tarts right away, or refrigerate them within two hours.
Tips for Making Mini Pumpkin Pies
How do you know when mini pumpkin pies are done baking?
When mini pumpkin pies are done baking, the edges of the crusts will be light brown and the centers will be slightly jiggly, but not unsteady, loose, or wobbly. If you have an infrared meat thermometer, it will come in handy for baking these mini pumpkin pies (and baked goods in general). The center of each pie should be about 185° when tested with the infrared thermometer.
How do you store mini pumpkin pies?
Wondering if pumpkin pie needs to be refrigerated? Yup, you should store them in the refrigerator! Since these mini pumpkin pies contain eggs, they should be stashed in a cold environment once they’ve completely cooled. To prevent other flavors from mixing with the pies and to keep that top layer of filling nice and fresh, store the pies in an airtight container, or on a dish tightly covered with wrap. While pumpkin pie is best enjoyed fresh, these will still be delicious from the refrigerator for up to four days.
Can you freeze mini pumpkin pies?
It’s perfectly fine and super simple to freeze mini pumpkin pies. Wrap each mini pie, then place in an airtight container. Store them in the freezer for up to two months. (After that, the pies begin to lose their fresh flavor and break down in texture. They will still taste good, but the crust will be a bit less buttery and flaky.)
Can you use a mini muffin tin?
You can use a mini muffin tin for this recipe, but the tarts will bake faster. You’ll have to adjust the temperature of your oven to 375°, and divide the recipe into two 24-count mini muffin tins. Cut the dough into smaller rounds using a 2-1/2-inch cookie cutter. Prepare the filled tin, then bake each batch for about 25 minutes. Cooling, serving and storage will be the same.
Can I transform this into a larger pie?
For a 9-inch pumpkin pie, preheat the oven to 425°. Unroll one refrigerated pie crust into a 9-inch pie plate, creating a fluted edge. Prepare the filling as you would for tartlets and pour the filling into the pastry shell. Bake it for 15 minutes, before reducing the temperature to 350°. Then bake the pie 35 to 45 minutes longer, covering the edges loosely with aluminum foil during the last 10 minutes to avoid overbrowning.
