


Here’s How to Decorate a Cake Like a Pro
Updated: May 09, 2024
Once you learn how to decorate a cake, you'll be whipping up gorgeous celebration-worthy treats in no time. We'll show you tips for filling a piping bag, choosing the right frosting, making trendy naked cakes and more.
Our editors and experts handpick every product we feature. We may earn a commission from your purchases.Learn more.
For special occasions, there’s no better dessert than a delicious and perfectly decorated cake. While many of us enjoy visiting our favorite bakery for an elegant treat, it is absolutely possible to get stunning results right at home. (If you like trying different cake recipes also try making Faith Hill’s coca-cola cake and Ina Garten’s mocha chocolate icebox cake). However, if you’re not a pro, here’s how to make box cake taste homemade. All you need to learn how to decorate a cake are a few basic tools (we bet you already have most of them in your kitchen) and a bit of patience.
Now, bake up your go-to layer cake, and let’s get frosting.
On This Page
Cake Decorating Ideas
Easy Swirls
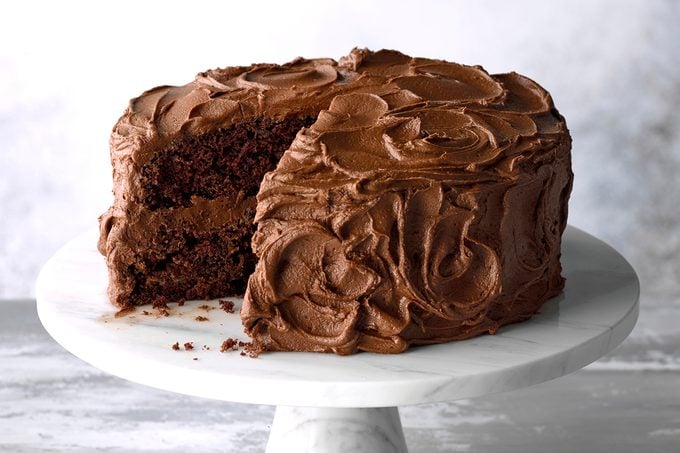
Think you need to break out your piping bag for an impressive cake? Think again! With just the back of a spoon, you can give your cake a gorgeous swirl texture.
To do this, just layer on your frosting on the outsides and top of your cake. Then, with the back of a spoon, make small swirl shapes until the whole cake is covered with a fun texture.
Piping
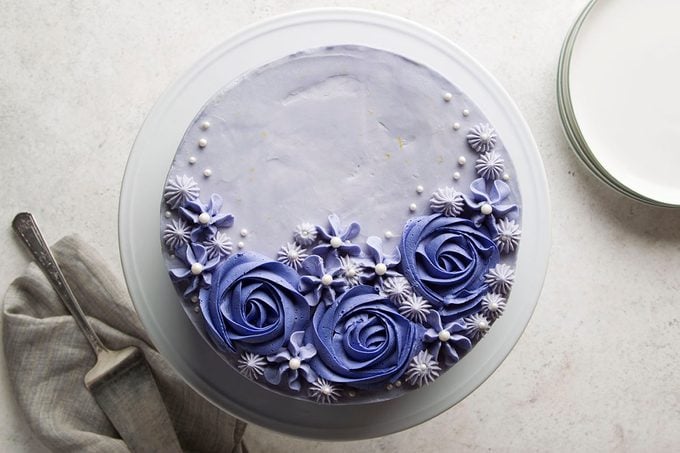
Want to get really creative? Grab a piping bag and some frosting tips. Each piping tip gives you a different effect so you can create all sorts of decorative techniques.
Use different tips to create flowers, leaves, stars, basketweave patterns and other designs. You can decorate an entire cake this way or used piped motifs as an accent.
Drip Cakes

There’s something about perfectly imperfect finishes that we just crave. Maybe that’s why we love drip cakes so much! This decorating technique is surprisingly simple.
To start, frost your cake and give it a smooth finish using a bench scraper (it’s a cake decorator’s secret weapon). Then make a ganache with chocolate or baking chips. The confetti cake above uses baking chips, heavy cream and a touch of food coloring.
When the ganache has cooled slightly, spoon it over the top of your cake. Using the back of your spoon, push the ganache to the edges of the cake and watch it slowly drip down the sides to form tempting chocolaty drips.
Naked Cakes

If you want to take the trendy route when decorating a cake, try making a naked cake. Naked cakes still use frosting, but it’s applied thinly to let the layers of the cake peek through. These cakes give you a little preview of what’s inside.
To make a naked cake, layer your cake as you normally would with layers of frosting in between. When it comes to the outer coating of frosting, apply thinly and then use a bench scraper to pull away any extra icing. Essentially, you’re just crumb coating the sides of the cake. It’s really that simple!
While this type of cake decorating is pretty minimal, don’t forget to give your cake a little extra finish up top so it looks complete. Fruit, crushed candy or sprinkles can give it the finishing touch. Use this recipe for chocolate malt cake as inspiration.
Writing and Piped Designs
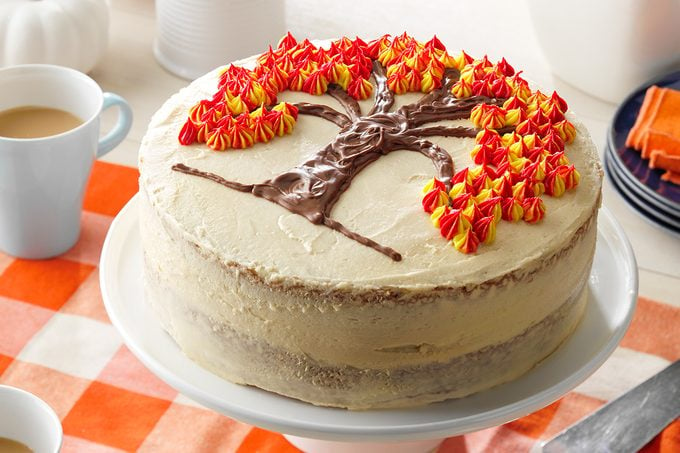
Part of the appeal of bakery-bought cakes is the perfect penmanship that those cake decorators have. But it’s really not too hard to replicate at home. All you’ll need is a piping bag, a fine piping tip, a toothpick and some patience.
To start, write or print out the message or motif you’d like to be featured on the top of your cake. If you’re very new to piping, do a test run on a sheet of parchment or waxed paper to get used to how the frosting flows out of the piping bag.
After a little practice, trace the design onto a sheet of parchment or waxed paper and lay it on top of your cake. With a toothpick or sharp skewer, prick the design until you have a dot-to-dot of your message. Carefully remove the paper and connect the dots with your piped frosting. That’s all it takes to write on a cake! And once you have a few cakes under your belt, you can do this freehand.
Sprinkles and More

For celebratory cakes, you can’t go wrong with sprinkles and other colorful toppings. You can top your favorite bake with just a dash of sprinkles and edible decorations or combine them with other decorating techniques. Beyond sprinkles, don’t forget about the tempting qualities of toasted nuts, shredded coconut, chopped candy and cookie crumbles. Use any or all of them to add a little extra dazzle to your cakes.
Cake Decorating Tools

To create gorgeous cakes, there are a few decorating tools you’ll want to have in your kitchen. Don’t be daunted by this list—most items cost $15 or less so you can create pretty cakes even on a budget. According to our Test Kitchen, these tools are must-haves:
- Offset spatulas: These spatulas are kitchen MVPs, especially when it comes to cake decorating. Large offset spatulas are perfect for adding even amounts of frosting in between each layer of cake. The smaller offset spatulas can help you get smooth finishes and elegant swirls on the exterior of your cake.
- Bench scraper: To give the outside of your cake a smooth finish, you’ll want a bench scraper. This gadget helps smooth away any imperfections. If you prefer a bit of texture, try these cake combs.
- Piping bags and tips: For fancy finishes, you’ll want to invest in piping bags and a few different pastry tips. Use these for writing on cakes, making flowers and other decorative elements.
- Cake turntable: While you can decorate your cake right on a serving plate, the job goes a bit quicker with a turntable. This spinning tray allows you to rotate the cake as you frost so your icing is even and perfectly swirled.
Tips for How to Decorate a Cake
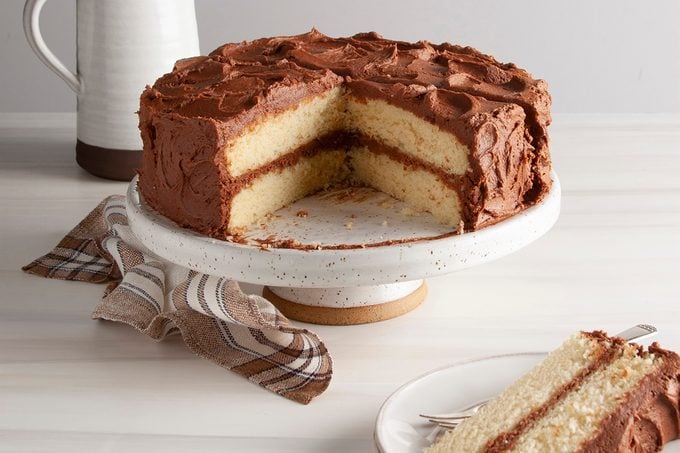
Choose the Right Frosting
Not all frostings are suitable for filling and topping cakes, but the good news is there are still a lot of delicious options. Buttercreams of all kinds (Italian buttercream, French buttercream, German buttercream, American buttercream and flavored buttercreams) work well for decorating. You can also use cream cheese frosting and ermine frosting. Essentially, you want a thicker frosting that can hold up under the weight of the layers of cake and will also stick to the sides.
In general, when it comes to decorating you want to avoid whipped cream frosting and very thin frostings.
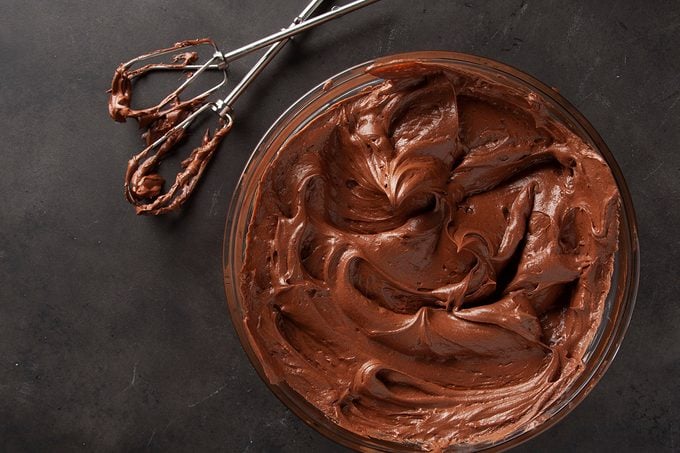
How to Fill a Pastry Bag
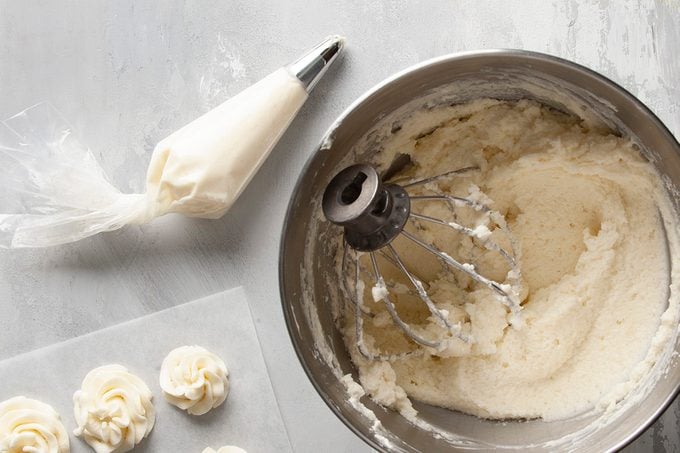
Yes, a zip-top bag will do in a pinch, but if you’re serious about decorating cakes, you’ll want real-deal piping bags—either the disposable kind or reusable pastry bags.
To use a pastry bag, start by snipping off the tip. Then insert the tip of your choice inside and make sure it’s pressed snugly in the bottom. Put the bag in a tall glass and fold the end over the lip of the glass. Scoop up your homemade frosting with a spatula and press it into the bottom of the piping bag.
Once filled, squeeze the frosting down into the bag and twist the top (you only want frosting coming out of the tip, not the back end). After your bag is prepped, you can experiment with pressure and piping techniques on a scrap of waxed paper or a plate before moving to your cake.
How to Level Cakes
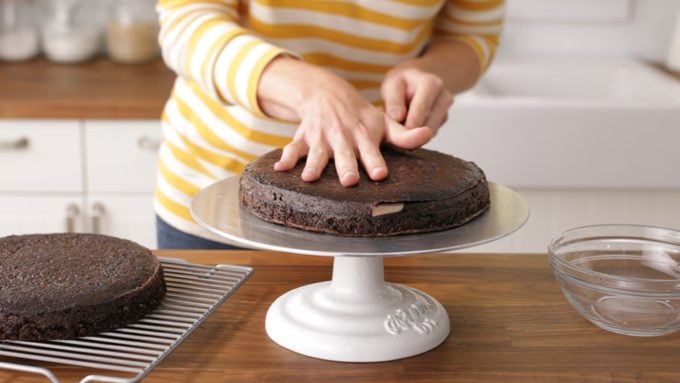
When making layer cakes, it’s important that each layer is level and flat so they are easy to stack. To create even cake layers you can try two different techniques (or a combination of both):
- Cake strips: You can take measurements before your cake goes in the oven for even layers. All you need are cake strips. Soak these strips in water and wrap them around your cake pans before they go in the oven. The damp strips will help the cake bake more evenly, leading to level cakes.
- Serrated knife: After your cake is baked and cooled, use a serrated knife to slice off the domed top of your cake. Work slowly and get down to eye level with the cake. This will help you make an even cut.
Chill the Cake Layers
Cold cakes are easier to frost. If you have the time, pop your cake layers into the freezer to firm up—30 minutes should do the trick. Once chilled, stack and frost as normal. The cake will be sturdier and the chill will help contain some of the crumbs.
And whatever you do, never, ever frost a warm cake—the icing will melt right off.
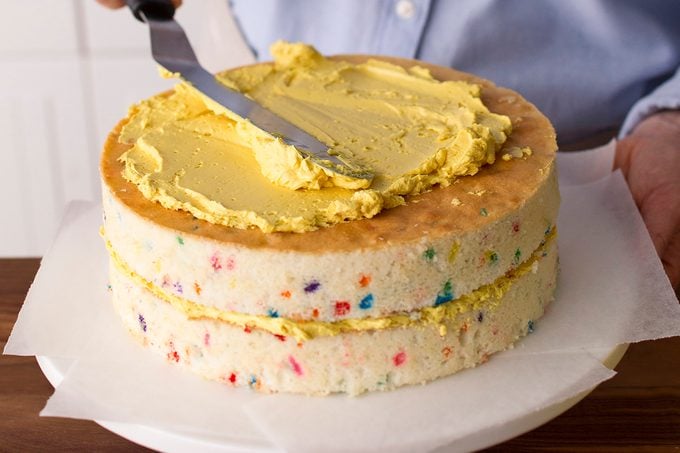
How to Crumb Coat a Cake

Strange as it sounds, the crumb coat is to prevent a mess, not make one. A crumb coat is a thin layer of frosting applied to the exterior of a cake to help contain crumbs that the cake may shed. This foundational layer means any decoration you apply on top will be neater and cleaner.
To crumb coat a cake, use an offset spatula and apply the icing, and spread it as thinly as possible. Make sure you get the sides and the top. Then pop the coated cake into the freezer for 15 to 30 minutes to firm up before adding more decoration.
How to Slice a Cake
After all the hard work of baking and frosting, you want every slice of your cake to be picture perfect.
To slice a cake cleanly, grab a sharp knife and dip it into hot water. Then wipe the knife dry and cut into the cake in one fluid motion. The heat from the knife will soften up the frosting and the sharp edge of the knife (nope—no serrated knife or cake cutter needed!) will give you the best looking slice. Wipe the knife clean and repeat for each slice.
Put These Skills to Work