


Jump-start your way to sourdough bread with this shortcut.

The Secret to Making a Quick Sourdough Starter That Actually Works


Updated Feb. 25, 2021
Sourdough bread is leavened (or raised) with natural yeast, which is found on your kitchen surfaces, wooden spoons and even your hands and the air around you. When building a sourdough starter, you’re capturing those yeasts and using them to not only leaven dough but also to enhance the flavor of your bread.
The catch is, building a starter that’s strong enough to make airy leavened breads can take weeks. Our Test Kitchen has a nifty hack to jump-start the process: Just add some dry yeast at the beginning!
How to Make a Sourdough Starter
You’ll need:
- 2 cups all-purpose flour, or other flour of your choice (whole wheat, a blend of white and wheat, ancient grains like kamut, etc.)
- 1 package (1/4 ounce) active dry yeast
- 2 cups warm water (110° to 115°)
Step 1: Mix
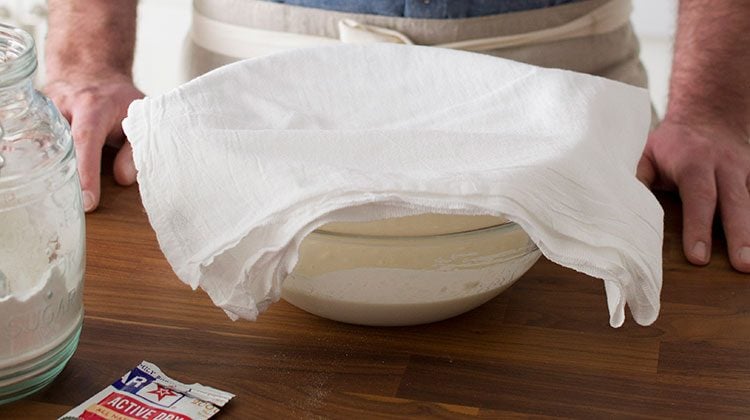
Grab a large (4 quart or so) container you won’t mind dedicating to your starter for a week or more. Use glass, ceramic or plastic, not metal.
Combine the flour and yeast in the container. Gradually stir in warm water until smooth. Cover loosely with a kitchen towel or a piece of cheesecloth.
Step 2: Wait
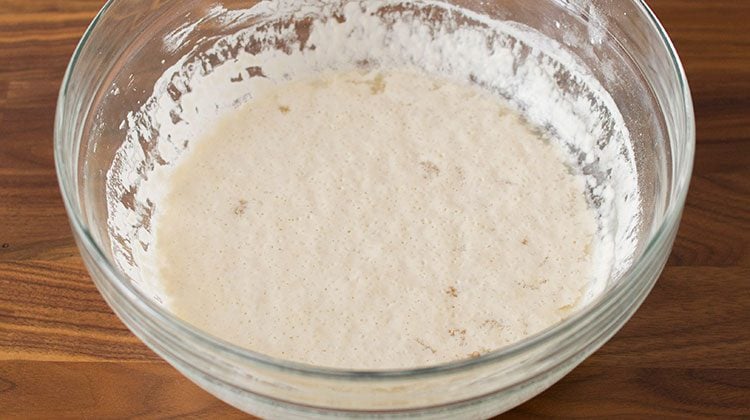
Let your mixture stand in a warm place until it gets bubbly, usually two to four days. In cold weather, it can take up to a week. Stir your starter daily with a wooden spoon or clean hands to encourage activity.
When the starter is ready, it will be bubbly, smell sour and have a cap of clear liquid floating on the top.
How can you tell if your starter has gone bad? Good starter will darken a bit and have a strong smell. If it has mold, a deeply offensive or rotten odor, or turns a different color entirely, it has gone bad. Toss it!
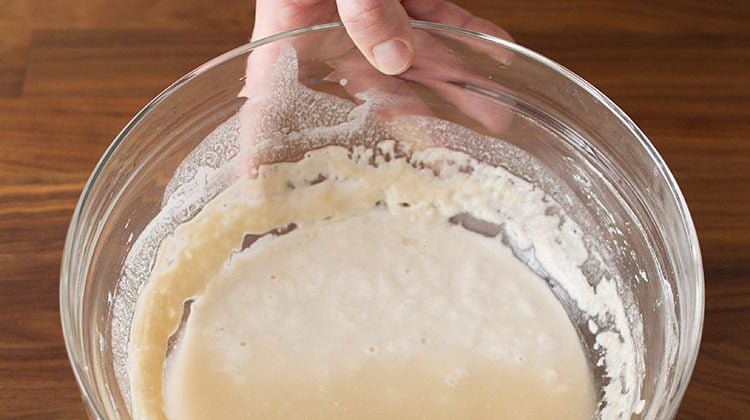
Step 3: Feed Your Starter
Pour off the liquid on the top—or stir it in if you’d like extra sour flavor. Discard half of the starter. For each 1/2 cup of starter you keep, add 1/2 cup flour and 1/2 cup warm water. Stir until smooth. Cover loosely and let stand in a warm place until bubbly.
While discarding half of the starter seems like a waste, you’re actually helping it to thrive and taste better. Trust us, don’t be tempted to keep it all, otherwise you’ll end up with gallons of very hungry starter. (Plus, you can use the excess to make these sourdough discard recipes!)
Also, by eliminating half of it, the starter that’s left is happier because it’s not competing with other yeast cells for food. Lastly, from a chemical standpoint, removing excess starter helps keep the ph level at the sweet spot where the yeast loves to live.
If your starter rises and then sinks before you get a chance to bake it, that just means that you missed the prime time for baking. Simply stir the starter, add a dash more flour and water, and wait for it to rise again.
Test Kitchen tip: You can control the timing of your starter. If you’d like it to rise quickly, warm it up. Use slightly warmer water in your mix and let it sit in a warm place. If you want to let the starter rise slowly, use cooler water or let sit in a cooler place, like a basement. Note that the longer your starter takes to rise, the more tang it will have.
Step 4: Bake
When bubbly and roughly doubled in size, your starter is ready to use! Pour off the amount needed in the recipe. Here’s how to make warm, crusty sourdough bread.
You can also stir a cup or two of starter into most breads—and even pizza dough!
Step 5: Saving Your Starter
The remaining starter will survive in the fridge for up to two weeks before it needs another feeding. Simply cover the starter container and stick it in the fridge. With proper care, your sourdough starter can live indefinitely. (Some bakers claim to use starter that’s decades old. One US woman won a Wyoming State Historical Society award for her 122-year-old starter!)
When you want to use it again, bring the starter to room temperature for an hour or two, and then feed the starter (Step 3 above). Wait for it to bubble, and then use it. You can repeat Step 3 and Step 4 as often as you like. With regular feedings, your starter will continue to get stronger, with more leavening power in your breads.
Find Recipes to Build a Bread-Making Bucket List
Originally Published: November 27, 2018