How to Make Homemade Pierogi the Right Way

Updated: Mar. 11, 2024

Packed with tasty fillings, these Polish dumplings are can't-get-enough treats. But there are some tricks to making homemade pierogi—we'll show you how to do it right.
Spend and receive a gift card up to $200 with Caraway through March 31. Gift codes are emailed after purchase. Spend $95 for $25, $195 for $50, $395 for $100 and $795 for $200.
With a last name like Kaminski, you can bet Polish foods are in regular rotation at my house. From kolaches to kruschiki to kielbasa, I’ve made my fair share of Polish treats, but my favorite of all: pierogi.
These filled dumplings are Poland’s signature dish and for good reason. They can hold a whole host of tasty fillings: potato and cheese (my favorite), cabbage, pork, even fruit. Delicious, buttery and stuffed with some favorite ingredients, you’ll definitely want to make these dumplings for yourself.
But there are a few tricks for making a good pierogi. I’ll walk you through the basics of making a classic potato and cheese pierogi. They take a little bit of preparation, but once you get that first cheesy, potato-packed bite, you’ll know it was worth it. Let’s start!
How to Make Pierogies

I love pierogi not only because they’re delicious, but because they use plenty of pantry staples. Even when my cupboards look a little bare, I can whip up a batch with this recipe. Here’s what you need to make pierogi at home.
For the dough:
- 5 cups all-purpose flour
- 1 teaspoon salt
- 1 cup water
- 3 eggs
- 1/2 cup butter, softened
For the filling:
- 4 medium potatoes, peeled and cubed
- 2 medium onions, chopped
- 2 tablespoons butter
- 5 ounces cream cheese, softened
- 1/2 teaspoon salt
- 1/2 teaspoon pepper
Editor’s tip: I like to amp up the flavor of this recipe and toss in a half cup of shredded cheddar. It’s not strictly traditional, but it’s tasty!
To finish:
- Butter
- Sliced onion
- Fresh parsley
- Sour cream
Tools for Making Pierogi


Step 1: Make the Pierogi Dough
In a food processor, combine the flour, salt, eggs, water and butter. Pulse until the mix forms a dough. If it looks too dry, add a water a tablespoon at a time until it comes together. Then remove from the processor, cover and let the mix rest for 15 to 30 minutes.
Editor’s tip: If you want to do it the old fashioned way, the way Busia might (or you just don’t have a food processor), you can mix together the ingredients in a bowl using a wooden spoon. Then turn it out onto the countertop and knead until it comes together.
Step 2: Prep the Potatoes
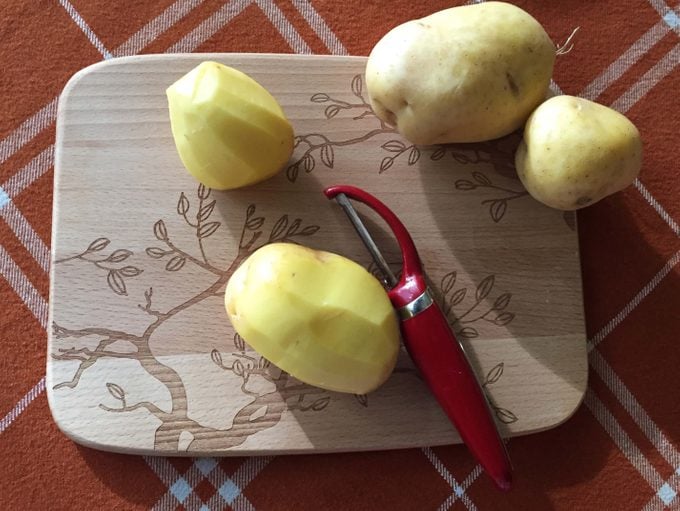
The filling for a classic pierogi is essentially mashed potatoes plus a little cheese–yum, right? So to start, prep your potatoes like you would for mashed potatoes: wash, peel and quarter them. I like to use Yukon Golds because they cook up nice and tender, and they have a great smooth consistency once mashed. You can substitute other potatoes if you don’t have Yukons on hand (and we’ve got some tips on how to pick the best potatoes for every recipe).
Once prepped, simply boil your potatoes until tender–the time will vary depending on the size of your spuds. Once cooked through (I like to check mine with a fork after 15 minutes or so), strain and set aside.
While the potatoes are simmering away, you can sautee your onions for the filling. Add them to a frying pan with the butter and cook until soft.
Step 3: Make the Filling
When the potatoes are nice and soft, drain them and press through a potato ricer into a large mixing bowl. This tool is definitely old-fashioned, but it’s works wonders to create a fluffy texture for pierogi filling (and mashed potatoes, too!).
Then stir in the sauteed onions, cream cheese, salt and pepper until smooth. I like to stir in about a half cup of shredded cheddar here too for extra flavor (I’m a Wisconsinite—I can’t help myself!). You can also feel free to add in other herbs and spices here as well. Chives or dill would taste great!
Editor’s tip: Traditionally, pierogi are made with farmer cheese (sometimes called quark)—a soft, neutral cheese. It’s a bit harder to come by, which is why our Test Kitchen suggests using cream cheese in this recipe. It’s a great substitute and gives these dumplings a creamy texture.
Step 4: Roll Out the Pierogi Dough
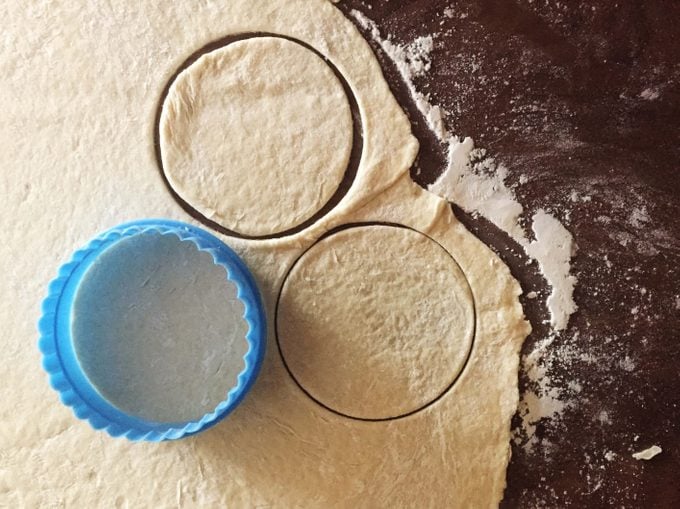
With your dough formed, get ready to roll. This dough is fairly sticky, so make sure to flour your work surface well.
Use your favorite rolling pin to roll out the dough. I use an old wooden one from my great-grandma. Start by rolling out a quarter of the prepared dough until it’s about an eight-inch thick; you want this to be very thin. As tasty as this dough is, the filling is the star of the show, so the less dough per pieroigi, the better. Using a biscuit cutter (three- to four-inch cutters work best), cut out rounds of dough.
Feel free to re-roll your dough scraps to make more pierogi shells. I think that working with the dough the second time around is a little easier (and a little less sticky).
Editor’s tip: Don’t have a biscuit cutter? Use the open side of a similar-sized prep bowl or drinking glass.
Step 6: Fill ’em Up
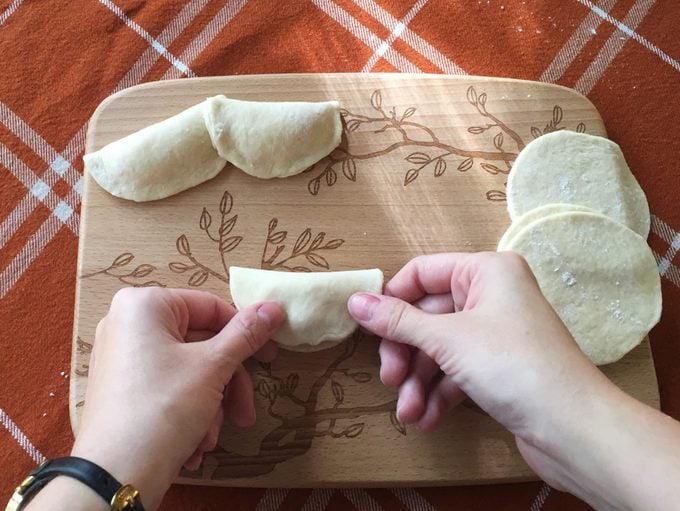
To fill your pierogi, place a tablespoon of potato filling in the center of each shell. Then, brush a bit of water around the very outer edge of this dough round using a pastry brush (fingers work too!). Fold over, and pinch along the edges to seal. Just like that, you’ve got a pierogi (actually a pierog—pierogi is plural!).
If you’re prepping these dumplings ahead of time, you can stop right here. You can store pierogi between layers of waxed paper in an airtight container in the refrigerator for a few days or freeze them for up to four months.
Step 7: Cook the Pierogi
Some folks might be wondering: Do you boil or fry pierogies? In my world, you do both!
Begin by boiling your pierogies in water for four to five minutes; this will heat them through and cook the dough. Some folks stop right here and eat their pierogi boiled. You could do that, but I’m here to tell you that to get the tastiest pierogi, you need to go one step further.
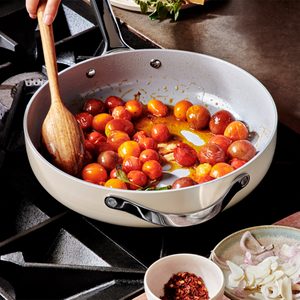
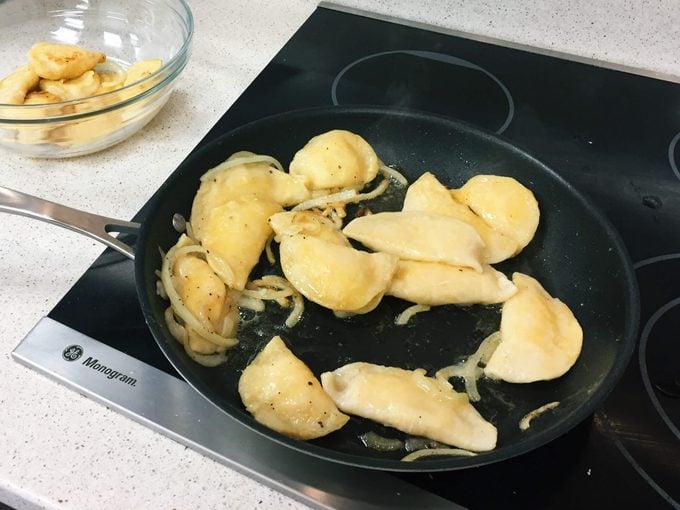
In a frying pan, heat two tablespoons of butter; add half an onion, sliced, and salt and pepper. When the onions are soft (and filling your home with a wonderful smell), toss a few pierogi into the frying pan. Saute until the dough is slightly browned. This will make for a slightly crisp exterior, which makes pierogi so so good!
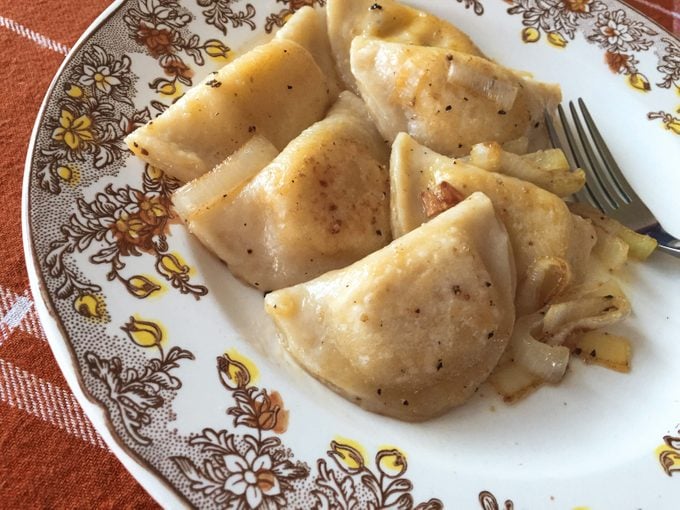
Serve with the sauteed onion and, if you like, a dollop of sour cream and fresh parsley. Chives and dill would also be tasty! Whatever’s growing in your herb garden.
How Are Pierogies Traditionally Served?
In Poland and in Polish neighborhoods, you’ll find that pierogi are traditionally served with sauteed onions and a dollop of sour cream. Sometimes, to make the dish more filling, these dumplings are sauteed with bacon and mushrooms as well—perfect complements for the onions and potato inside.
To complete your meal, you can add a salad (creamed cucumber salad is an Eastern European classic) or soup to your Polish meal.
How Do You Store Pierogies?
Because making pierogi is a bit of a project, I understand if you want to make a big batch—some for dinner today and some for dinner down the road.
To store prepped (but not cooked) pierogi, layer the dumplings between sheets of waxed paper or parchment in an airtight container. You can keep them in the fridge ready to go for two to three days. If you want to keep them longer, pierogie freeze exceptionally well. Just move that container to the freezer where they’ll keep for up to four months. When you’re ready to make them, just defrost and prepare as usual.


Originally Published: September 02, 2020