What Is Baked Alaska & How to Make This Vintage Dessert
Updated: Aug. 13, 2023
So what is baked Alaska? We fill you in on the history of this dessert plus tips for making it at home.
A dessert that’s cold and toasted, creamy and marshmallowy, over-the-top and yet somehow totally possible to make right at home? That could only be a baked Alaska. But what is baked Alaska precisely? And why does this vintage dessert deserve a comeback?
On This Page
What Is Baked Alaska?
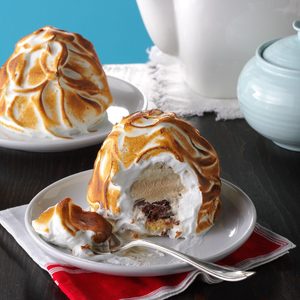
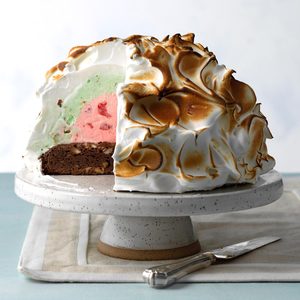
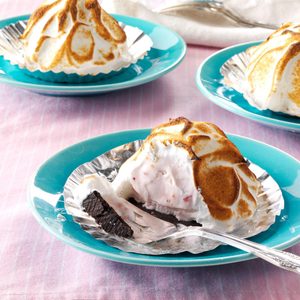
Baked Alaska is a treat comprised of three components: cake, ice cream and meringue. A layer of cake—any flavor—is topped with a dome of ice cream (again, any flavor). That duo is then enrobed in a snowy white layer of Swiss meringue. To finish this dessert, the meringue is then toasted either in the oven or with a kitchen torch.
So where did this elaborate icy hot dessert come from? The folks at NPR explain that once meringue was found to be an excellent insulator, meringue-covered frozen treats came into fashion. French chefs created the first iteration of this dessert called an Omelette Norwegge—taking its name from the cold landscape of Norway.
A few decades later, pastry chef Charles Ranhofer took inspiration from this French dessert to create his version at Delmonico’s restaurant in New York City. Ranhofer was known for making clever references when naming his desserts (he named dishes after celebrities and politicians of the era). In 1867, the hot topic was the Alaska Territory, and Ranhofer named his cake-meets-ice-cream-meets-meringue dessert the Alaska Florida. This later got tweaked to be called a baked Alaska.
How to Make Baked Alaska
Baked Alaska is not a dessert you can whip up on the fly. You’ll definitely want to reserve a little extra time to put this all together, but know that this recipe is worth every second you put into it!
While baked Alaska can be made in many different flavor combinations, a favorite at Taste of Home is our grasshopper baked Alaska. It marries this 1950s dessert with a midcentury cocktail classic.
Ingredients
For the cake:
- 1/2 cup butter, cubed
- 2 ounces unsweetened chocolate, chopped
- 1 cup sugar
- 1 teaspoon vanilla extract
- 2 large eggs
- 3/4 cup all-purpose flour
- 1/2 teaspoon baking powder
- 1/2 teaspoon salt
For the ice cream filling:
- 2 quarts vanilla ice cream, softened
- 1 package (4.67 ounces) mint Andes candies, chopped
- 2 tablespoons creme de menthe
- 1 tablespoon creme de cacao
- Green food coloring, optional
For the meringue:
- 8 large egg whites
- 1 cup sugar
- 1 teaspoon cream of tartar
Tools
- 8-inch round cake pan: An 8-inch cake forms the base of this dessert. Make sure you have the right size pan in your kitchen.
- Mixing bowl: A mixing bowl doubles as a mold for the ice cream dome that tops the cake layer of this dessert.
- Kitchen torch: Ever been curious about ? This recipe is the perfect excuse to invest! This compact blow torch is perfect for toasting the meringue covering baked Alaska. Use it to make creme brulee too!
Directions
Step 1: Make the cake batter
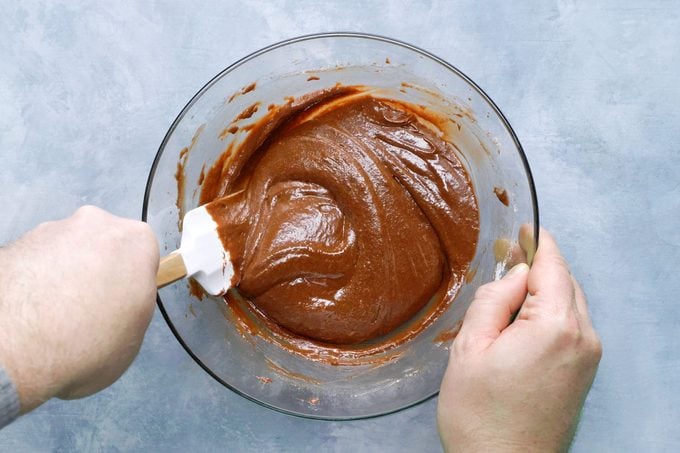
The first step in making this dessert is building the foundation: the cake. Begin by melting the butter and chocolate together in a microwave-safe bowl. Heat in 30-second bursts until the ingredients are melted and smooth.
Then stir in the sugar and vanilla extract. Beat in the eggs one at a time being sure to beat well after each addition.
Next, stir in the flour, baking powder and salt until you have a smooth batter.
Step 2: Bake the cake
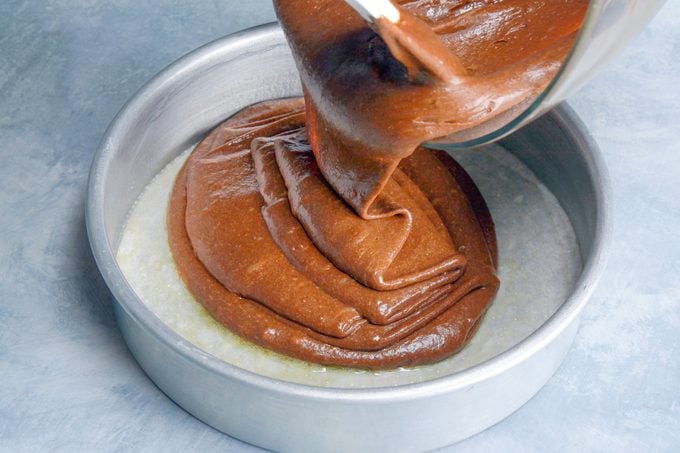
Grease and line an 8-inch cake pan. Fill the pan and bake at 350ºF for 30 to 35 minutes. You’ll know the cake is done when you insert a toothpick into the center and it comes away with moist crumbs.
Cool the cake for 10 minutes in the pan. Then turn the cake out onto a wire rack to cool completely.
Step 3: Add ice cream to a mold
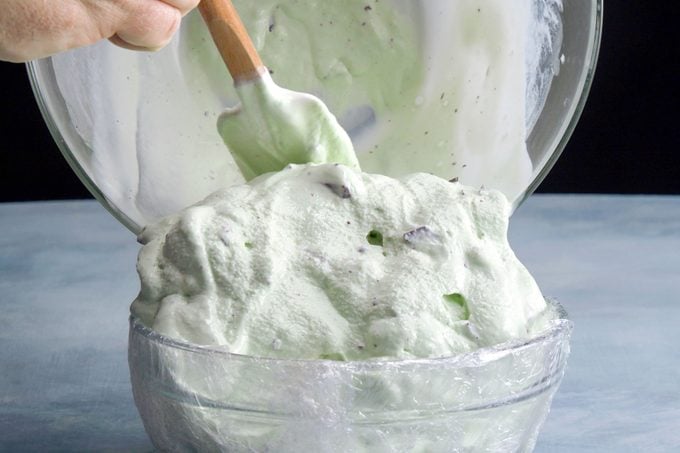
Now’s the time to make the ice cream dome that will top the cake. Combine the vanilla ice cream, mint candies, liqueurs and food coloring, and stir to combine.
Press the ice cream mixture into a round mixing bowl lined with plastic wrap. Freeze until set—at least an hour though overnight is best.
Editor’s Tip: It can be hard to stir the liqueurs and candy into ice cream straight from the deep freeze. To make this easier, learn how to soften ice cream first. And if you want to make this step simpler, soften your favorite mint-flavored ice cream and press it into the mold.
Step 4: Make the meringue
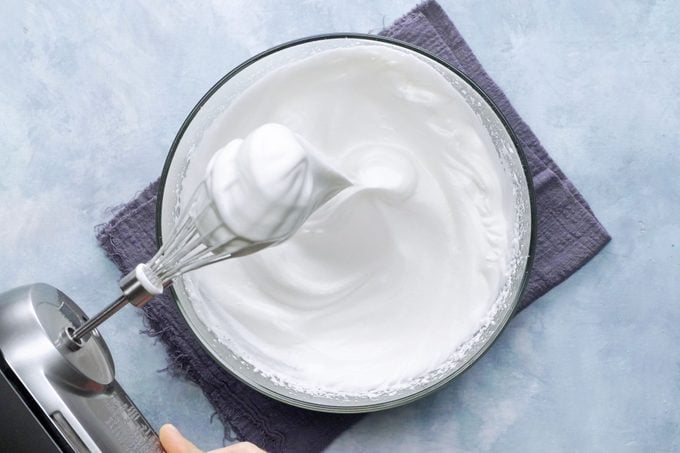
Separate the egg yolk from the whites. Add the egg whites, sugar and cream of tartar in a saucepan. Mix these ingredients with a hand mixer on low speed for a minute. Continue beating over the simmering pot until the mixture reaches 160ºF—this will take about 8 minutes.
Once the mixture hits that temperature, transfer it to a bowl and continue beating until stiff, glossy peaks form and the sugar has dissolved.
Editor’s Tip: Make sure that the saucepan you’re using is safe to use with the metal whisk attachments of your hand mixer. You don’t want to damage the finish on your pots.
Step 5: Assemble the pieces
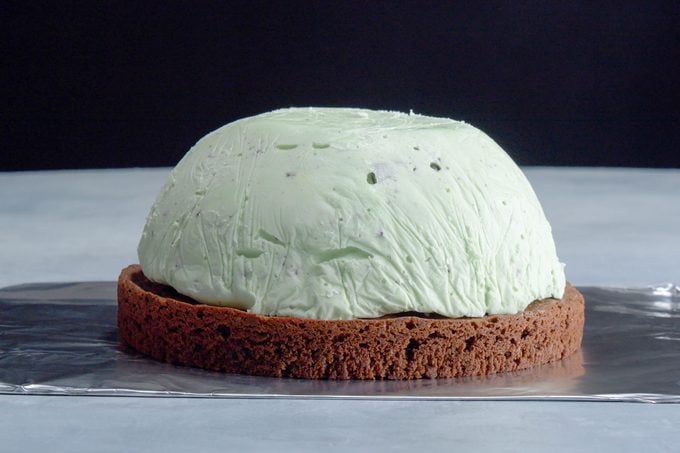
If you plan on toasting the meringue in the oven, place the cake base on a foil-lined baking sheet. If you’re going to use a kitchen torch, you can put the cake on a heat-safe serving dish.
Top the cake with the inverted ice cream mold. Peel away the plastic wrap.
Next, spread the meringue over the ice cream, being sure to get the meringue all the way to the base. The meringue can be spread with an offset spatula or piped on with decorative pastry tips—all up to you!
If you’re serving immediately, move right onto the next step. Otherwise, stash this dessert in the freezer until you’re ready to serve—up to 24 hours.
Step 6: Toast the meringue
Ready to choose your own adventure? If you’re making this dessert the old-fashioned way, pop the baked Alaska into a 400º oven for 2 to 5 minutes—until the meringue is lightly browned.
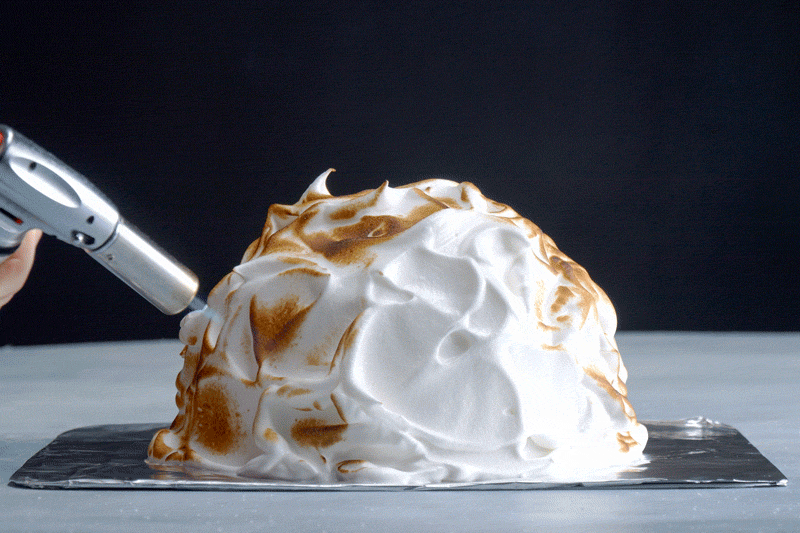
If you’re looking for a reason to use your kitchen torch, break that out and carefully toast the meringue until the edges start to brown slightly. Don’t hold the torch too close—keep about 6 inches of distance between the torch and the meringue.
Step 7: Serve
Serve baked Alaska right away. Dip a sharp knife into hot water, wipe dry and then slice this dessert into wedges like you would a cake. Clean the knife and repeat for each piece.
Types of Baked Alaska
This grasshopper-inspired baked Alaska is a great place to start on your frosty-meets-toasty journey, but it’s by no means the only destination.
Baked Alaska can be made with all sorts of flavor combinations. You can swap out the flavor of the cake, the ice cream inside as well as different mix-ins. You can even layer up multiple flavors of ice cream like with this spumoni baked Alaska. Here are some flavor ideas to get you started:
- Strawberry shortcake: Start with a vanilla cake base, use strawberry ice cream; stir in fresh or freeze-dried strawberries for extra flavor.
- Turtle: Use a chocolate cake as the foundation. Stir pecans and caramel into your favorite vanilla ice cream (or take a shortcut and use turtle ice cream).
- Almond joy: Pair coconut ice cream with chocolate cake. Stir in extra almonds into the ice cream for crunch.
- Birthday cake: Use confetti cake as the foundation and pile on the birthday person’s favorite ice cream flavor. Bonus points if it also uses sprinkles!