


How to Cook Deconstructed Turkey

Updated: Feb. 21, 2024
Instead of roasting a whole turkey this year, consider making a deconstructed turkey. It cooks up faster, and every piece turns out juicy and moist.
Our editors and experts handpick every product we feature. We may earn a commission from your purchases.Learn more.
Cooking a turkey is a bit tricky. Most of us only cook a whole turkey once a year, and it takes so much longer than the chickens we’re used to roasting. Not to mention the pressure of serving a perfectly cooked bird to your entire family! Traditional turkey recipes usually result in overcooked, dry breast meat while you wait for the legs and thighs to come to 170°F. Brining helps, and spatchcocking will crisp up all the skin evenly, but you’ll still run the risk of over- or undercooking some of the parts.
The solution: deconstructed turkey. This turkey tip was made popular by Julia Child and can be found in Julia and Jacques Cooking at Home. It’s a great way to ensure all parts of the turkey stay juicy and moist. Not only that, but it cuts the roasting time in about half!
What Is a Deconstructed Turkey?
A deconstructed turkey has been broken down into its individual pieces: breast, legs and wings. You can cook them all together in a roasting pan as we describe below or use different cooking methods for each part. Roast the legs while you slow cook the breast, or braise the thighs on the stovetop to free up the oven for side dishes. A deconstructed turkey can still be brined, too, but it takes up significantly less space in the refrigerator.
Why Deconstruct a Turkey Instead of Cooking It Whole?
There are two major benefits to cooking a deconstructed turkey. For starters, it takes about half the amount of time to cook. Air can circulate more easily around the individual turkey pieces, reducing the cook time significantly. This method also allows you to easily remove the pieces from the oven as they finish cooking, ensuring the whole bird is juicy and moist.
Don’t worry about the pieces getting cold as they sit, either. When the whole bird is finished, you can place the turkey parts in a 500°F oven to crisp up the skin and reheat any meat that may have chilled.
Tools You’ll Need
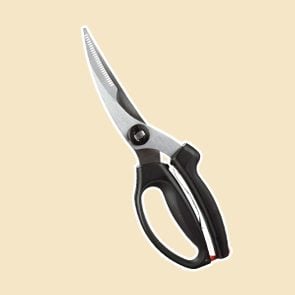


- The first thing you’ll want to pick up for a deconstructed turkey is a pair of poultry shears. They make it infinitely easier to remove the backbone, and you could use them instead of a knife to break down the turkey if that feels less intimidating.
- You’ll also want a sturdy roasting pan with a rack or a baking sheet lined with an oven-safe rack. Elevating the turkey pieces from the bottom of the pan promotes airflow, crisping up the skin on all sides.
- To ensure your turkey cooks perfectly, you’ll definitely want to have a good thermometer. You can use an instant-read meat thermometer to temp the turkey when you think it’s finished, but we prefer using a probe thermometer. The probes allow you to remotely monitor the temperature, knowing what’s going on inside without opening the oven door.
How to Deconstruct a Raw Turkey

If you have a great local butcher near you, they can probably take care of this step for you, selling you a ready-to-roast deconstructed turkey. But it’s not too hard to do it at home, so don’t be afraid to tackle it!
Step 1: Prepare the turkey
Start with a defrosted turkey. (It would be extremely difficult to do this process on a half-frozen turkey!) Remove the giblets and neck from the cavity, saving them for making stock and gravy.
Step 2: Remove the wings
Place the bird breast-side down on the cutting board. Pull the wing away from the body and make small cuts until you can cut see the joint that connects the wing to the back. Flex the wing to pop the joint out of the socket before slicing through the joint to disconnect the wing from the body. If you hit a hard bone, you’ve missed the joint, so reposition your knife and try again.
Looking for the best electric knife? Check out what our Test Kitchen thinks are the top performers.
Use your fingers to identify the knuckle joint that connects the wingtip to the wing. Slice through the joint and add the tips to the bag for stock. Repeat the process for the second wing.
Editor’s Tip: If you’re running short on time, feel free to skip this step. Simply remove the wingtips, twist the wings to tuck them behind the back and roast them on the breast. They’ll be a little overcooked, but they have enough fat that they’ll turn out just fine!
Step 3: Remove the legs
Flip the turkey onto its side and pull the leg away from the body. If the turkey is very stiff, wiggle the legs around to loosen things up. Using your sharpest knife, slice through the skin until you reach the point where the leg meets the body. Cut a semi-circle shape around the oyster (a small, oval-shaped piece of meat on the spine). Don’t stress this part too much; if most of the oyster meat remains connected to the spine, it will still add flavor to your stock.
When your knife meets the thigh bone, pull the turkey leg up until it’s parallel to the spine. Hold the leg at the knee (where the drumstick meets the thigh) and pull the leg down away from the wing to break the joint. You’ll hear a satisfying “crack” when it’s finished. If you’re having trouble, the leg is probably too far extended. Pull it up towards the body and try again. Cut through the sinew in the now-exposed leg joint and continue to cut downwards along the backbone to remove the leg.
Repeat the process for the second leg.
Step 4: Remove the breast
Place the turkey breast-side down on the cutting board. Using a pair of kitchen shears, remove the backbone by cutting it on either side. Add the backbone to the bag for stock.
Turn the turkey over and remove the excess skin from the neck. Feel around in the neck area for the wishbone, a thin bone that runs along the top of each breast. Make a small slit on either side of the wishbone to expose the bone. Grab ahold of it with your hands and pull it towards you to remove it from the turkey. It’s sometimes helpful to grab this slippery bone with a paper towel to help with grip.
Using your palms, press down on the breastbone to flatten it.
Step 5: Admire Your Handiwork
From here, you can season and roast the turkey straight away, or you can brine the turkey pieces using one of our turkey brine recipes. Use the bones to make turkey stock, an essential component of a great giblet gravy.
How Long Do You Roast Each Part of the Turkey?
When you’re ready to roast, arrange the turkey pieces on a baking sheet or roasting pan. Use an oven-safe roasting rack to elevate the pieces, or lay the turkey on a bed of vegetables. (You can’t go wrong with onions, carrots and celery, but stuffing is a fine choice here, too.) If you’re using a probe thermometer, insert it into the thickest part of the breast or the thigh. Wiggle the probe to ensure it’s in the deepest part and isn’t touching the bone.
Slide the turkey into the oven with the legs positioned towards the back. Oven temperatures are usually warmer near the back, giving the thighs the heat they need to reach their higher target temperature. While the turkey roasts, resist the urge to open the door, which cools down the oven and increases the total cooking time.
The roasting times provided in this chart are for defrosted, refrigerator-cold poultry roasted in a 325°F oven.
- Turkey breast: 1 to 2 hours, 165°
- Turkey legs: 1-1/2 to 2-1/2 hours, 170° to 175°
- Turkey wings: 1-1/2 to 2 hours, 165°
Editor’s Tip: Your roasting time will vary based on the size of the turkey.
How to Serve Turkey
Thanksgiving isn’t just about the turkey: Having the right side dishes make all the difference. After you carve the turkey breast, plate it up with some of our favorite recipes. Don’t forget the gravy!