


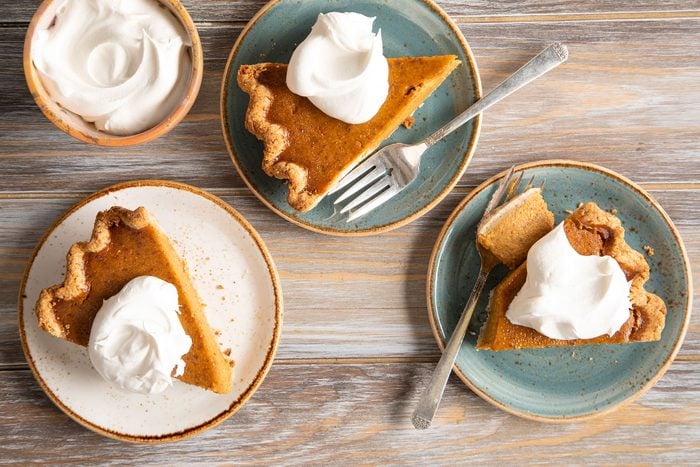
Good news, pumpkin fans: Pumpkin pie filling is naturally gluten-free! If you crave the classic dessert on Thanksgiving, or just on a chilly autumn day, it’s easy to bake a gluten-free pumpkin pie. Our recipe features a flaky, buttery crust and silky smooth filling that’s perfect for fall baking. If you’re nervous about homemade pastry dough, don’t worry: We’ll walk you through it one step at a time.
Gluten-Free Pumpkin Pie Ingredients
- Canned pumpkin: No need to get fancy with from-scratch blended pumpkin or squash. Canned pumpkin gives the best flavor and texture in our tests.
- Gluten-free flour blend: Unlike all-purpose wheat flour, which contains one grain, gluten-free baking mixes combine a few different flours and starches to mimic the flavor, texture and structure of traditional flour. Use a top-rated store-bought gluten-free flour blend or make a gluten-free baking mix from scratch.
- Ground almonds: Adding ground almonds to pastry crust contributes flavor and plenty of fat and oil, yielding a tender, delicate crumb. Look for ground almonds at the store or make them yourself. Blitz up whole almonds in a food processor or spice grinder. Don’t overdo it, though, or you’ll end up with almond butter.
- Xanthan gum: Gluten acts as a binder in wheat-based baked goods, holding the batter together and providing structure in the final bake. Many gluten-free baked goods, especially bread, add binding agents to help achieve the best structure. In this recipe, xanthan gum plays that role. If your flour mix already contains xanthan gum, omit it from the recipe.
Directions
Step 1: Mix dry ingredients
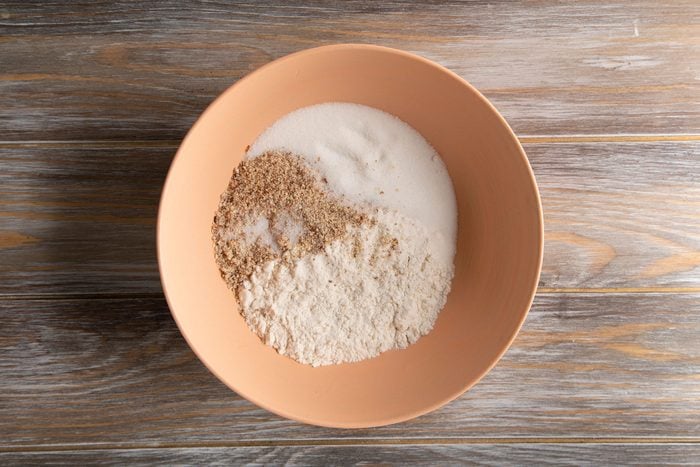
In a large bowl, combine flour, almonds, sugar, salt and xanthan gum.
Step 2: Work in the butter
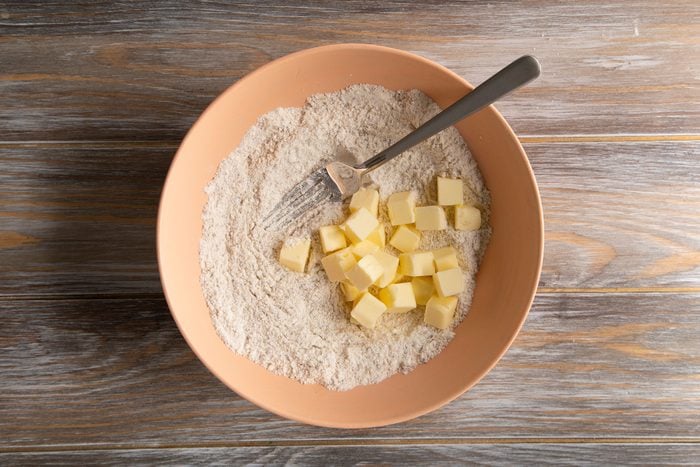
Cut in the butter until most of the mix is crumbly (think of wet sand on a beach), with some larger, pebble-sized pieces of butter remaining. The larger pieces will make the pastry extra flaky.
Stir in the egg. Mix until the egg is fully incorporated into the dough.
Step 3: Slowly add water
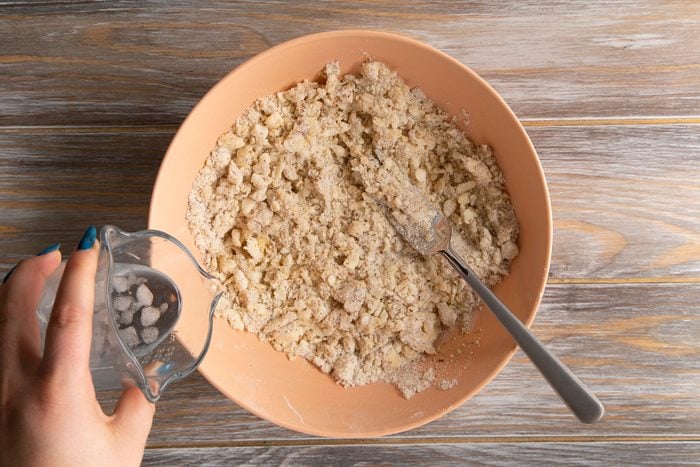
Gradually add ice water, tossing with a fork to distribute the moisture without overworking the dough. (Unlike gluten-containing pastry, over-mixing the dough won’t lead to a tough, chewy crust. But it will break down those lovely big bits of butter you’ve got, which will make the crust less flaky.)
As soon as the dough holds together when pressed, stop adding water, even if it’s not uniformly solid. Portions might even look a bit crumbly. This will make for a lighter, more tender pastry.
Step 4: Wrap and chill
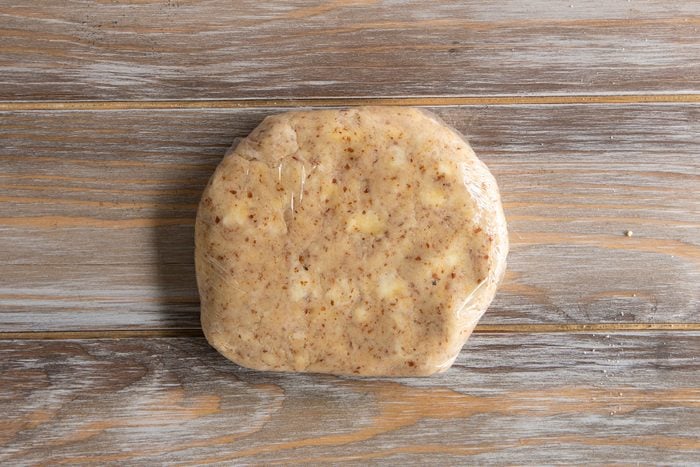
Shape the dough into a disk, pressing any loose or crumbly pieces into the rest of the dough. This should help the dough adhere, but wet your fingertips and sprinkle a bit of water on it if it’s truly not coming together. Wrap tightly in plastic wrap. A well-made pastry will have visible “marbling” of butter bits.
Refrigerate for at least one hour, or overnight. This will allow the dry ingredients to fully absorb the liquid, and the butter to get cold again.
Step 5: Roll out
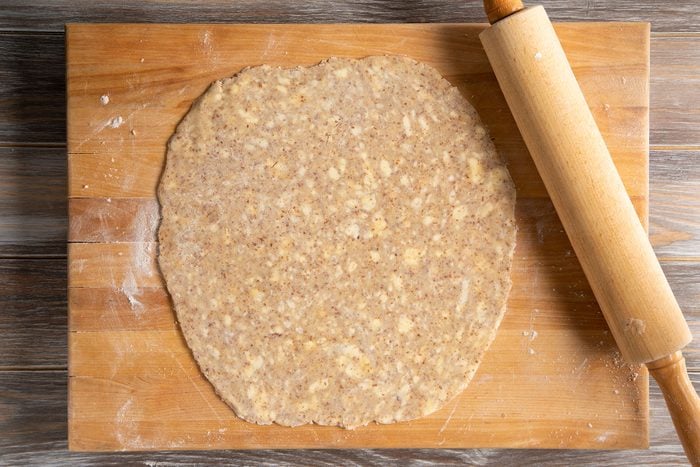
Preheat oven to 350°F. Dust your countertop, a cutting board or other work surface lightly with flour; make sure to use gluten-free flour, either an all-purpose blend or plain rice flour. Roll the dough to a 1/8-inch-thick circle. It should be about one to two inches wider than the pie plate.
Transfer to a 9-inch pie plate. Many bakers like to roll the pastry around the rolling pin, gently lift and unroll over the pan. Others opt for a foolproof method: Roll the dough on plastic wrap, lift the wrap, invert over the pan and gently peel the plastic wrap away.
Test Kitchen Tip: Did the pastry get rubbery or melty as you worked? Return it to the fridge for 10 to 15 minutes to firm it back up.
Step 6: Flute the crust
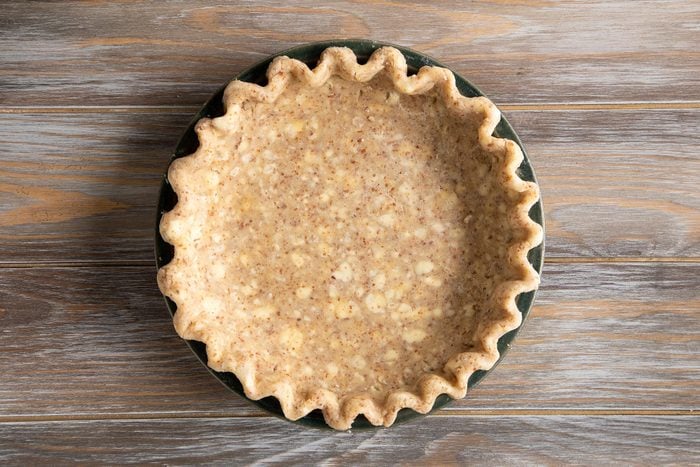
Trim the crust to 1/2 inch beyond the rim of the pie pan. With your thumb and finger, flute the edge to make a decorative pie crust.
Step 7: Make the filling
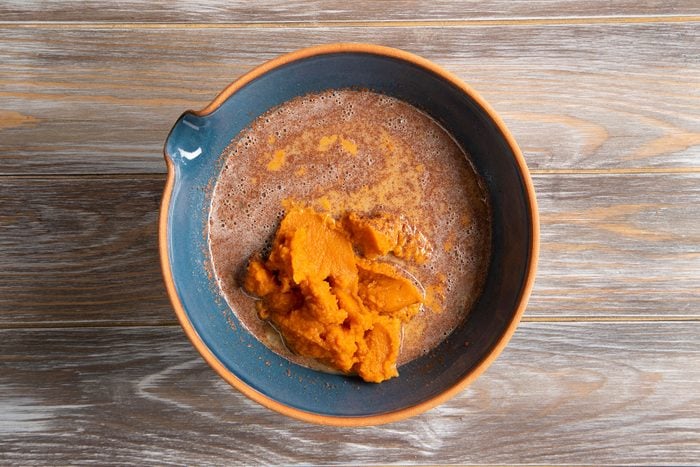
In a large bowl, lightly beat the eggs. Add the cream, sugars, cinnamon, nutmeg, salt, ginger and cloves. Mix well. Stir in the pumpkin just until blended.
Step 8: Bake
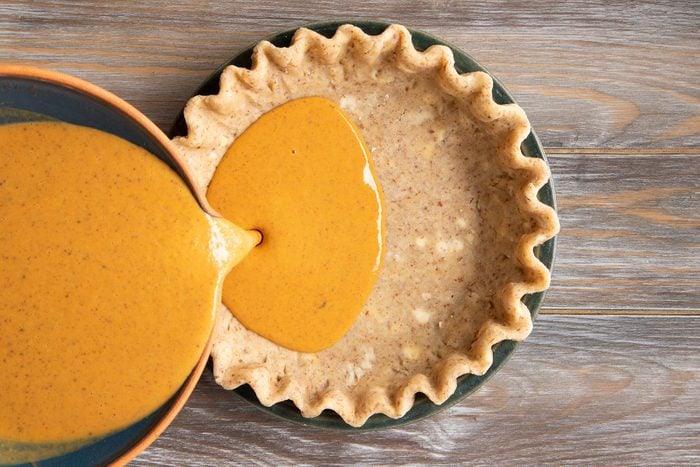
Carefully pour the filling into the crust. (It might splatter if you go too fast!)
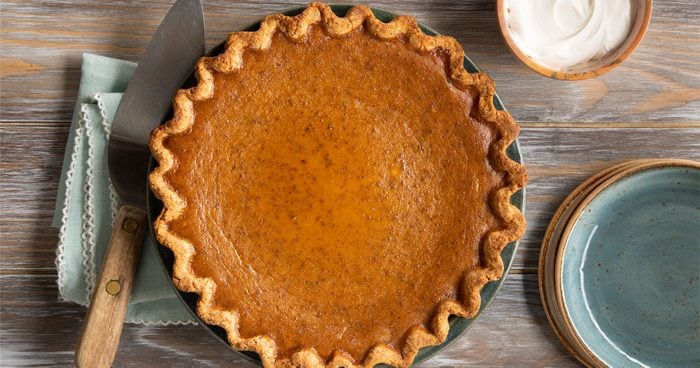
Set the pie plate on a baking sheet, and carefully place in the oven. Bake until a knife inserted in the center comes out clean, 50 to 60 minutes. If the crust edges are browning too quickly, cover the top of the pie with aluminum foil.
Cool on wire rack until the pie is room temperature, then store it in the fridge until ready to serve.
How to Make Dairy-Free Gluten-Free Pumpkin Pie
Need to go dairy-free? Use vegan butter in the crust recipe (make sure it can be used for baking). The half-and-half in the pumpkin filling can be swapped for coconut milk. Nondairy milks will be too thin to use.
Other crust substitutes include lard, an old-fashioned option, while this vegan pie crust calls for shortening. Some dairy-free chefs like to use coconut oil, but it will change the flavor of the pie.
If you’re looking for some dairy-free dessert options, try this dairy-free pumpkin pie, just one ingredient swap transforms this traditional dessert into a rich and decadent dairy-free sweet treat.
How to Store Gluten-Free Pumpkin Pie
Refrigerate any leftovers, tightly covered with plastic wrap or aluminum foil. The pie will keep up to three days in the fridge.
Pumpkin pie also freezes well! Wrap up any leftovers tightly before freezing, or freeze an entire pie for a make-ahead holiday meal. Make sure the pie is completely cooled before freezing, or the crust may end up rubbery. Defrost the pie in the refrigerator. Pumpkin pie will keep for two weeks in the freezer before the texture starts to get icy.
Gluten-Free Pumpkin Pie Tips
Why do the ingredients need to be cold?
The trick to super-flaky pastry? Keep things cold! Start with cold butter and work quickly, handling the dough as little as possible for the lightest results. (Why? Those bits of butter in the dough will melt as the pie bakes, leaving pockets of air that make the final crust so tender and flaky.)
Using cold water will also keep the butter from melting before the dough’s in the oven. Fill a small bowl with water and ice cubes, and measure the water right from the ice-cold bowl.
Is my pie dough really mixed?
One of the main mistakes novice pie makers commit is over handling the dough. In gluten-containing pies, overworking the dough will cause a tough crust. For gluten-free pies, that’s not a risk, but you still want to work gently to keep the butter in large pieces. This creates those big pockets of air, aka flaky texture. Other mistakes include adding too much liquid to the crust, or using too much flour to roll it out, both of which make the dough that much less tender.
How can I keep my pumpkin pie filling from splashing in the oven?
Uncooked pumpkin pie tends to slosh out of the pan, either when you’re setting the pie in the oven, pushing the oven rack in or removing the pie to cover with foil. A splashed pumpkin custard on the oven floor will burn and make a huge mess! Avoid this snafu by baking the pie on top of a baking sheet, which makes it easier to transfer and catches any potential spills.