Why You Need a Make-Ahead Roux for Gravy

Updated: Oct. 19, 2021
Want to make sure the homemade gravy turns out perfectly for your Thanksgiving feast? A restaurant chef shares her secret to making perfect, lump-free sauce using make-ahead roux for gravy.
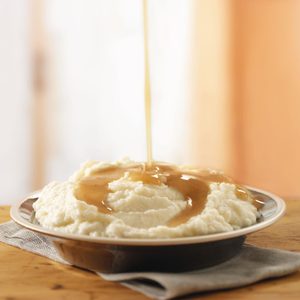
The turkey may be the star of the show, but gravy is what really makes or breaks Thanksgiving dinner. It’s not only ladled onto sliced turkey, but it’s also delicious over Thanksgiving side dishes. Spooning it over the leftovers before reheating mashed potatoes, stuffing and cornbread is also the secret to locking in moisture and making sure everything tastes just as good the day after.
If you’re looking to make the most flavorful, lump-free gravy, look to Grandma’s tips for homemade gravy. But if you’re looking to do that and save time, ask a chef what she would do: use make-ahead roux for gravy.
Make the Roux Ahead of Time
Roux (pronounced ROO) is one of the first things you learn about in culinary school. It’s a smooth paste made from flour cooked in fat. When you add it to a liquid, it transforms regular ol’ broth or milk into a thick, creamy sauce, giving body to your soups and sauces. At home, you usually cook the flour in a pan and add the liquid directly to it, but in a restaurant setting, we often make roux ahead of time.
It’s one of those shortcut secrets used by restaurant chefs to speed up ticket times and increase efficiency in the kitchen. I got so used to doing it at work that I started doing it at home!
As it turns out, it’s the best thing that ever happened to me on Thanksgiving Day. Think about it: You’re already pretty stressed out from juggling all those cooking tasks. You have a huge turkey to manage along with multiple side dishes, appetizers, and desserts. When it comes time to make the gravy, you’re frantically re-heating your vegetable sides, mashing the potatoes, and thinking about carving the turkey. Do you really want to risk burning the flour and ruining your gravy? So, instead, make your roux ahead of time!
How to Make (and Use) Roux
All you need is equal parts fat and all-purpose flour. You can use any fat you like (vegetable oil, bacon grease, butter, or chicken fat), but keep in mind that the gravy will be tastier if you use flavorful fat. That’s why I never use margarine or shortening to make roux because those fats have very little flavor.
Prepping the Roux
In a small saucepan, slowly heat the fat over medium heat until it’s melted. You’re ready to add the flour if the fat bubbles when you sprinkle a pinch of flour into the pan. Add the flour and whisk until it forms a rough paste. As you cook, whisk constantly and notice how the roux begins to soften and thin. After about five minutes, you should no longer smell raw flour as you hover your nose over the pan. That means it’s done!
You might be used to cooking your roux longer than five minutes (a dark roux for gumbo can take as long as 45 minutes!). You can continue cooking your roux if you like, but a brown roux won’t have as much thickening power as a white roux.
Once the roux is made, store it in an air-tight jar in the refrigerator. It keeps for a while (and you can also freeze it), so feel free to make a big batch for soups or sauces.
How Much Roux Do You Need?
In general, here is how much white roux you’ll need to thicken your sauce. You can always thin it out if it gets too thick, or add more premade roux if it’s too thin!
- For a thin sauce: 1 tablespoon flour + 1 tablespoon butter + 1 cup liquid
- For a medium-bodied sauce: 2 tablespoons flour + 2 tablespoons butter + 1 cup liquid
- For a thick sauce: 3 tablespoons flour + 3 tablespoons butter + 1 cup liquid
- For a super thick sauce: 4 tablespoons flour + 4 tablespoons butter + 1 cup liquid
Using the Roux
After cooking the roux, let it cool slightly in the pan before storing it in an air-tight container in the refrigerator. It lasts in the fridge for up to six months and up to a year in the freezer. To freeze roux, place tablespoon dollops on a sheet pan or ice cube tray and transfer them to a freezer bag once they’re frozen.
If you froze the roux, thaw it in the refrigerator overnight. When you’re ready to make gravy, combine the pan drippings from your turkey with homemade broth and heat it up until the mixture simmers. If you have the range space, we recommend placing the cold roux in a separate medium saucepan and slowly whisking in the hot broth until the two are well-combined and smooth. Things can get a little lumpy if you add the make-ahead gravy roux directly to the pot of liquid, but it will work in a pinch.
After whisking the roux into the hot broth, give the gravy a whir with an immersion blender (here’s our Test Kitchen’s favorite model) to smooth things out.
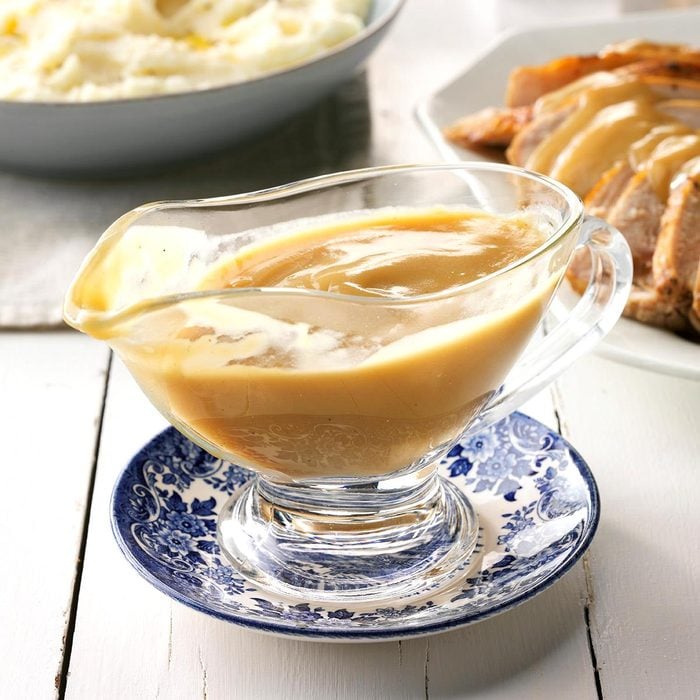
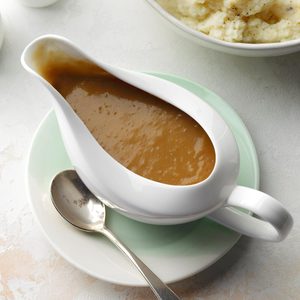
All that’s left to do is pour it into a gravy boat and pop it on the table!
Gravy Recipes Where You Can Use Make-Ahead Roux

Originally Published: October 19, 2021