


How to Organize Your Pantry with Mason Jars

Updated: Mar. 26, 2024
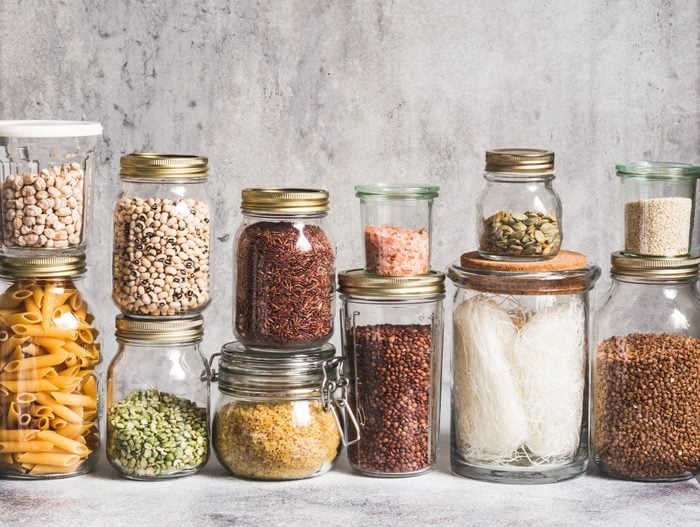
Creating an aesthetically pleasing kitchen with mason jars is easier than you think.
Can mason jars be used for storage?
Yes! Mason jars are excellent storage containers, especially when outfitted with airtight lids. The sturdy, non-porous glass is ideal for holding baking supplies, snacks, dry goods and other essentials. Plus, from a health standpoint, glass is preferable to plastic as it doesn’t contain Bisphenol A (BPA) or chemicals.
That being said, glass isn’t perfect. Mason jar storage containers are typically heavier than their plastic counterparts—and they’re breakable. If you have young kiddos who like to help themselves to an after-school snack, this may not be the best material.
Pros
- Aesthetic
- Healthy glass storage
- Minimized risk of pantry pests
- Airtight seals keep food fresh
- Easy to see exactly what you have on hand
- Wide range of sizes
- Stackable
Cons
- Cannot lift by the lid
- Heavy
- Breakable
- Not very child-safe
How to Organize Your Pantry with Mason Jars


Tools and Supplies
- Assorted mason jars: You’ll need an assortment of mason jars for this project. I recommend opting for jars in a wide variety of sizes and configurations, such as:
- Stack and store jars: As you might garner from its name, this three-pack set stacks for easy storage.
- Storage latch jars: This three-pack set stacks, and it features a latch for tighter storage.
- Quart jars: Not too big, not too small, quart jars are just the right size for many pantry staples.
- Pint jars: They’re one of the smallest options. In fact, you may already have pint jars leftover from canning season!
- Air-tight lids: If you opt for pint or quart mason jars, swap out the metal closures for wooden storage lids. This mason jar accessory provides an airtight seal, and is easier to access than the traditional screw-off lids.
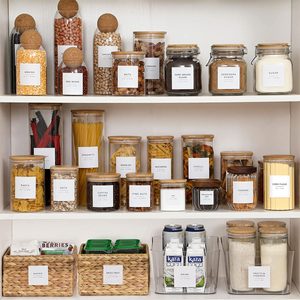
- Pantry labels: These are not necessary, but they certainly pack a beautiful punch! Pantry labels also make it simple to differentiate between similar items in storage. Oh, and if they look familiar, you’ve likely seen pantry labels on TikTok.
- Lazy Susans: For deep cupboards, a lazy Susan is the ideal solution. Not only do they fit smaller mason jars, but they’re so easy to use. A quick spin provides access to everything on the shelf! If you need a different size, check out these other lazy Susan options.
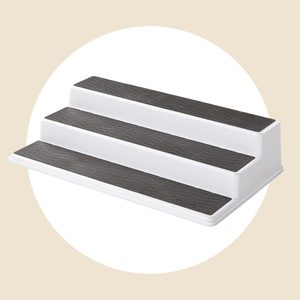
- Tiered organizers: You won’t be able to store every pantry essential in a mason jar. Maximize your space for canned goods, bottles and more with a tiered organizer or two.
Directions
Step 1: Wash and Dry the Mason Jars
The first step is by far the most tedious. Before you begin, wash and dry the mason jars. Depending on the size of your pantry, this can be quite a task.
I bathed over 25 jars and lids in warm, soapy water. (You could also run them through the dishwasher.) Then, each piece got a thorough wipe with towels. For the lids, I even removed the rubber gasket seals to ensure no water got trapped behind. You want to make sure each jar is completely dry before starting, otherwise you risk spoiling your dry goods with moisture. A podcast or good playlist helps the time pass!
Step 2: Configure the Layout
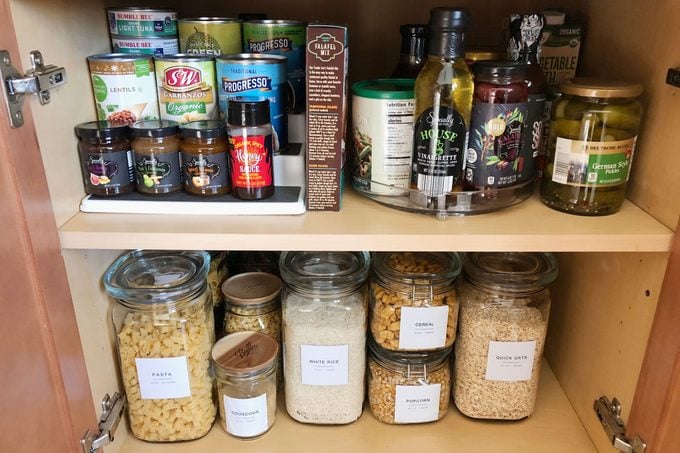
Next, you’ll need to spend a little time determining where to put the jars. For my cooking needs—and because my pantry space is broken up between several cupboards—I chose to group like things together. That means baking ingredients, like flour, sugar, baking soda and chocolate chips, went in one space, while rice, pasta, quinoa and other grains went in another.
It took a little mixing and matching to achieve a layout I was satisfied with. I needed to make sure all of my jars were accessible, and that items I use daily got the prime spots. Since my pantry is on the small side, I also leaned on lazy Susans and tiered organizers to maximize my available space.
If like things together isn’t your style, you could also organize by:
- Alphabet: Arrange your ingredients from A to Z. This setup works best if all of the jars are the same size. Otherwise, a tiny jar of saffron may get lost next to your extra-large container of sugar.
- Color: Pantry aesthetics? Yes, please! This option works with jars of all shapes and sizes. Keep in mind that, depending on the foods you buy, this option may not be quite as Instagram-ready as you think, though. A lot of classic pantry staples, like grains, sugars and flours, typically have a beige hue, which can end up looking blah. Just make sure you have a rainbow of pantry goods before you organize with this option.
- Size: A scaling pantry—with larger jars on the bottom, medium jars in the middle and smaller jars at the top—makes quite the visual impact. Plus, it’s practical. The bulkiest, heaviest jars will be easiest to reach.
Step 3: Add Pantry Labels (Optional)
This step is optional, but it really takes your pantry organization to the next level. If desired, use a set of stick-on pantry labels to, well, label your jars.
You can absolutely do this step once the jars are filled, but keep in mind that they’ll be heavier and more awkward to maneuver.
Step 4: Fill the Mason Jars
Finally—it’s time to fill! I recommend putting down a few sheets of paper towels to protect your floors from any spills. Then, grab your pantry goods and start transferring.
For some foods, you may have leftovers that don’t quite fit in the jar. (Looking at you 5-pound bag of flour.) If that’s the case, consider grouping all of these odds and ends in a pantry storage container you can easily access when it’s time to refill. If you find yourself having a lot of leftovers, re-evaluate the layout and size of your jars, then make adjustments so more staples can fit in their entirety. There’s no sense in storing everything twice.
Step 5: Restock the Pantry
Once your jars are labeled and filled, place them in your pantry according to the layout you set up in step two, and voilà! You now have a beautifully organized pantry full of mason jar storage.
Oh, and if you want to go the extra mile, learn how to organize potatoes, onions and garlic. Then, take a stab at organizing your spices. Right this way for more kitchen organization ideas!
Originally Published: January 24, 2023