How to Brine Practically Any Meat

Updated: Feb. 07, 2024
We'll show you why it's worth it to use a brine—especially on leaner cuts of meat like pork chops and chicken breasts.
There’s nothing worse than cutting into a dry, flavorless pork chop or a rubbery chicken breast. Luckily, there’s an easy fix to ensure that lean meats don’t dry out as they cook: brine.
Meats like poultry, shrimp and pork are notoriously easy to overcook because they don’t have much fat and marbling to protect them. Infusing that meat with salt works food-science magic, increasing the moisture inside and amping up the flavor. Brining builds in a lot of forgiveness in case you accidentally overcook things, all but guarantee you won’t end up with a chewy piece of dry meat!
How Does Brining Work?
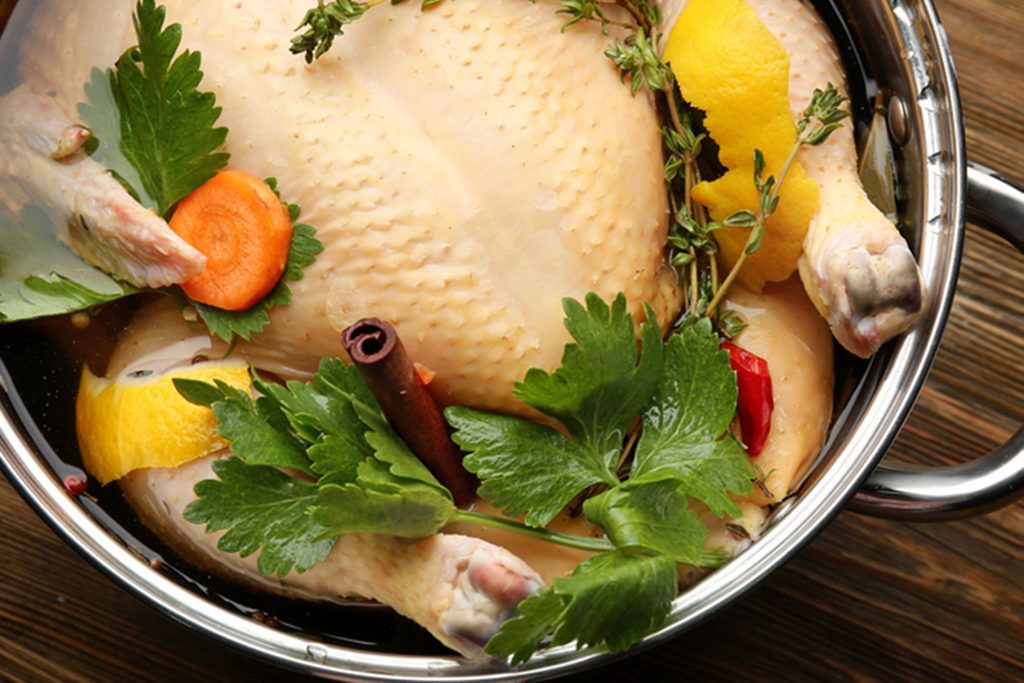
Brining is the process of submerging a cut of meat into a solution of salt and water. It adds flavor, seasoning from the inside out, but it also changes the meat’s physical nature. The salt in brine denatures the meat’s proteins to allow the cells to retain more moisture. Meanwhile, the brine also tenderizes meat by causing its muscle fibers to unravel and swell. It all comes together to trap so much liquid inside that it can’t all evaporate during the cooking process, creating a moister, juicier piece of meat. Isn’t science great?
Brines protect lean cuts of meat like chicken breasts, pork chops, and seafood as they cook. That makes brine one of our go-to secrets for super tender meat every time you grill. It’s not necessary to brine red meats (like beef or lamb) or fattier cuts (like chicken thighs or pork shoulder), but these items may benefit from a flavorful marinade.
Is Marinating the Same as Brining?
Not exactly. Marinades don’t contain as much salt as brines, but they’re made with oil and acid (like citrus juice or vinegar) to help break down tough muscle fibers.
Brine Ideas
There are only two ingredients in a traditional brine: water and salt. You can choose any type of salt you like, but keep in mind that different salts take up different volumes. Table salt is finer than coarse kosher salt, causing 1/2 cup of table salt to taste saltier. It’s best to stick to kosher salt in brine recipes unless your recipe advises differently.
You don’t have to take the traditional salt-and-water-only route if you don’t want to. Try some of these ideas to amp up the flavor of your meat or vegetables.
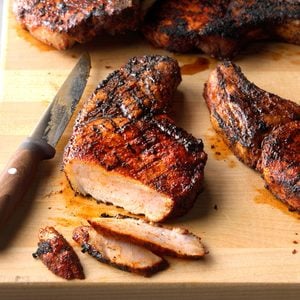
- Add sugar, brown sugar or molasses. These ingredients add sweet flavor to meat while also promoting browning. Use the same amount as salt, or more if desired. Sugar-infused brines work especially well with pork, like grilled pork chops.
- Use some alcohol. Alcohol can help carry the brine’s flavors, allowing them to penetrate more deeply into the meat. Add as little as a tablespoon of strong, neutral alcohols like vodka or 1/4 cup of flavorful alcohols like rum or gin. Feel free to add even more when working with weaker alcohols like wine and beer.
- Skip the water. You can absolutely substitute other liquids as the base instead of water. Try using apple juice or chicken broth to replace some or all of the water, or go all-in and brine chicken in buttermilk or pickle juice. If you’re using an acidic ingredient instead of water, you’ll want to reduce the brining time. Acid will break down the proteins on the outside of the meat, giving it an unpleasant, mushy texture.
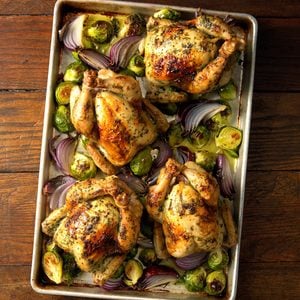
- Toss in other flavorful ingredients. Adding fresh herbs or citrus peels (or zest) is a fantastic way to amp up the flavor of your brine. We especially like adding herbs to poultry brines, like herb-brined cornish game hens. You can also use other flavorful ingredients, like soy sauce, Worcestershire, garlic and onions. Try heating the brine to infuse these ingredients into the liquid (and then making sure to cool the brine down before adding the meat).
Dry Brine vs. Wet Brine
Dry brines work in the same way as wet brines but they don’t use any water at all. By rubbing your meat with pure salt, you won’t add any excess moisture that could dilute the meat’s natural flavors. Instead, the salt infuses with the meat’s juices, creating super-concentrated flavors.
This method has become especially popular for Thanksgiving turkeys because it’s physically easier to do. You don’t have to worry about finding a container large enough to hold all that brining liquid! You can also add dry rub spices while you’re at it to create a dry-brined, herb-rubbed turkey.
You might be surprised at how little salt you need for this method, too: For each pound of meat, use 1-1/2 teaspoons of kosher salt (or, a tablespoon for every two pounds). Rub the salt into the meat until it’s covered (but not caked on) and let it sit, uncovered, in the refrigerator for the same amount of time as a wet brine.
How Do You Make a Brine?
For a traditional brine, all you need is water, salt and a little time—that’s it; you barely even need a recipe. I like using 1 tablespoon of kosher salt for every cup of water. For smaller cuts, like chicken breasts or pork chops, 4 cups of water will be sufficient to cover the meat completely. Larger cuts may need more brine, so increase the ratio of water and salt accordingly. (For example, brining a turkey requires about 6 quarts of water and 1-1/2 cups kosher salt!)
Keep in mind that some types of kosher salt are saltier than others, too.
Ingredients:
- 4 cups water
- 1/4 cup kosher salt
- Any additional herbs, sugar or aromatic ingredients (optional)
Directions:
Start by combining the water and salt in a large container. The salt should dissolve naturally when the solution is stirred with a whisk, but you can also heat the mixture over low heat to dissolve the salt more quickly. Adding heat is the best way to infuse additional ingredients into the brine, like sugar, herbs and aromatic ingredients. When applying heat, try heating only a quarter of the water. This allows you to use cold water when adding the remaining liquid, cooling down the solution more quickly.
Pro tip: Some brine recipes call for additional ingredients, from sugar and honey to herbs and other aromatics like onion and garlic. These additions make the brine smell good and add flavor to the outside of the meat, but they won’t penetrate the meat. Since they don’t add to the overall juiciness of the meat, they’re entirely optional. I often prefer to use these ingredients post-brine, as a spice rub, a compound butter or sauce that tops the meat. When you’re adding them to the brine, add them alongside the salt.
Brine Times
Brine is a very salty solution, so it works pretty quickly. As a general rule of thumb, brine meat for about one hour per pound. You can go longer, but keep in mind that it’s definitely possible to over-brine your meat. Most over-brining simply makes everything a little too salty, and you can soak the meat in cold water to draw out the excess salt. If you really let it go too long—as in, brining for days instead of hours—things may go beyond repair. Doing so can make your meat mushy, and there’s no way to fix that!
Here’s a handy guide for how long to brine different types of meat:
| Shrimp or scallops: | 15 to 30 minutes |
| Fish fillets: | 10 to 30 minutes |
| Whole fish: | 1 to 3 hours |
| Boneless chicken pieces: | 30 minutes |
| Bone-in chicken pieces: | 1 to 2 hours |
| Whole chicken: | 4 to 12 hours |
| Cornish game hen: | 1 to 2 hours |
| Turkey breast: | 4 to 12 hours |
| Whole turkey: | 12 to 24 hours |
| Boneless pork chops: | 30 minutes |
| Bone-in pork chops: | 30 minutes to 1 hour |
| Whole pork tenderloin: | 1 to 2 hours |
| Whole pork loin: | 2 to 12 hours |
How to Store the Brine
Once you’ve made your brine, place it in a plastic container, resealable bag or a glass or stainless steel bowl. For larger cuts of meat, our Test Kitchen recommends picking up a set of Cambo containers. Taste of Home Culinary Director Sarah Farmer remarks how “the measurement markings are helpful while pouring in the liquid.” It’s easy to get your hands on commercial equipment like his through your local restaurant supply store. A cooling rack set into a large rimmed baking sheet is helpful for brine brines. “You want the cool air to circulate all around the meat,” says Sarah.
If the brine was heated to dissolve the salt or sugar, allow it to cool completely before adding the food you wish to brine. Then, transfer the container to the refrigerator. If the brining ingredients float to the top, weigh them down with a small dish or a piece of parchment paper.
Don’t fret if you made too much brine! Unused brine made with salt and water can be stored indefinitely in the refrigerator. If you added any herbs or aromatics like garlic, it will still last up to two weeks. It’s not a good idea to reuse brine, though, so toss it after the first use.
What to Do After the Meat Is Brined
After waiting the appropriate amount of time, remove the meat from the brine and pat it dry with a paper towel. You won’t need to rinse it with fresh water unless you accidentally brined it for too long.
From here, cook the meat according to your favorite recipe. Brined meats hold up exceptionally well to the grill’s high heat, but you can also cook them in a cast-iron skillet on the stovetop or roast them in the oven to make a sheet pan dinner.
Brining Tips from the Kitchen
Do you rinse meat after brining?
If you followed the general brine recipe—1/4 cup kosher salt per quart of water—and you didn’t brine the meat for too long, there’s no reason to rinse after brining. Just pat the meat dry after removing it from the brine.
Do you have to cook immediately after brining?
No, you don’t have to cook meat immediately after removing it from the brine. In fact, most cooking methods (but especially smoking, grilling and roasting) benefit from a brief period of air-drying. Dry surfaces create less steam, allowing the meat’s exterior to better caramelize and crisp up. Simply store the meat in the refrigerator. Depending on its size, it can sit uncovered for up to 12 hours, or 24 hours when covered with plastic wrap.
Can you brine at room temperature?
According to the Food and Drug Administration (FDA), it’s safe to keep raw and cooked meats at room temperature for up to two hours (or one hour if the temperature is above 90°F). That said, we usually brine anything that goes longer than 30 minutes in the refrigerator to be safe.
Do you season after brining?
You can absolutely season your meat after brining. Keep in mind that the brine is very salt-rich, so you won’t need to add any extra salt. Feel free to season with your favorite dry rub after brining. You can also toss the meat with low- or no-salt liquid marinades.
Can you brine without salt?
Brines do need salt to work, so you can’t make a brine without it. You could certainly reduce the amount of salt for your personal preferences, using just two tablespoons per quart of water. The other alternative is to make a salt-free marinade and allow the acidic ingredients to tenderize the meat.
Can you put too much salt in a brine?
Yes, you can definitely put too much salt in a brine. For starters, a certain amount of water is needed to dissolve salt (250 mL water per 100 grams salt, or about 6 tablespoons per 1 cup water). Our ratio calls for only 1 tablespoon per cup water, so you really don’t need much! If you accidentally make a very salty brine, add more water to dilute it or significantly decrease the brining time.
Originally Published: October 23, 2020