7 Pumpkin Carving Hacks You Need to Know
Updated: Dec. 03, 2023
These hacks come from everyone's favorite grandmother, Babs Costello, so you know they're genius.
Double, double, toil and trouble! With Halloween around the corner, a classic All Hallows’ Eve activity is in full swing—pumpkin carving. There’s a long history to why we carve pumpkins. But that doesn’t mean we always carve them with ease. Carving can quickly turn messy (for kids and adults alike). Plus, pumpkins aren’t always simple to design or maneuver.
Cue everyone’s favorite grandmother, Babs Costello (aka TikTok sensation @brunchwithbabs) who has us covered thanks to some genius pumpkin carving hacks. Babs never fails to break down the most challenging of house chores and activities (her guide on how to load a dishwasher the right way is a lifesaver!). As one TikToker says in Babs comments, “how do you make everything easier.” Aka, prepare to take notes on how to carve a pumpkin the Babs way.
I mean, if Babs suggests something, we know it’s brilliant. These pumpkin carving hacks offer no exception.
Babs’ Do’s and Don’ts of Pumpkin Carving Hacks
Like many, carving pumpkins for Halloween “is a treasured tradition in our family,” Babs says. Yet, she explains, yuck and mess can plague the process. Before resorting to no-carve pumpkin ideas, try Babs’ tips and hacks that “cut the job in half” for the perfect jack-o-lanterns.
Take note, these hacks are no joke. TikTok can’t get enough of them! Babs’ pumpkin carving video has 4 million likes. Take a look at the viral do’s and don’ts of pumpkin carving that the home hack guru suggests.
@brunchwithbabs 🎃Do’s and Don’ts of Pumpkin Carving 🎃It is a treasured tradition in our family to carve jack-o-lanterns for Halloween. But with all the yuck and mess, sometimes my kids would quit the project before we even started. Babs’ Do’s and Don’ts for Pumpkin Carving, saves the mess and speeds up carving so you can have the perfect jack-o-lantern with no mess and no fuss. Happy Halloween 🎃XO Babs 1. Carve from bottom. That way you have the stem to hold onto and you can easily slip the pumpkin right over a candle or flashlight. 2. Hold pumpkin in your lap to carve. You will have a much steadier pumpkin to cut. 3. Use a red dry erase marker to sketch your design. It erases easily and if you miss a spot, it blends in. 4. Use a hand mixer to clean out your pumpkin. 5. Use cookie cutters and a rubber mallet to carve your design. 6. Cover all cut surfaces with Vaseline to keep the pumpkin moist after carving. Pumpkins should last 1-2 weeks carved! 7. Sprinkle some cinnamon on the inside top of your pumpkin for festive pumpkin spice smell when a candle is lit inside the pumpkin. 🎃 #pumpkincarving ♬ original sound – everyone’s grandmother
Tip #1: Sit, don’t stand
First, “don’t stand and carve your pumpkin, sit!” Babs advises. Carve the pumpkin resting on your lap for a steady work surface.
Tip #2: Cut out the bottom of the pumpkin
Babs hollows out pumpkins from the bottom rather than the top. This takes out the hassle of trying to perfectly position a candle in the pumpkin. Instead, just slip the carved pumpkin over a tea light. Plus, you can hold onto the stem while carving, too. It’s that simple.
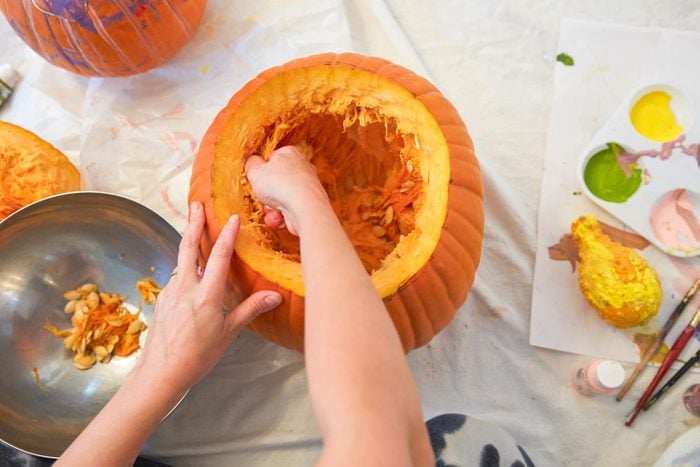
Tip #3: Clean out pumpkin “guts” with a hand mixer
Instead of cleaning pumpkins out by hand, use a hand mixer. That’s right, “get all those strings cleaned out!” The mixer does the heavy lifting of loosening the pumpkin strings. Then you’re free to scoop out the guts.
Psst… Don’t forget to save the seeds. You can roast pumpkin seeds for a snack later on.
Tip #4: Use a dry erase marker to sketch designs
Switch out permanent marker for a dry erase marker when designing pumpkins. Dry erase markers (Babs uses a red marker) erase easily and missed spots can blend into the pumpkin. As Babs says, “you can get rid of the lines after you carve.”
Tip #5: Carve pumpkins with a mallet and cookie cutter
Let’s face it, carving pumpkins with a knife is way harder than it needs to be. That’s why Babs suggests using a cookie cutter and rubber mallet to carve out your design. Make sure to remove the dry erase marker lines once the carved pumpkin pieces are pushed out.
Tip #6: Lengthen pumpkin life with Vaseline
“Don’t let all your work go to waste,” Babs says. To fully enjoy carved pumpkins, cover the cut surfaces of pumpkins with Vaseline. This keeps the pumpkin moist so it doesn’t dry out as quickly, which preserves it for around 1-2 weeks. That’s way beyond the 3-5 days a pumpkin usually lasts.
Tip #7: Scent jack-o-lanterns with cinnamon
Create a fall-scented jack-o-lantern by sprinkling cinnamon on the inside top of pumpkins. Place the pumpkin over a candle for a pumpkin that not only looks amazing, but smells wonderful too. It’s like pumpkin spice!
A grateful TikToker commented, “I was today years old when I realized I’ve been doing this the hard way my entire life!” Another commented, “Babs, you never fail to impress and teach me something new, and inspiring.” And with hacks this good, we can’t help but agree.
If you need us, we’ll be carving pumpkins the Babs way all spooky season long. Happy Halloween!