12 Secrets to Baking the Best Cutout Cookies
Updated: Feb. 05, 2024
Whipping up bakery-perfect sugar cookies only requires two basic ingredients: a little love and a little baking know-how.

There’s nothing more indulgent than taking that first bite into a soft, tender cookie. The classic sugar cutout cookie is twice as nice because these sweet treats offer the opportunity for creativity and fun. You can shape, frost and decorate to your heart’s content, and they can be stylized to reflect your favorite holidays and occasions, like Christmas and Halloween.
Before you whip up a batch of cute creations, brush up on these helpful tips to ensure good and consistent baking results.

Choose the Right Fat (Preferably Butter)
Julia Child famously quipped, “Life is too short for fake butter or fake people.” Amen! Butter is the ideal fat for cookies because it adds the best flavor. However, stick margarine (with at least 80% fat content) and shortening will also yield good results. All three fats tenderize, add moisture, carry flavors and provide richness to cookies, so it all comes down to your recipe or personal preference.
Avoid whipped, tub, soft, liquid or reduced-fat products as they contain air and water and will produce flat, tough cookies.

Soften Your Butter
When creaming butter or margarine with sugar, it should be softened first. (You should be able to make an indentation in a stick of butter with your finger and a table knife will be able to glide through it.)
If you forgot to take the butter out of the refrigerator prior to baking, resist the urge to zap it in the microwave to soften. The butter may end up too soft or possibly even melted. This will result in cookies that will spread too much and turn out greasy. Follow these easy tips for softening butter when you’re pressed for time.

Don’t Overmix
Here’s the key when mixing the batter: Be gentle! Overmixing or handling the batter too much results in the gluten in the flour forming elastic gluten strands. You’ll end up with dense, tough cookies. And this goes for all cookies—not just cutouts!
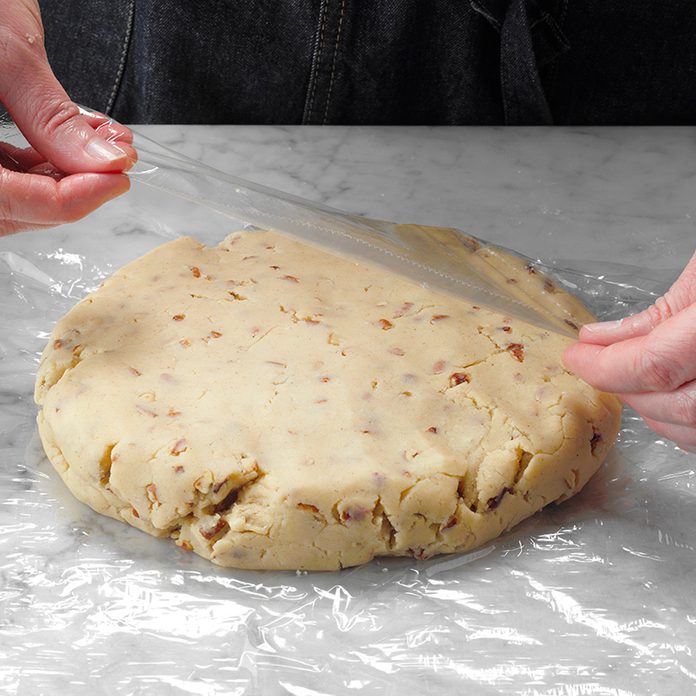
Chill the Dough
For easier handling, chill the cookie dough for 1 to 2 hours before rolling out. This is especially true if the dough was made with butter rather than shortening. Once chilled, lightly dust your work surface and rolling pin with flour to prevent sticking.

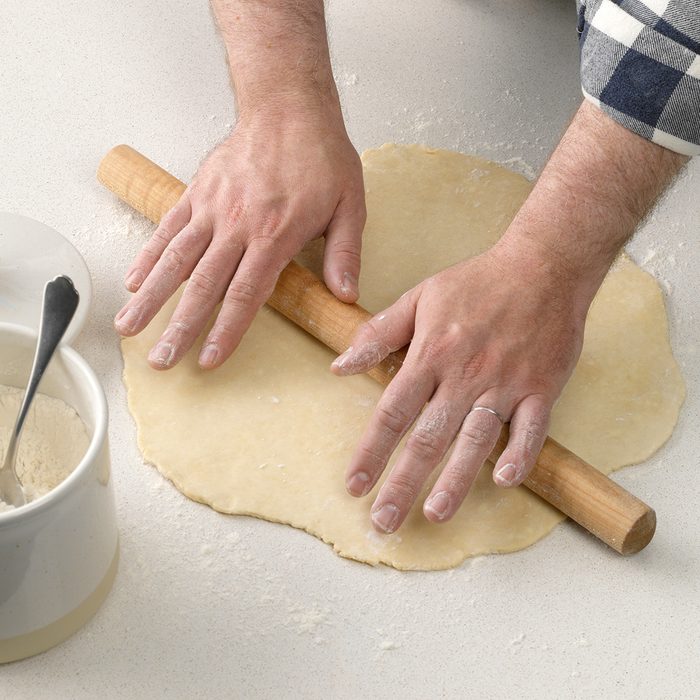
Show That Dough Who’s Boss
Roll out the dough as evenly as possible to the recipe’s recommended thickness (here’s how to roll out cookie dough like a pro!). Most recipes suggest rolling the dough to ¼-inch thick because it’s easy to work with (less breakage) and achieves a soft, tender cookie. Roll out a portion of dough at a time and keep the remaining dough in the refrigerator. Roll out from the center to the edge, keeping a uniform thickness and checking the thickness with a ruler.
If the thickness of the dough is uneven, the cookies will bake unevenly. Thinner cookies will be crispy and may burn, while thicker cookies will be chewy.

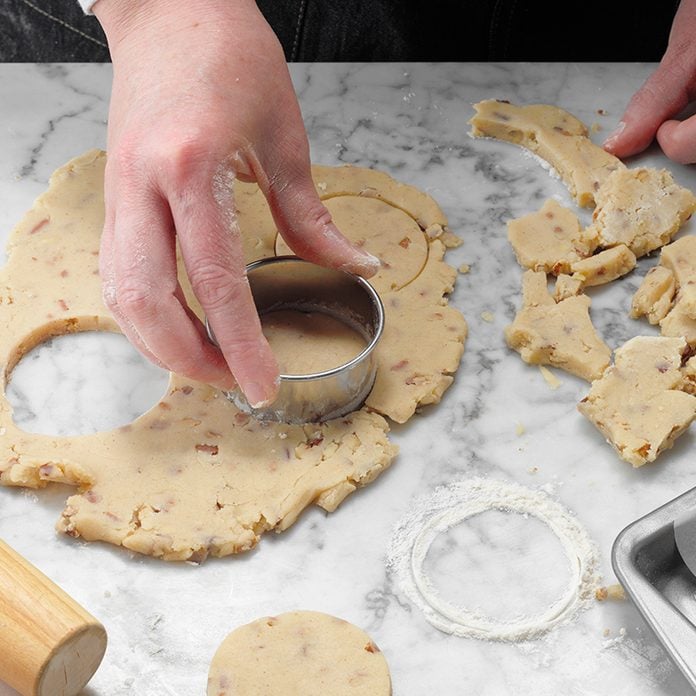
Keep Cutouts Intact
Cutting the perfect shapes with cookie cutters and successfully transferring them to the cookie sheet intact can be tricky (we’ve all had a dud or two). But with a little practice, you can master cutouts like a pro.
First, dip the cookie cutter in flour, then press the cutter into the dough. Lift each cookie with a small metal spatula or pancake turner to support the cookie as it is moved to the baking sheet.
As a general rule, keep the cookies about the same size and thickness per batch for even baking. If you’re using a variety of sizes of cookie cutters, that’s not a problem. Just bake the smaller cookies in one batch and the larger ones can go in the oven next.
Don’t Reroll the Dough Too Many Times
Rerolling and shaping the dough, much like overmixing, can make your cookie dough tough. Try to limit how many times you reroll your scraps (the same way you would with biscuits). Once is enough and then bake up any irregular scraps for a snack.
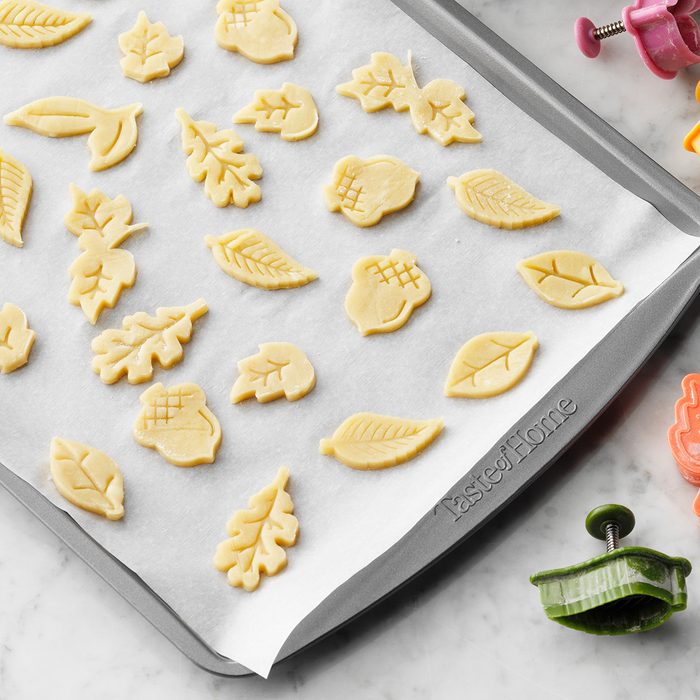
Be Mindful of Your Cookie Cutter Placement
To prevent rerolling the dough more than necessary, try to place your cookie cutters strategically. Place the shapes close together so you minimize scraps.
Use the Right Baking Sheets
Use heavy-gauge dull aluminum baking sheets with low sides. In general, lining the cookie sheets with parchment paper is also a good idea.
When a recipe calls for greased baking sheets, use shortening or cooking spray. Dark finishes may cause the cookies to over brown. Insulated baking sheets cause cookies to be pale in color.

Evenly Distribute Cookies on the Baking Sheet
Unless the recipe states otherwise, place each cookie 2 to 3 inches apart on a cool baking sheet. Leave at least 2 inches around the baking sheet and the oven walls for good heat circulation. For best results, bake only one sheet of cookies at a time. If you prefer to bake two sheets at once, switch the position of the baking sheets halfway through the baking time.
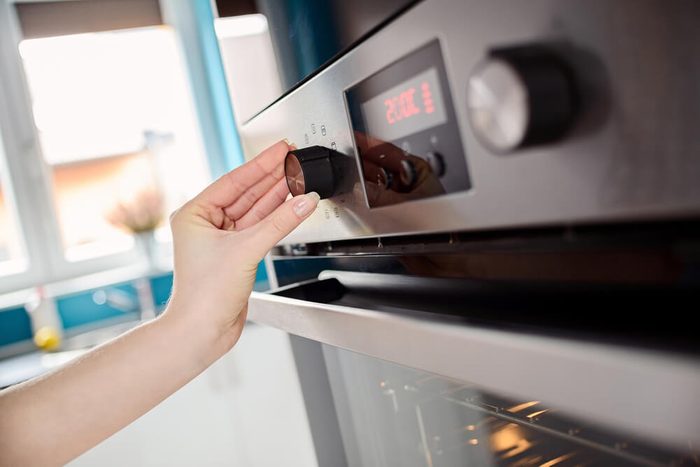
Check Your Oven Temperature
Use an oven thermometer to check the accuracy of your oven temperature. A few degrees too hot or too cool may cause the cookies to be under- or over-baked. Use a kitchen timer and check cookies when the minimum baking time has been reached, baking longer if needed. Follow doneness tests given in individual recipes.
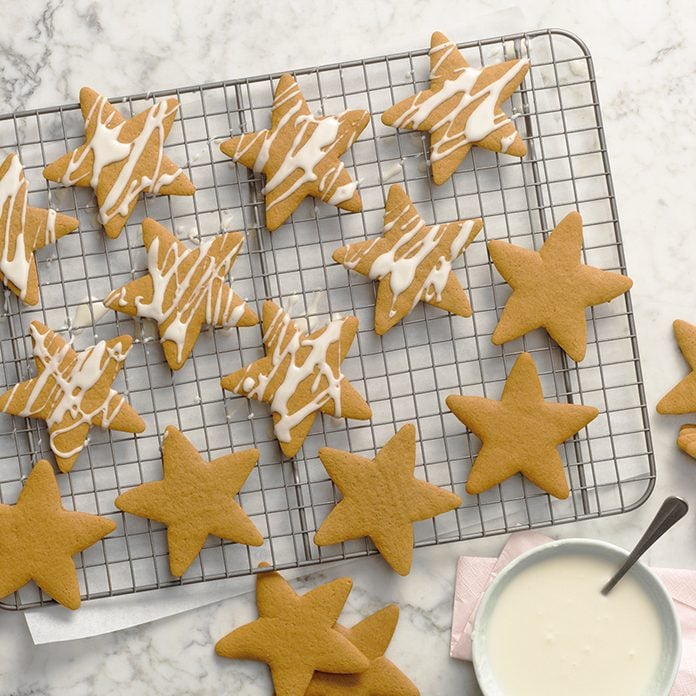
Allow Sufficient Cooling Time
Unless otherwise directed, let cookies cool for 1 to 2 minutes on the baking sheet before removing them to a wire rack to cool completely. Once they’re entirely cool, you can feel free to decorate.
Additionally, allow the baking sheets to cool completely before placing the next batch of cookie dough on them. The heat from warm baking sheets will soften the dough and cause it to spread.