When not properly cared for, the tools we rely on for cleaning up around the house can actually spread harmful bacteria and germs. So check out these tips for how to clean your cleaning tools.
17 Simple Ways to Clean Your Cleaning Tools
1
/
16
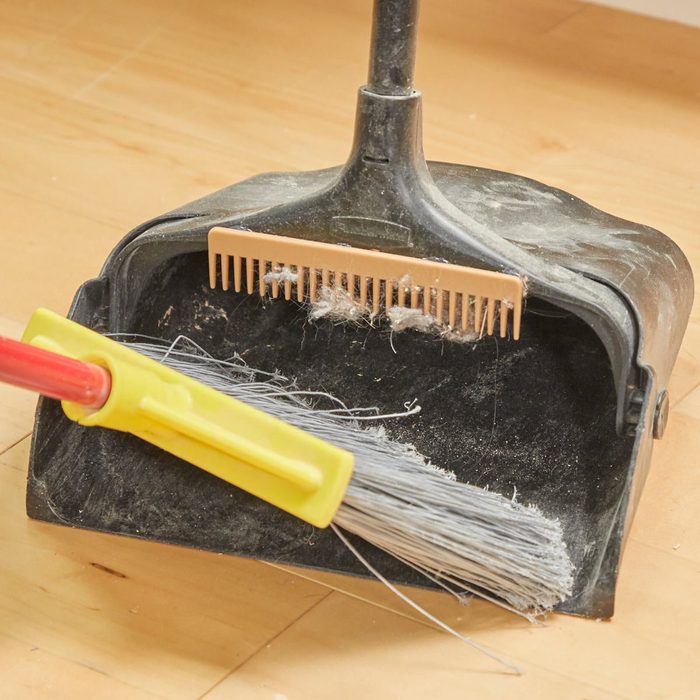
Dust Bunny Broom Cleaner
Every time you sweep, clumps of dust and hair collect at the ends of the broom’s bristles. To solve this problem, hot glue a wide-tooth comb to the top of a dustpan. Just run the bristles through the comb to remove any excess gunk dangling from the broom.
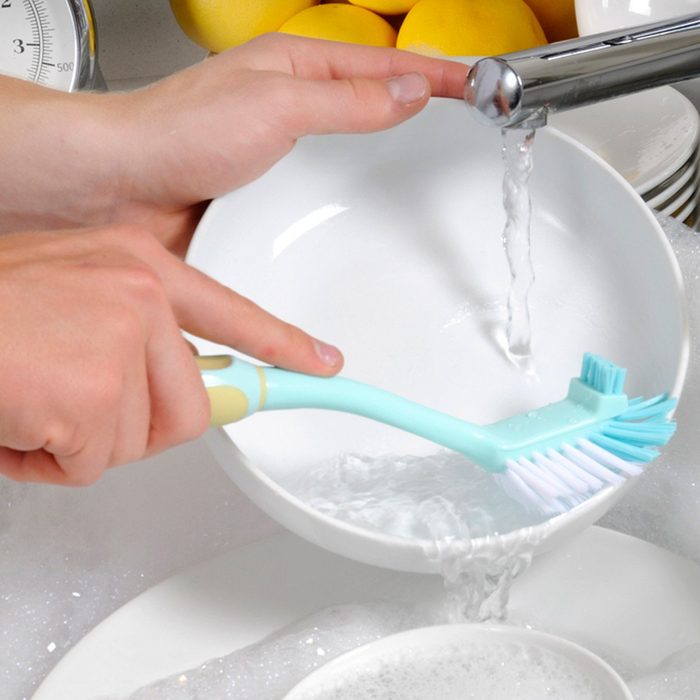
How to Clean Your Dish Brush
You use it to clean your dishes, but how often do you actually clean your dish scrubber brush? When not properly cared for, those tools we rely on for cleaning up in the kitchen can actually spread harmful bacteria. The trick is to clean your dish scrubber brush to make sure you’re getting the best clean possible. You can either clean it once a week in the dishwasher or with a vinegar mixture. While you’re at it, here’s how to clean your kitchen sponge because it’s really, really dirty.
2
/
16
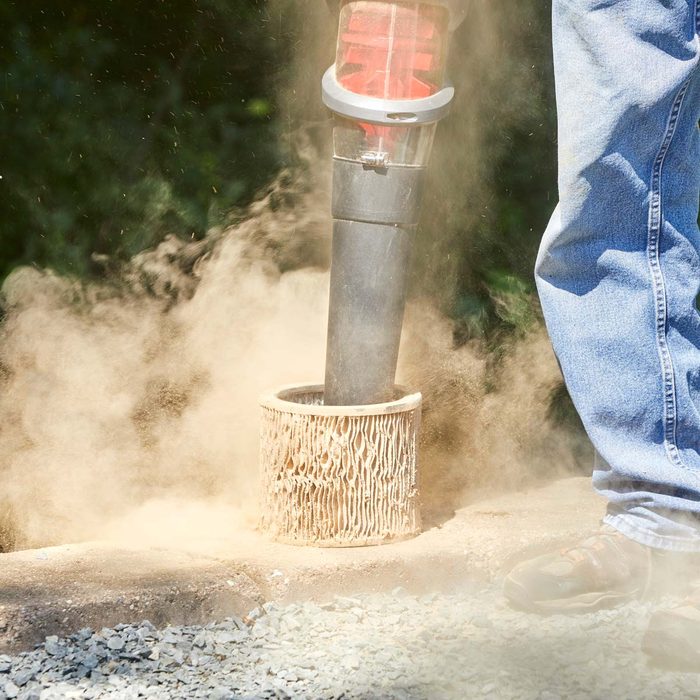
Cleaning Shop Vacuum Filters
You might hold shop vacuum filters at arm’s length to clean and blow them out with an air hose nozzle. But you probably still ended up covered in dust every time. Instead, hold the filter down with your doos and blow it out with a leaf blower. Your pants and shoes will still get a little dirty, but you’ll keep your face and hands clean.
3
/
16
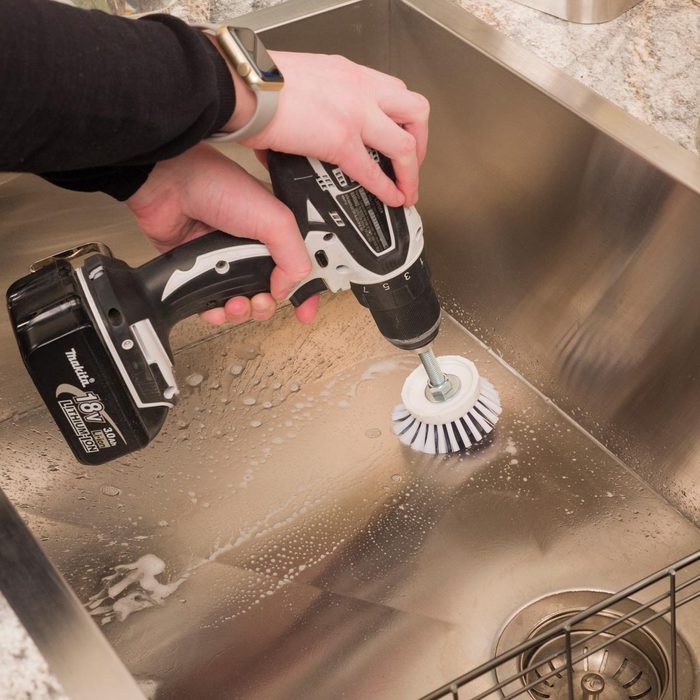
The Drill Brush
You use your sink to clean dishes, but you won’t get anywhere if your sink is dirty, too. Clean it quickly with this drill brush hack.
To make this drill brush you’ll need a drill, a washer, a bolt, a long machine screw and a brush head replacement.
- Start by threading the machine screw through the brush head so the head of the screw rests in the brush head hole.
- On the other side of the brush head, slide on the washer and secure it in place with a nut.
- Make sure to tighten it well with a wrench. However, do not over-tighten, as this may cause the plastic brush head to crack.
- Next, attach the scrubber head to the drill.
To clean, fill a bowl or bucket with hot water and dish soap (or the cleaning agent of your choice). Dip the power scrubber into the mixture just enough to saturate the bristles and do not submerge the drill! Now simply point and press the drill to start and let the drill brush do the work. Check out more expert cleaning tips for the pros.
4
/
16
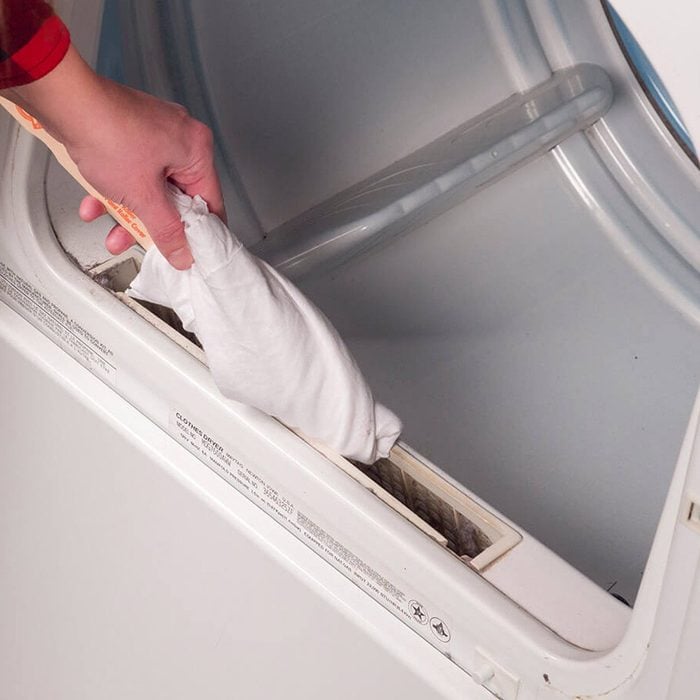
Clean Lint Trap
Even if you empty your dryer’s lint trap before each load, chances are there is still lint buildup around the area that could potentially cause a fire. So it’s important to deep clean the area once in a while, and this handy hint will get the job done.
Wrap a clean rag around one end of a paint stir stick. Remove the lint trap and clean out the area with the rag-covered stick. To help the lint stick to the rag, dampen it with water first.
5
/
16
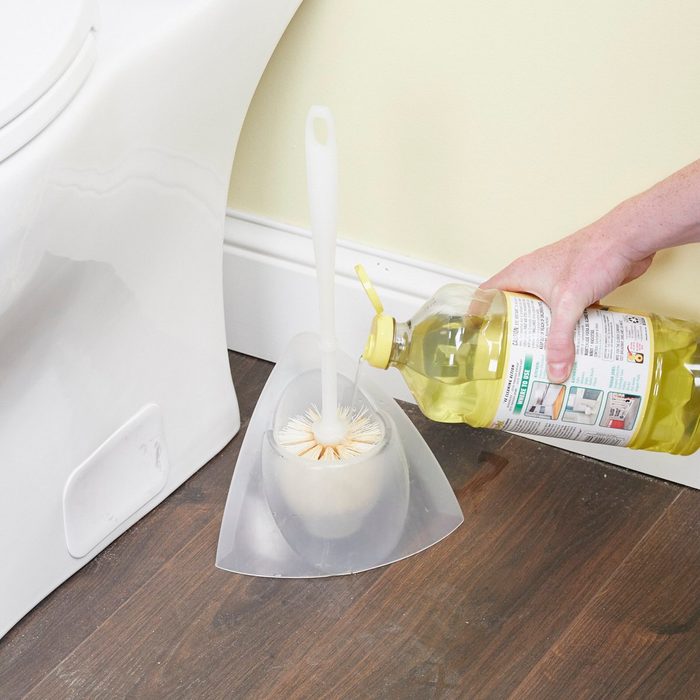
Keep Your Toilet Brush Germ-Free
Toilet brushes are relegated to a filthy task, and the thought of what’s leftover on that brush will make you a little queasy. So, splash a little Pine-Sol in the bottom of the brush container. Not only does this help to deodorize the bathroom, but it also disinfects the toilet brush.
6
/
16
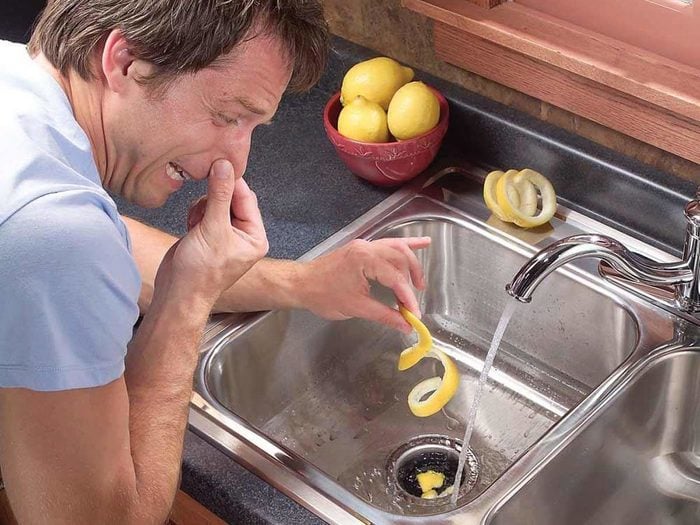
Citrus Peels and Ice Cubes for a Stinky Disposer
Your garbage disposal is great for cleaning up food in the sink, but if your disposer has developed an odor, it may be holding on to bits of rotted food. Here’s how to clean them out:
- With the water running at about half throttle, drop in orange or lemon peels. Run the disposer for five seconds. Citric acid from the peels softens crusty waste and attacks smelly bacteria. Give the acid about 15 minutes to do its work.
- Turn on the water and the disposer and drop in a few ice cubes. Flying shards of ice work like a sandblaster inside the disposer.
- Run the water until the bowl is about half full. Then pull the stopper and turn on the disposer to flush it out.
7
/
16

Clean a Vacuum with a Vacuum
The typical way to clean the filter of a bagless vacuum is to tap it against the inside of a trash can until most of the dust falls off. But that raises a cloud of dust and doesn’t get the filter completely clean. For faster, more effective filter cleaning, use your shop vacuum. Clean prefilter screens and post-filters the same way. Just remember to be gentle with the shop vacuum’s nozzle. Some filters have a coating that you can scrape off if you press too hard.
8
/
16
Mr. Clean Magic Eraser Bath Scrubber
You spend so much money on cleaners with bleach in them, only to scrub and scrub before your bathroom finally starts to sparkle. Take the effort and money out of cleaning with the Mr. Clean Magic Eraser Bath Scrubber. It features Febreze Freshness and can erase three times more soap scum than leading all-purpose spray cleaners. What makes the Magic Eraser so magical? Find out here.
9
/
16
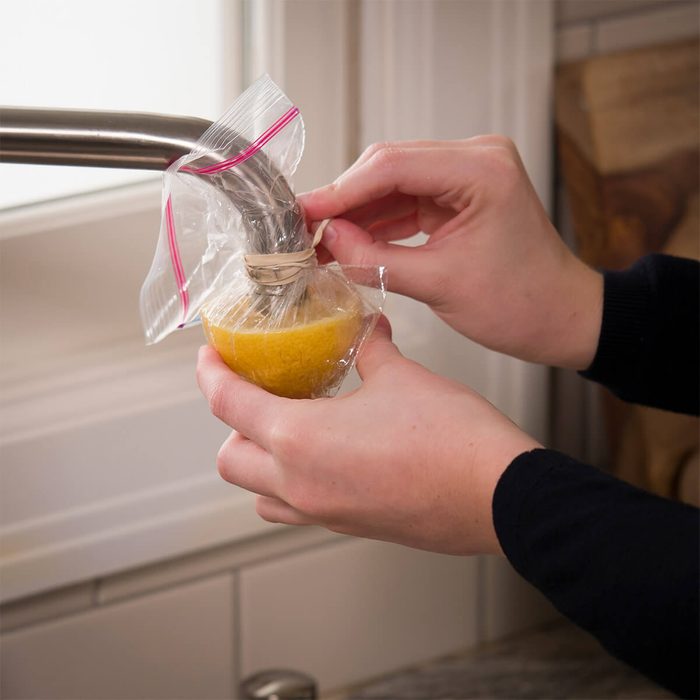
Clean Sink Faucet
To get rid of hard-water buildup on a faucet, try this natural solution:
- Cut a fresh lemon in half. With one of the halves, use your thumbs to gently open up the center. Then press the lemon onto the end of the faucet.
- Put a small plastic bag around the lemon and secure it around the faucet with a rubber band. Be sure that the rubber band it cinched tightly and that the lemon is around the end of the faucet.
- Leave the lemon in place for a few hours to allow the citric acid to work its magic.
After you remove the lemon, you may need to use a gentle scrubbing pad to wash off any loosened hard-water buildup. Then wipe the faucet with a damp cloth to remove any leftover lemon juice, and your faucet will be squeaky clean—and you didn’t need to use harsh chemicals. Here are 20 more ways you can clean your house with a lemon.
10
/
16
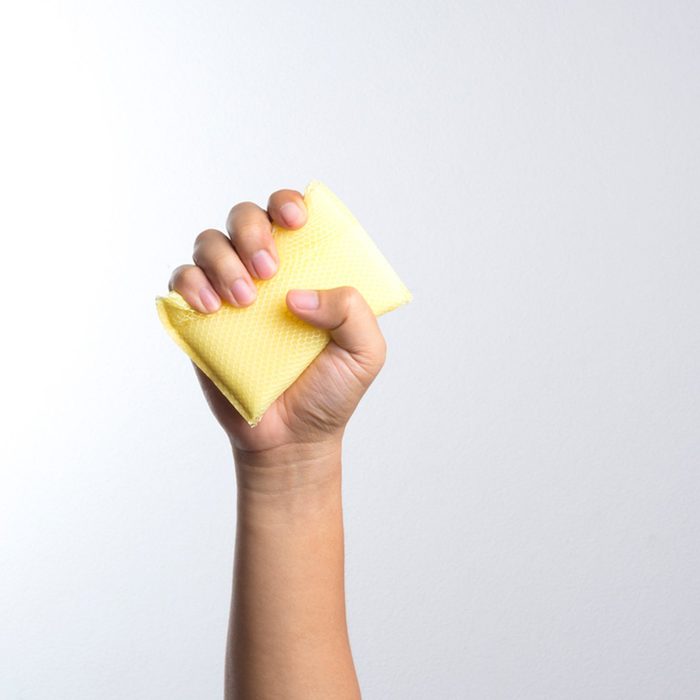
How to Clean Your Kitchen Sponge
The kitchen sponge is a well-used cleaning tool. From your dishes to your counters, it soaks up a lot of dirt and leaves things sparkling. That’s why it should come as no surprise that the kitchen sponge harbors a hefty amount of bacteria. The most effective and easy way to clean your sponge is to douse it in bleach. You’ll want to soak it for at least five minutes in a solution of 3/4 cup bleach to 1 gallon of water, then squeeze and rinse it out. You can also microwave a damp sponge for about a minute.
11
/
16
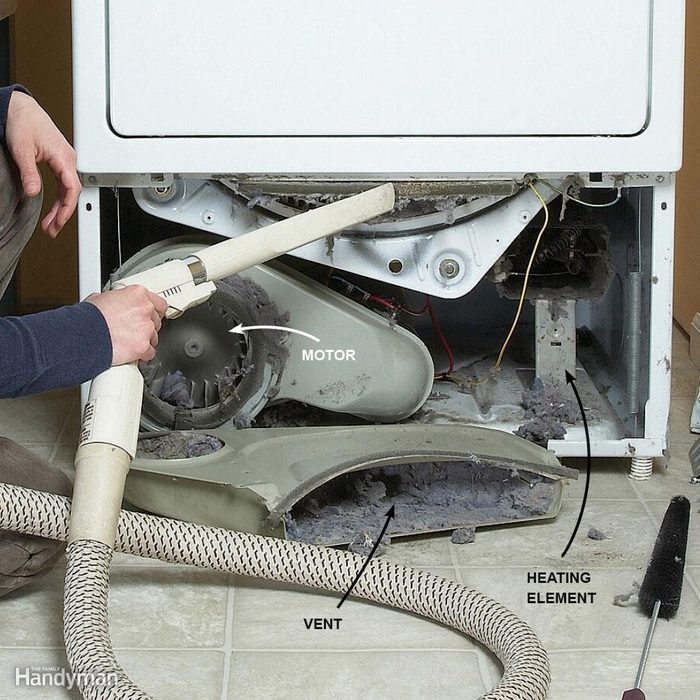
Inside Dryer and Dryer Vent
Built-up lint inside dryer cabinets causes more than 15,000 fires every year. Lint escapes through tiny gaps around the edges of the dryer drum and falls into the cabinet, especially when the exhaust vent or vent cap is clogged and airflow is restricted. The lint can get ignited by electric heating elements, gas burners or even a spark from the motor, and the flames then travel through the lint-lined exhaust vent. To make sure this doesn’t happen in your house, check the exhaust vent and the inside of the cabinet frequently.
12
/
16
Dishwasher
You’d think your dishwasher, post dishwashing, would already be clean. But you’d be wrong! Food bits find their way into all the nooks and crannies of your dishwasher, leading to bad smells and eventually, your dishes not getting clean. Learn how to thoroughly clean your dishwasher here.
13
/
16
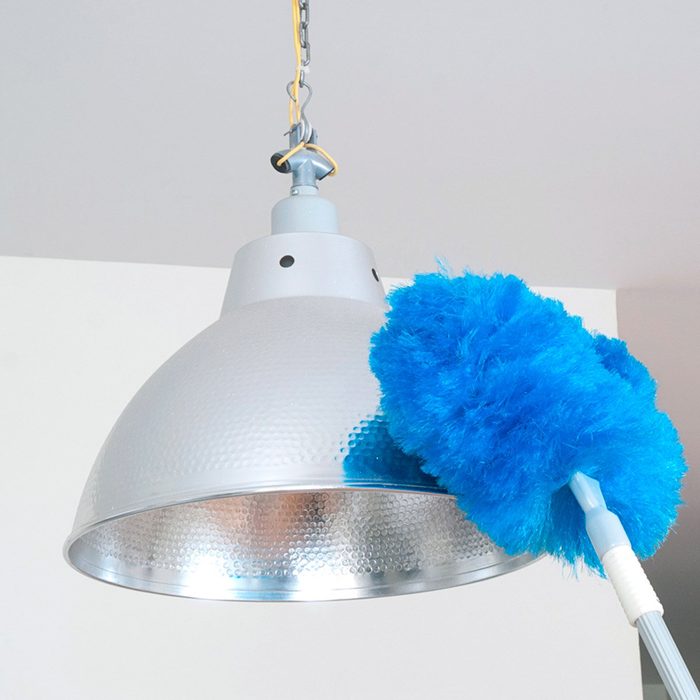
How to Clean Your Duster
No matter how hard we try to prevent it, dust happens. Dusters—whether cloth, feather, synthetic or disposable—are a necessity if you want to keep your home clean and as dust-free as possible.
So when it comes to your duster, it makes sense that you clean the dust out of it every now and then (unless you use a disposable duster such as Swiffer, which you can just toss when it’s dirty). Cleaning your duster regularly will not only prevent you from just spreading that old dust around, but it will help keep your duster in good condition.
14
/
16
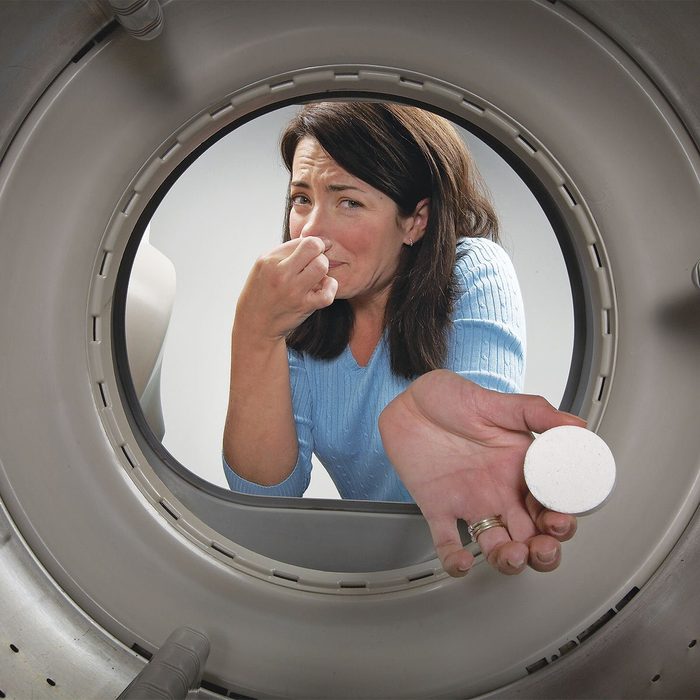
Washing Machine
Just because you’re washing clothes regularly, it doesn’t mean your washer doesn’t need cleaning. Once a month, run an empty load with just hot water and bleach. We also recommend using an Affresh tablet to kill mold and odors. Simply place an Affresh tablet in the washer and run a cycle with hot water.
15
/
16
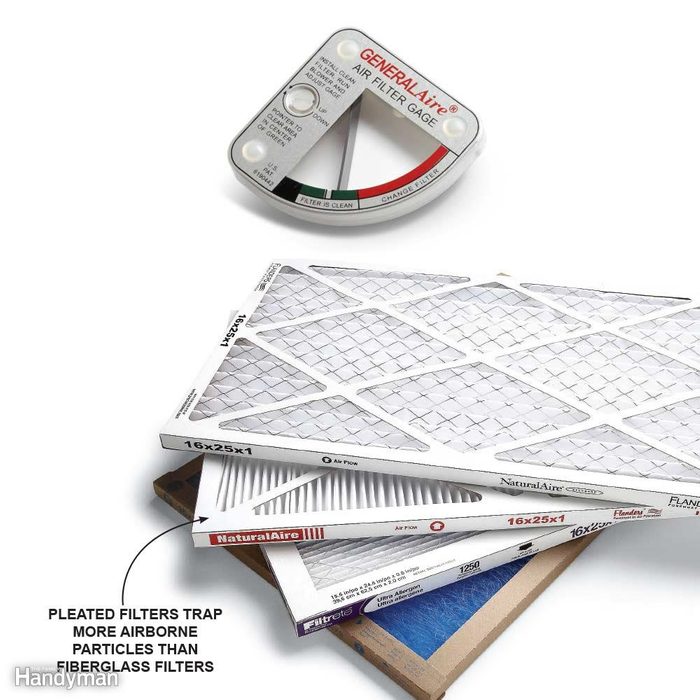
Upgrade Your Furnace Filter
Your home’s forced-air heating or cooling system helps to control dust by filtering the air. A standard cheap fiberglass filter protects your furnace from large dust particles and provides maximum airflow, but it does little to reduce household dust. More expensive pleated filters usually provide a good balance between cost and filtration efficiency. These filters trap 80 to 95 percent of particles 5 microns and larger. Here are the best furnace filters to buy.
But if you have family members with allergies, consider spending more on high-efficiency filters, which capture 99 percent of airborne particles as small as 0.3 microns (bacteria and viruses, fumes and pollen). These furnace filters are one of the best for how to remove dust from the air. Be aware that you’ll have to run your furnace fan full time to get the maximum benefit from a high-efficiency filter, and you’ll have to change the filter frequently to prevent damage to your furnace from the reduced airflow.
If you go the high-efficiency route, install a filter monitor such as FilterScan, which automatically alerts you when your furnace filter needs changing, or the GeneralAire G99 Filter Gage, which requires you to manually check it.
16
/
16
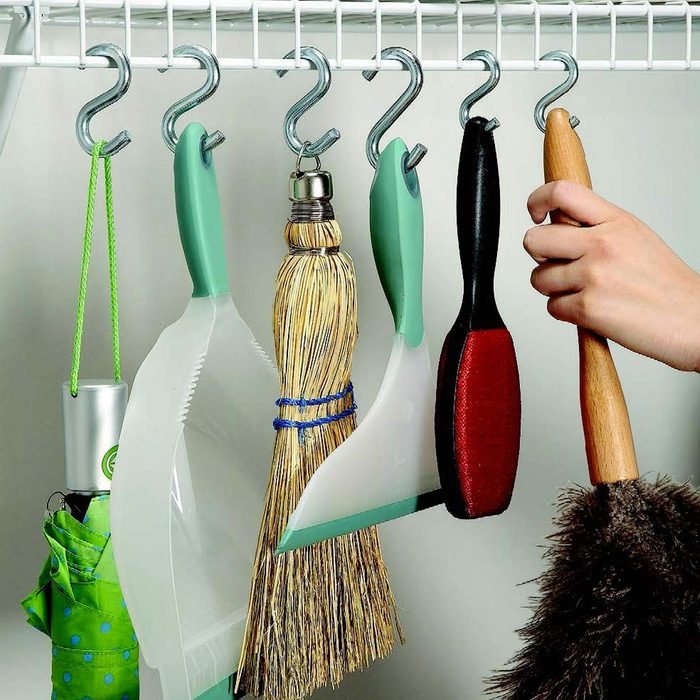
S-Hook Hang-Up
Once you’re done cleaning the house, your cleaning supplies need a place to stay clean and organized too. Pick up a pack of S-hooks at a home center and turn wire shelving into a rack designated for cleaning gear.
Every product is independently selected by our editors. If you buy something through our links, we may earn an affiliate commission.
Originally Published on The Family Handyman