I have a confession to make: I didn’t really understand homemade pickles until I had a garden. Why go through the trouble of making technical canning recipes when there are so many pickles at the store? My naivety was quickly revealed when I started growing my own food. The first time my garden overflowed with zucchini and cucumbers, I realized what it was all about. Recipes like this garlic dill pickle recipe are such a great way to preserve the bounty. Plus, homemade pickles are so much more flavorful!
The canning process can be intimidating if you’re new to it. That’s OK! But you don’t have to be afraid of the process. Pickling is perfectly safe, as long as you follow the recipe and pay attention to the process. To learn more about pickling, read up about how pickling works.
Tools Needed for Garlic Dill Pickles
This recipe walks you through making a canned pickle, or a pickle that’s been processed in a water bath to extend its shelf life. You’ll need a few tools to make sure the jars seal properly:
- Canner or steam canner: This pot is designed to keep the cans completely submerged so they obtain a proper seal. It also has a rack that elevates the jars from the bottom of the pot. If you don’t have a canner, you could use a deep stockpot. Just make sure it’s big enough to fit the jars and an extra 4 inches of space above them for boiling water. You’ll also need a metal or silicone rack to elevate the jars from the stockpot so they don’t crack or break.
- Glass mason jars, lids and rings: This recipe calls for three (quart-sized) glass jars. It’s OK to reuse the jars from a previous pickling session, but you’ll want to start with brand-new lids. Otherwise, you may not get a safe seal.
- Other canning tools: If you plan to can a lot, pick up these essential canning supplies. Tools like funnels, jar lifters and a bubble popper (to remove air bubbles) aren’t strictly necessary, but they are helpful!
Ingredients for Garlic Dill Pickles
- Pickling cucumbers: Look for blemish-free cucumbers about 3 to 4 inches long. If the cucumber has a crunchy texture, sweet taste and small seeds, it will probably make a great pickle!
- Garlic: Don’t worry if your pickled garlic takes on a blue or greenish hue. This happens when fresh garlic combines with an acid (like vinegar). It might look weird, but blue pickled garlic is still perfectly safe to eat.
- Dill heads: These heads are the flowering portion of the dill plant. They start as a bunch of yellow flowers and turn into an umbel filled with green seeds. Fresh dill is best, but you can substitute 1 teaspoon dill seed for every dill head.
- White vinegar: White vinegar is our go-to choice for canned and quick pickle recipes.
- Canning salt: Canning salt (or “pickling salt”) is extra fine and doesn’t contain caking agents or additives like iodine. If you don’t have canning salt on hand, kosher salt works, too.
- Crushed red pepper flakes: A touch of spice gives the pickles a bit of a bite.
Directions
Step 1: Pack the jars
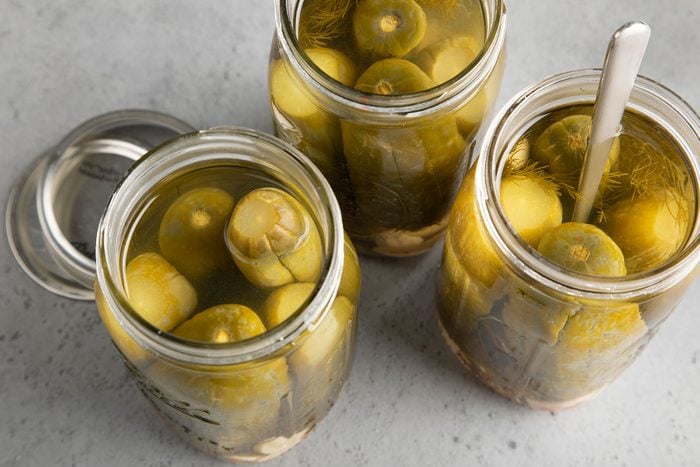
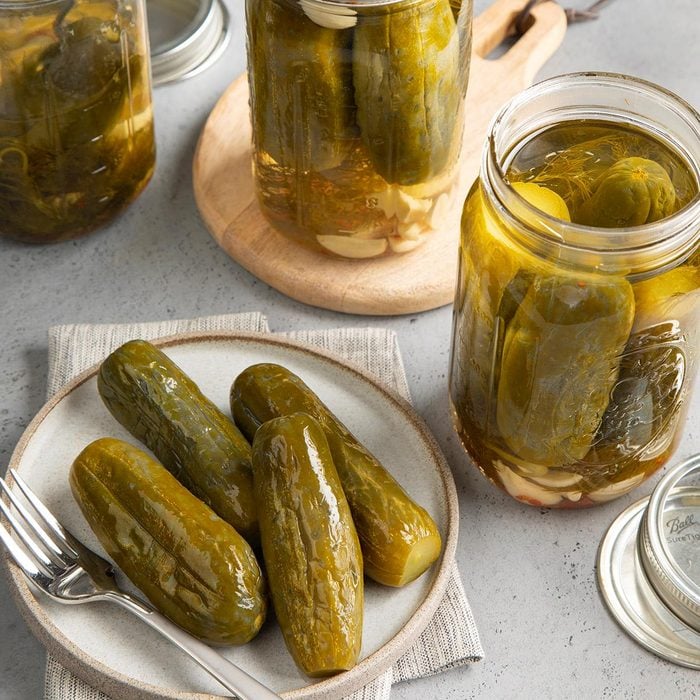
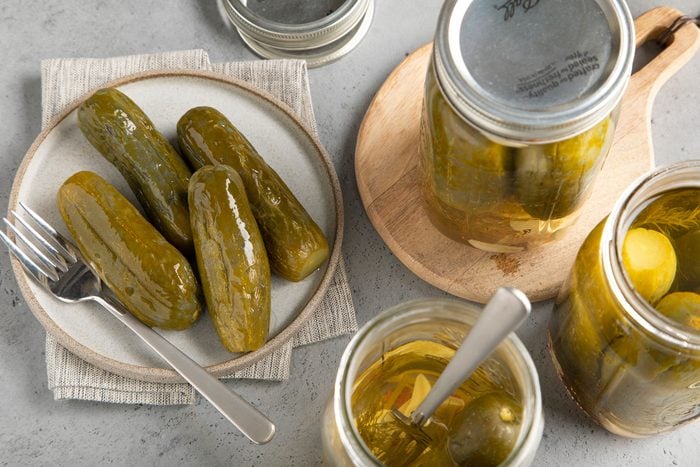
Place five garlic clove halves and five dill heads in each of three hot 1-quart jars. Pack the cucumbers into the jars to within 1/2 inch of the top.
Test Kitchen Tip: Clean the canning jars, and heat them with hot (but not boiling) water. This prevents the jar from cracking when you add the hot brine later. Read more about sterilizing canning jars in our complete guide for how to make pickles.
Step 2: Boil the brine
In a large saucepan, bring the water, vinegar, salt and pepper flakes to a boil. Carefully ladle the hot brine over the cucumbers, leaving 1/2-inch headspace. Add the remaining five garlic clove halves to each jar.
Step 3: Prepare the jars for canning
Remove the air bubbles in the jars, and the adjust headspace, if necessary, by adding additional hot brine. Wipe the rims to make sure they’re dry and clean. Center the lids on the jars, then screw on the bands until they are fingertip tight.
Editor’s Tip: If you end up with extra brine, save it in the refrigerator for the next batch of pickles. Or use it to cook greens or boil potatoes.
Step 4: Can the garlic dill pickles
Place the jars into a canner with simmering water, ensuring that they are completely covered with water. Bring the canner to a boil. Process for 15 minutes. Remove the jars, and cool.
Test Kitchen Tip: The processing time listed is for altitudes of 1,000 feet or less. For altitudes up to 3,000 feet, add five minutes; 6,000 feet, add 10 minutes; 8,000 feet, add 15 minutes; 10,000 feet, add 20 minutes.
How can you tell if the canning seal has formed properly?
Check that each jar is properly sealed by looking at the lid. It should have a slight concave shape because of the vacuum that was created during canning. Next, press down in the center of the lid. It should not give.
If the lid isn’t slightly concave, or if the lid pops or springs up when pressed, the jar did not seal properly. It’s OK if it didn’t work the first time around. You can process your jar of soon-to-be pickles again if the can didn’t seal properly.
Do you need to refrigerate pickles?
Pickles don’t need to be refrigerated if they’re sealed properly. Store the sealed jars in a cool, dark, dry place. Stacking the jars might affect the seal, so keep them in a single layer. However, unsealed jars should be kept in the refrigerator.
“Open jars of pickled food should always be refrigerated,” says Julie Lang, Taste of Home contributor and author of The Complete Guide to Pickling: Pickle and Ferment Everything Your Garden or Market Has to Offer. Bacteria can form in the jar, even in the acidic pickling liquid. Keeping the pickles cool also helps them keep their crisp texture.
How long are garlic dill pickles good for?
Unopened canned pickles will last safely stored for up to one year. We recommend you eat them within six months for the best quality. Once opened, they should last about a month in the fridge.
Julie says the opened pickles are less likely to spoil if they’re fully submerged in the brine (aka pickle juice). And keep your fingers out of the jar! Use a clean fork to reach into the jar when you want a crunchy snack.
Garlic Dill Pickle Tips
What kind of cucumbers should you use in this garlic dill pickle recipe?
The best cucumbers for pickling have thin skin, firm flesh and a small size. At the grocery store, they might be labeled as “Kirbys,” “canning” or “pickling” cucumbers.
Be careful with supermarket cucumbers, as they often come with a waxed coating. The wax is edible, but it will change the texture of your pickles. We recommend getting the produce from a local farmer or farmers market instead. Better yet, grow your own! No matter where you get them, always wash your cucumbers thoroughly before using.
Can you use regular salt instead of canning salt to make garlic dill pickles?
We don’t recommend using table salt to make canned pickles. Canning salt (or pickling salt) is extra fine and doesn’t contain caking agents or additives like iodine, which can make the brine cloudy.
Which vinegar is best for making garlic dill pickles?
Use a vinegar with 5% acidity, like white vinegar. It’s important to avoid making any changes to canning recipes that could affect the pickle’s pH. The pH scale measures how acidic or basic a substance is. It’s used by food scientists to determine whether canned pickle recipes are safe. If you’d like a milder flavor, you can use cider vinegar (another 5% vinegar). You could also use a 10% strength vinegar to create bold, extra-crunchy pickles. However, do not use rice vinegar, which typically has a low acidity.
How do you make sure that garlic dill pickles are crisp?
Choosing the right cucumber is the key to ensuring that pickles turn out crisp. Snacking cucumbers (like Persian cucumbers) will create soft pickles.
How can you tell if pickles have gone bad?
Canning extends the lifetime of pickles, but they don’t last forever! Before opening, check the jars. You should be able to see or smell if the pickles have gone bad. If the jar has a bulging lid (or if there’s a change in color in the pickles), they’re probably not safe to eat.
You should also look for a change in opacity in the brine (e.g., it used to be clear, but it’s now cloudy). After opening the pickles, make sure they don’t have a white film, mold growth or unexpected smells.
When in doubt, toss it out!