


Decorative Easter Egg
Prep: 1 hour + standing
1 decorative egg
Updated: Jun. 30, 2023
TAKE A CRACK at crafting this sugar ary shell from CT’s cooks. It’s sure to make
Easter “eggstra” special! Our kitchen staff made the egg using a basic mold and piped icing. For additional holiday appeal, they filled their confection with green coconut “grass” and a purchased lamb figurine. If you have a bit of cake-decorating experience, you should have no problem creating the icing roses on top of the egg. Haven’t ever made roses? For an easier project, look for ready-made sugar flowers in the baking aisle of the grocery store.—Taste of Home Test Kitchen
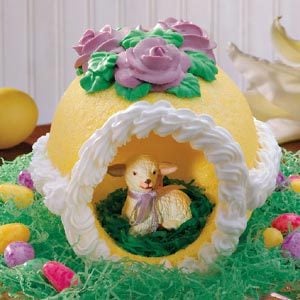
Decorative Easter Egg Recipe photo by Taste of Home