
Whiten Piano Keys
Piano keys can get discolored over time and through use. Get them to sing a different tune by cleaning them with toothpaste. See how a piano can work as a hiding space.
Ever seen a piano on Craigslist for free? See what a repurposed piano looks like.
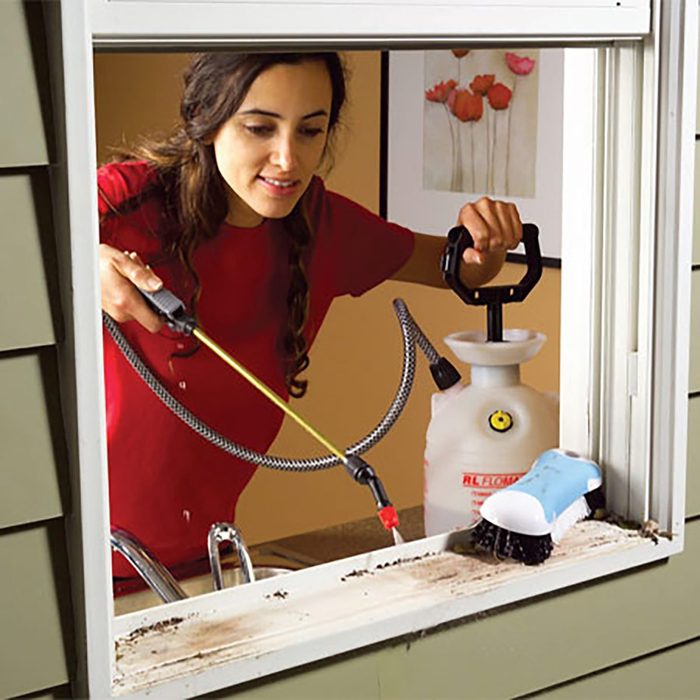
Garden Sprayer Cleans Hard-to-Reach Spots
A garden sprayer can be a mini power washer for cleaning windowsills and other hard-to-reach spots. Before you fill the tank with water, be sure to rinse it repeatedly to flush out any chemical residue.

Clear Up Coffee Rings
Your guests should’ve used a coaster but now you have a coffee stain on your table. A little dab of toothpaste can get that stain out, just like coffee stains on your teeth. See how to remove stains in wood furniture if that stain penetrated deep and how to refinish furniture, as well.
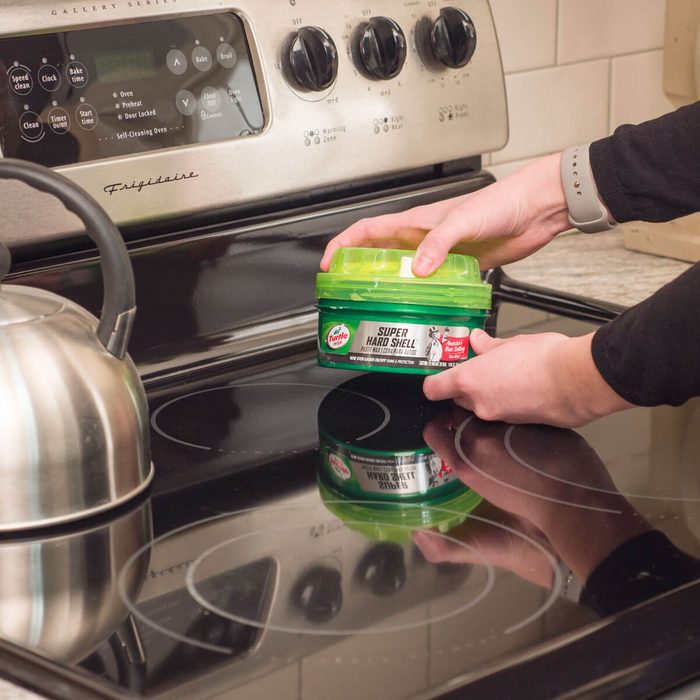
Make Your Appliances Smudge-Free
If you own stainless steel kitchen appliances, you may want to consider using car wax to clean them rather than a surface cleaner.
Simply apply a light coat of car wax to the appliance, allow time to dry and buff clean to resist fingerprints and smudges. No more kiddy fingerprints on the fridge!
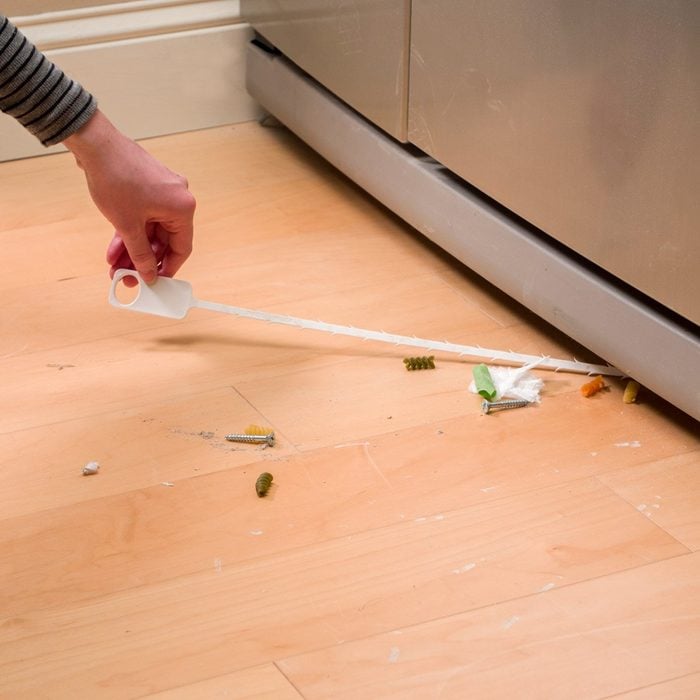
Zip-It Clean!
The space between your fridge and the floor is a magnet for pet hair, dust, food crumbs and other small trinkets. And if gone too long without cleaning, it can attract ants and other pests.
To make this cleaning task less difficult, use a hair trap cleaner (also called a drain cleaning zip tool), which sells at home improvement stores for under $5. This hair trap won’t leave scratches on the floor and can reach further than a vacuum cleaner attachment.
This tool will also help you when your bathroom sinks inevitably clog with hair. Here’s how to unclog a sink.
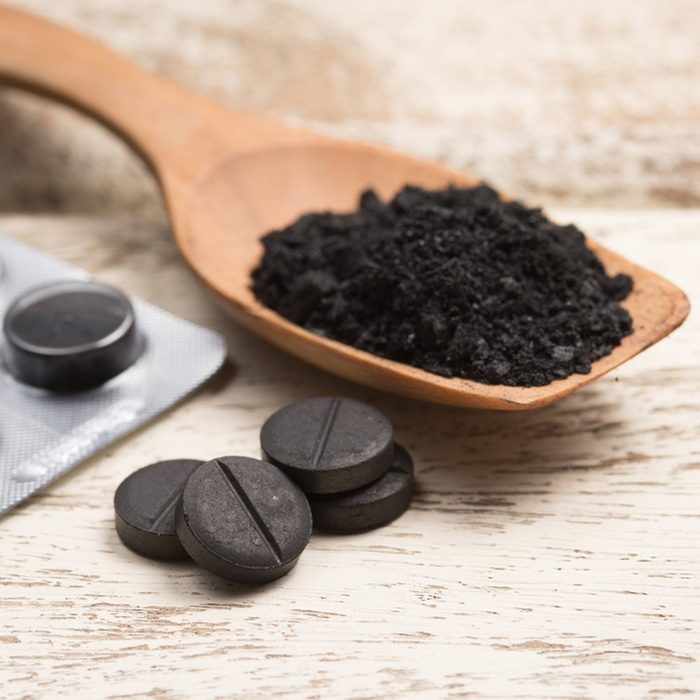
Activated Charcoal
Activated charcoal is an even better adsorbent and odor-killer than baking soda, and can deal with a wider variety of particles. However, this highly purified charcoal dust isn’t the best thing to put on your furniture, where it can stain. Instead, consider getting freshener bags of activated charcoal, like these, and hide them in the corners of your furniture to help reduce odors.
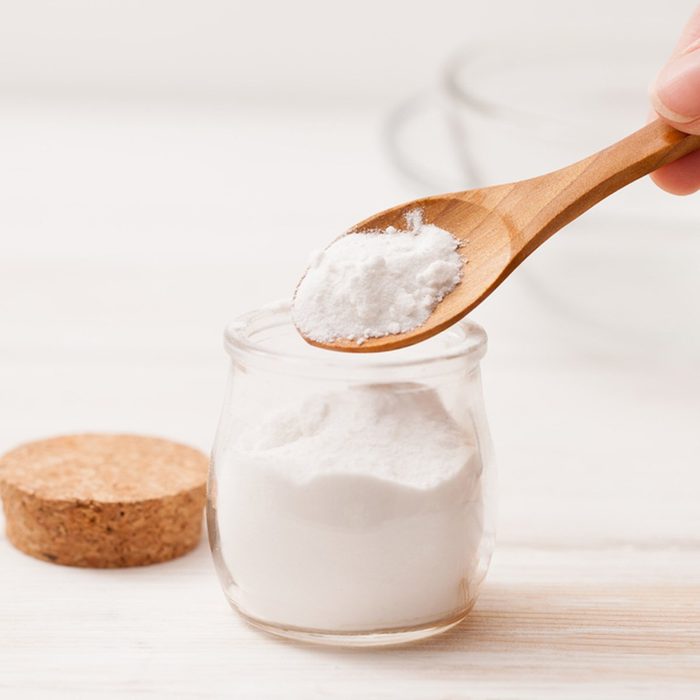
The Baking Soda and Vacuum Trick
Baking soda is a natural adsorbent, which means it has the ability to absorb odors when used correctly. If you have fabric-covered furniture, then put some baking soda in a salt shaker or similar dispenser and sprinkle it liberally on the furniture you want to freshen up.
Baking soda doesn’t do its work all at once, so give it time to neutralize as many odor-causing particles as possible. An hour or so is ideal, and for bad situations, you may just want to leave the baking soda on overnight (as long as it won’t get tracked everywhere by pets). When the time has elapsed, get out the vacuum cleaner and thoroughly vacuum up all the baking soda. This should freshen up most fabrics.
Note: Baking soda may have varying effects based on what is causing the odor or general “staleness” of your furniture. It neutralizes acidic compounds very easily, but may not be effective for all problems.

Purchase a Paintbrush
Leslie Reichert, founder of The Green Cleaning Coach and author of The Joy Of Green Cleaning uses a stiff paintbrush around her furniture to pull the dirt out without having to move all the furniture around. “You are brushing it out away from the furniture so the vacuum can suck it up,” she says.
See how setting a vacuum at the right height can ensure a long-lasting carpet.
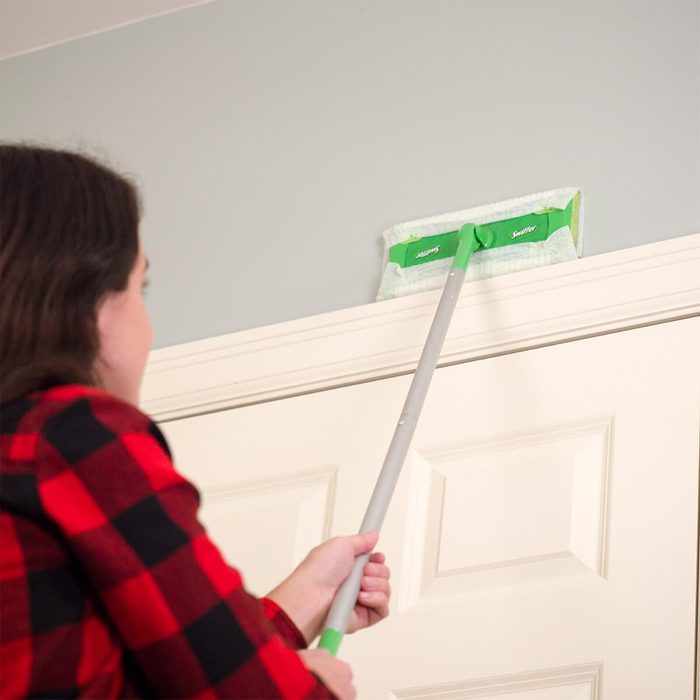
Floor Swiffer for Walls
A Swiffer Sweeper floor mop is useful for more than just cleaning hard floors. Use it to dust interior walls and trim, too.! Attach a dry cloth to the rectangle end and press it along walls and trim. You can pick up dust, cobwebs and dirt safely, without having to step on a ladder.
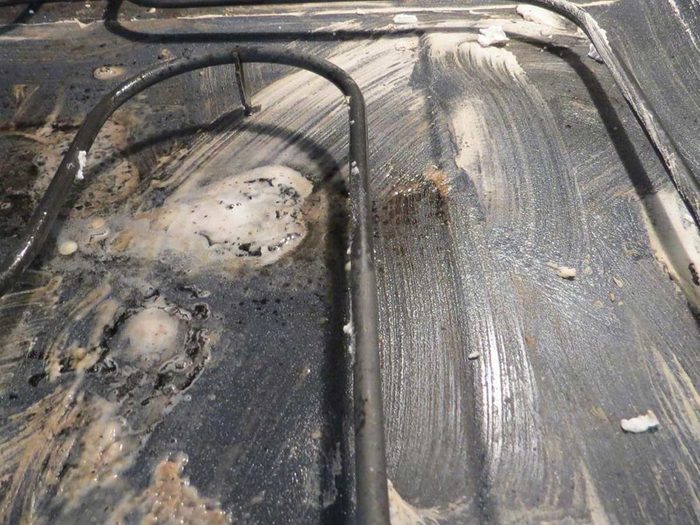
Baking Soda + Vinegar = Magic
To deep clean your oven, create a paste made of baking soda, water and a squirt or two of dish soap. Mix thoroughly until you have the consistency of mashed potatoes. Use a household sponge to cover the interior of your oven with the paste. Sides, back, floor and don’t forget the oven door. Make sure all areas are covered, the thicker the better, especially on problem areas. Allow to sit overnight, and then take a spray bottle of equal parts water and vinegar and fully saturate all surfaces of the oven. You’ll see the chemical reaction between the baking soda and vinegar begin to bubble and break up baked on char. Spray extra vinegar over problem areas and let the spray soak in for about 15 minutes.
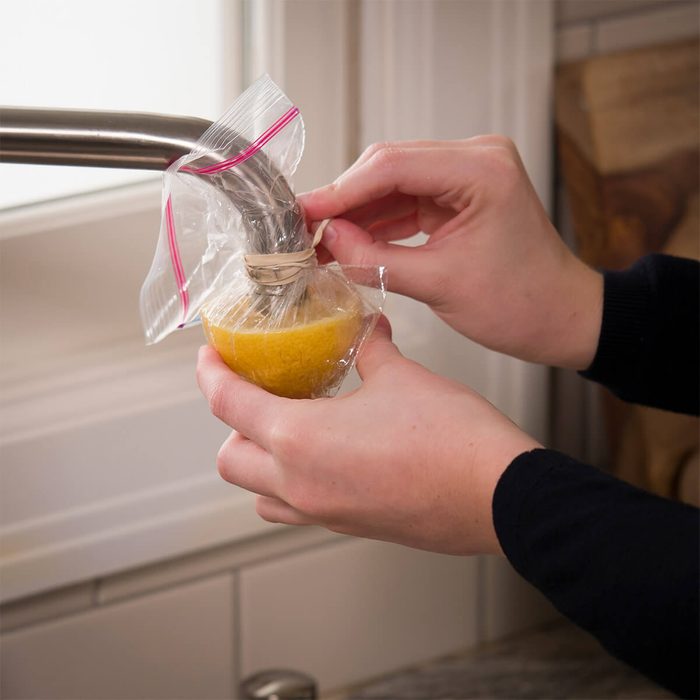
Remove Hard-Water Buildup with a Lemon
Remove hard-water buildup on your faucet with this simple, natural solution: place half of a fresh lemon on the end of the faucet, wrap a small plastic bag around the lemon and secure it to the faucet with a rubber band. After a few hours, remove the lemon and wipe the faucet clean.
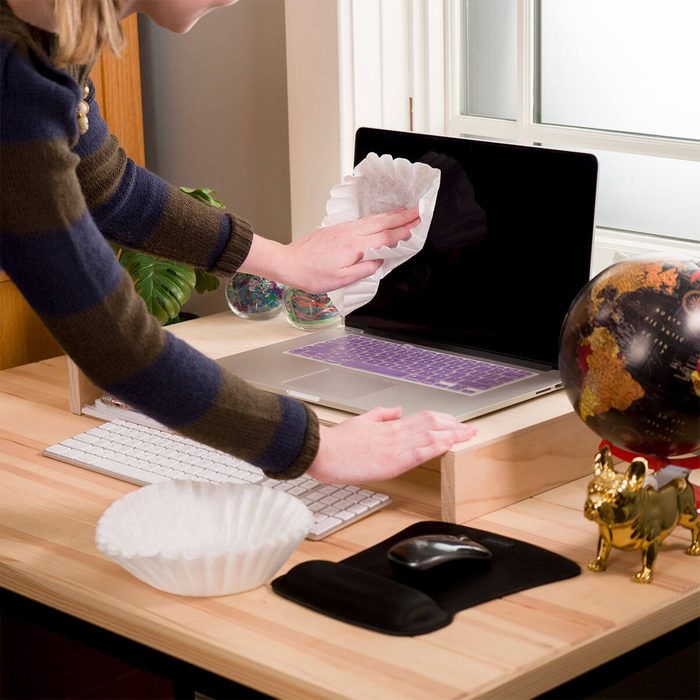
Coffee Filters for Dusting
The next time you clean your computer monitor or TV screen, use a coffee filter. The thin, cloth-like paper catches a lot of dust and can cover a large area. You can use a coffee filter for dusting other household accessories, too.
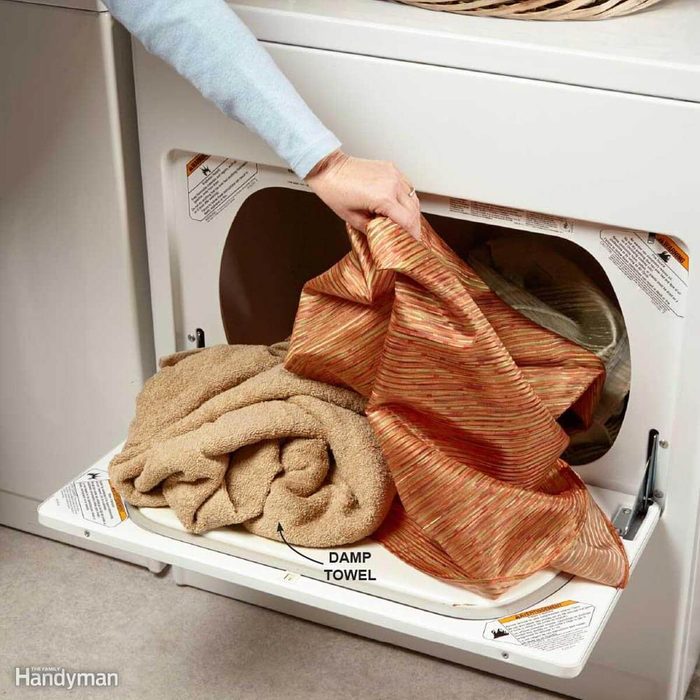
Dust with Your Dryer
Blankets, pillows, slipcovers, drapes and other textiles not only trap household dust, but they create it as they shed and disintegrate. Curtains and drapes in particular get dusty because they absorb moisture and dirt from the outside and act as a landing pad for dust from ceiling fans and air vents. The best idea is to buy machine-washable items and launder them twice a year (OK, at least once). For non-machine-washable textiles, throw them in the dryer on the air-fluff setting (no heat) for 20 minutes with a damp towel. The damp towel will attract pet hair, and the tumbling movement and airflow will remove the smaller particles for you. Keep towels out of the way with a space-saving towel rack on a cabinet door.
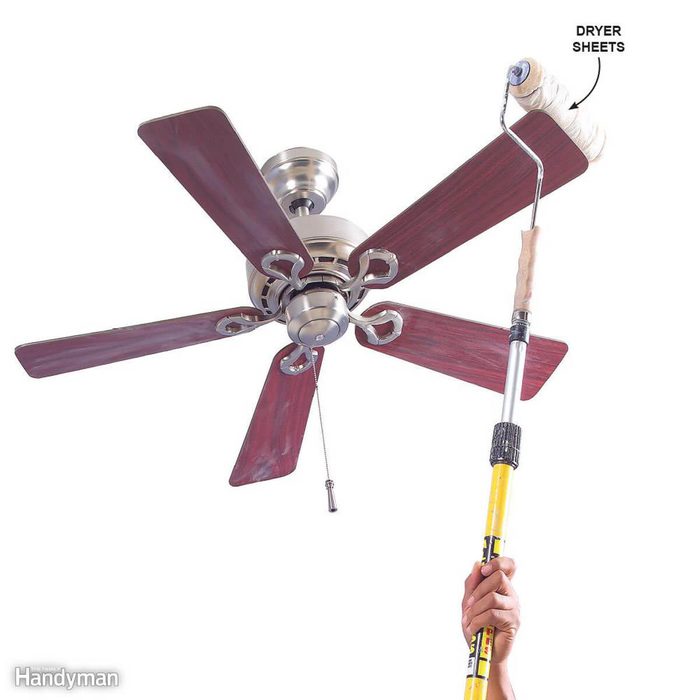
Duster for the Vertically Challenged
Unless you play in the NBA, dusting ceiling fans and other high, out-of-reach objects is a real chore. Wrap a dryer sheet around a clean painting roller and secure the ends with rubber bands. Attach an extension handle to the roller and dust away.
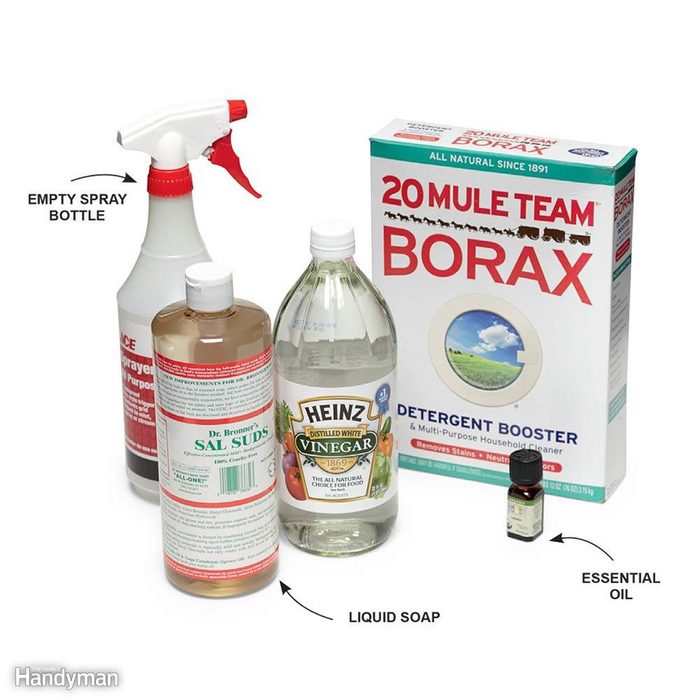
Make Your Own Greener Cleaning Solution
Professional housecleaner Maggie Orth likes to make her own cleaning products. Here’s her recipe for an all-purpose cleaning solution, modified from a recipe she found in the book Clean House, Clean Planet by Karen Logan. In a 5-quart bucket, mix: 1 cup of distilled vinegar, 3 tablespoons of borax, 1 gallon of hot water and 1/2 cup of soap (Maggie uses Dr. Bronner’s Sal Suds). Maggie likes to add 10 or 15 drops of tea tree, lavender or lemon oil for a nice fragrance. Mix the ingredients and then pour some of the mixture into a spray bottle. Save the rest in a gallon jug. This is enough all-purpose cleaner to last for years!
Use this mixture to clean tile, countertops and painted woodwork. It’s a good all-purpose cleaner, but it’s not the best for cleaning glass. Maggie uses club soda to clean glass.
Sometimes home remedies are great at keeping pests out of the garden as well.
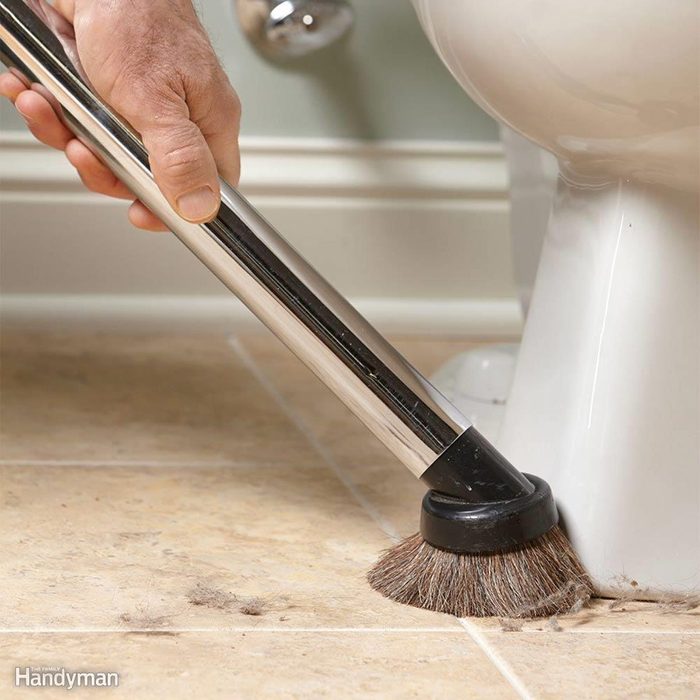
Vacuum First, Then Scrub
Do you ever find yourself chasing strands of wet hair or running into dust balls in the corners with your sponge or cleaning rag? You can eliminate this nuisance by vacuuming the bathroom before you get out your cleaning solutions. For a really thorough cleaning, start at the top, vacuuming the dust from light fixtures and the top of window casings. Then work your way down. And finally, vacuum the floor methodically so you cover every inch. You don’t want to leave any stray hair or dust bunnies to muck up your cleaning water. A soft-bristle upholstery brush works best for this type of vacuuming. Figure out what vacuum to use here.
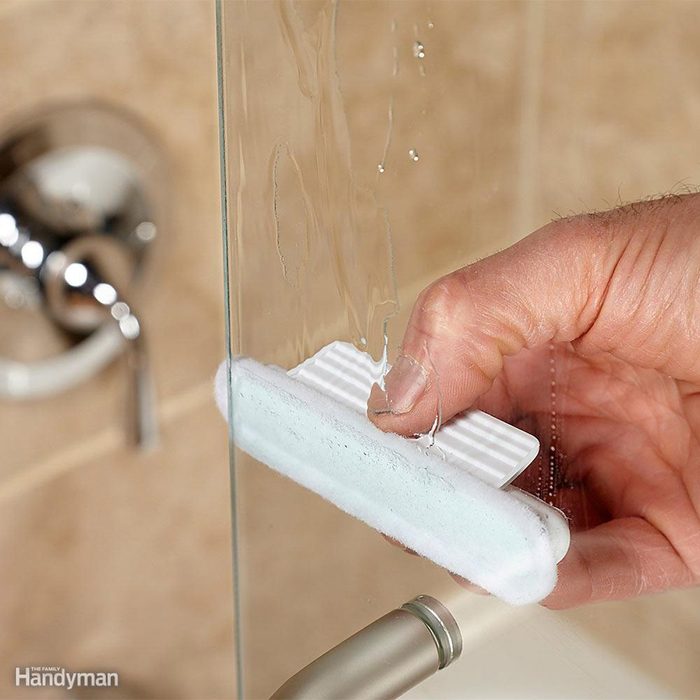
Protect Your Shower Doors from Mineral Buildup
When the beads of water left on your glass shower door dry out, they leave minerals behind that are at best unsightly, and at worst can be tough as nails to remove if you let them build up. You can avoid beading water altogether by coating the glass with an auto-glass treatment. Two brands are Aquapel and Rain-X. Follow the instructions on the package to apply the treatment to your shower door glass. You can buy Aquapel or find a local dealer online. You’ll find Rain-X at any auto parts store. You can also follow our guide on how to clean glass shower doors.
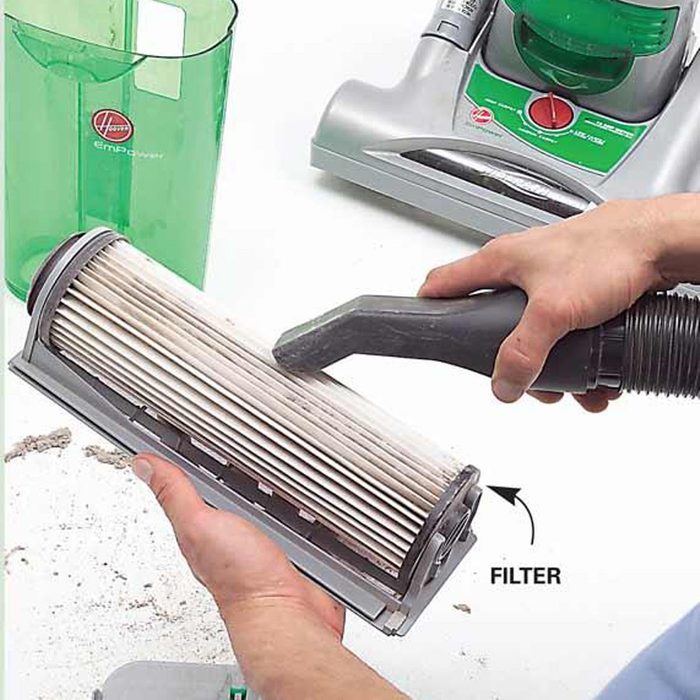
Clean Your Bagless Vacuum Filter
The typical method is to tap the filter against the inside of a trash can until most of the dust falls off. But this raises a thick cloud of dust and doesn’t get the filter completely clean. Here’s a faster, neater, more thorough approach: Take the vacuum out to the garage and clean the pleated filter with a shop vacuum. Some pleated filters have a special coating that you can damage, so be gentle with the shop vacuum nozzle. Clean prefilter screens and post-filters the same way.
Learn what the experts say on how often to change filters on bagless vacuums.
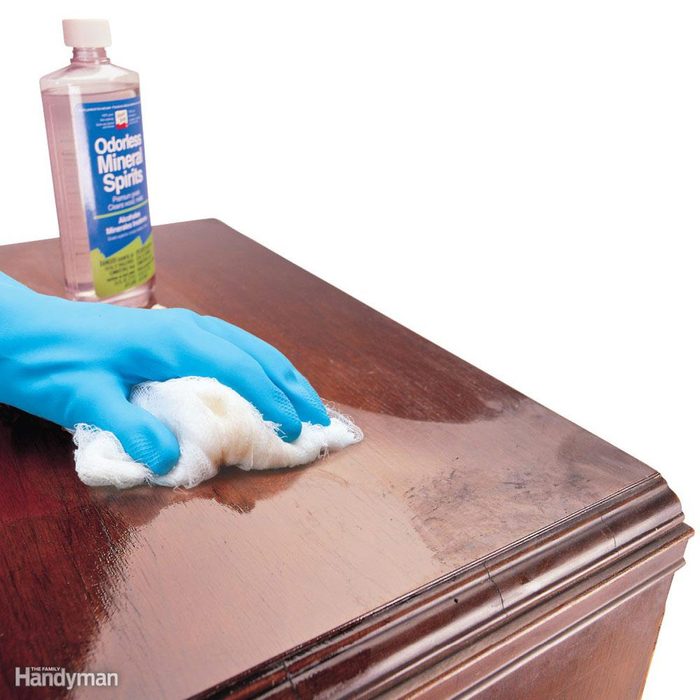
Renew Wood with Mineral Spirits
If the finish on your furniture or woodwork is dull and murky, it may need refinishing. But before you take on that project, take a tip from furniture restorers and clean it with mineral spirits. Mineral spirits—sometimes labeled “paint thinner”—is a gentle solvent that dissolves years of grime and residue from cleaners or polishes without harming wood finishes. Get it at a home center or paint store. Just soak a soft cloth and keep rubbing until the cloth no longer picks up grime. Work in a well-ventilated area and remember that the fumes are flammable. Hang the cloth outdoors to dry before throwing it in the trash.
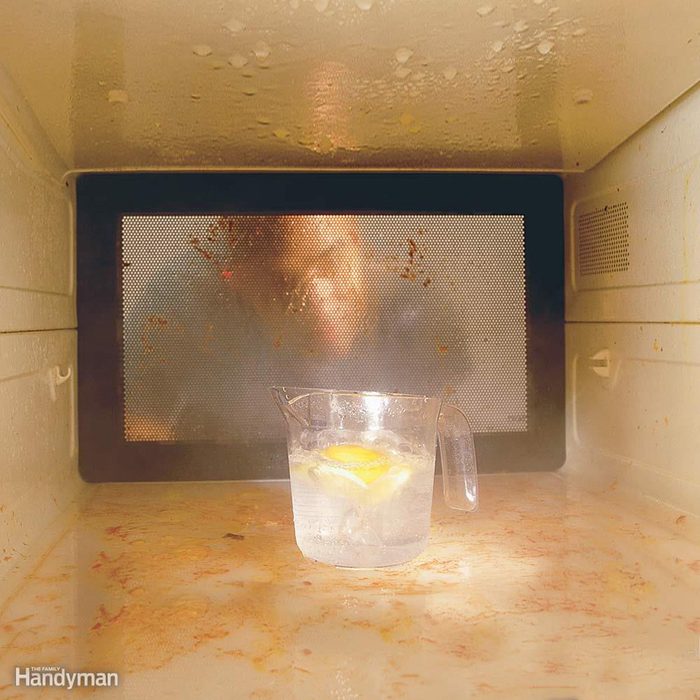
Microwave Cleaner
It’s easy to clean baked-on food and spills from your microwave Here’s how: Partially fill a measuring or coffee cup with water and add a slice of lemon. Boil the water for a minute, and then leave the door closed and let the steam loosen the mess. After 10 minutes, open the door and wipe away the grime. Plus: Best Household Cleaning Supplies & Products
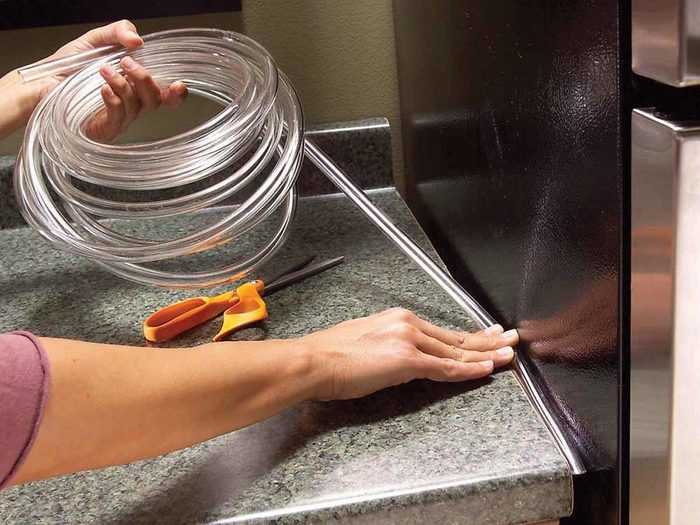
Countertop Gap Filler
If crumbs, papers or even flatware falls into the gap between your countertop and refrigerator, fill the void with nearly invisible plastic tubing. Clear tubing is available at home centers in several widths starting at 1/8 in. Save headaches and money by following these steps to keep your fridge running.

Remove Tough Grime with Less Scrubbing
Whether it’s built-up soap scum on the shower walls, ground-in dirt on the floor tile, or dried toothpaste on the vanity top, a Magic Eraser sponge will make short work of it. Just dampen it and rub it on the offending mess. In most cases, the mess will come right off. These sponges are especially useful for removing ground-in dirt from porous floor tile and getting those pesky nonslip strips in the bottom of your tub clean. Magic Eraser sponges are available at grocery stores, hardware stores and wherever cleaning supplies are sold. Unlike regular sponges, they wear out pretty fast, so stock up. While you’re out, look for these other very useful household cleaning supplies.
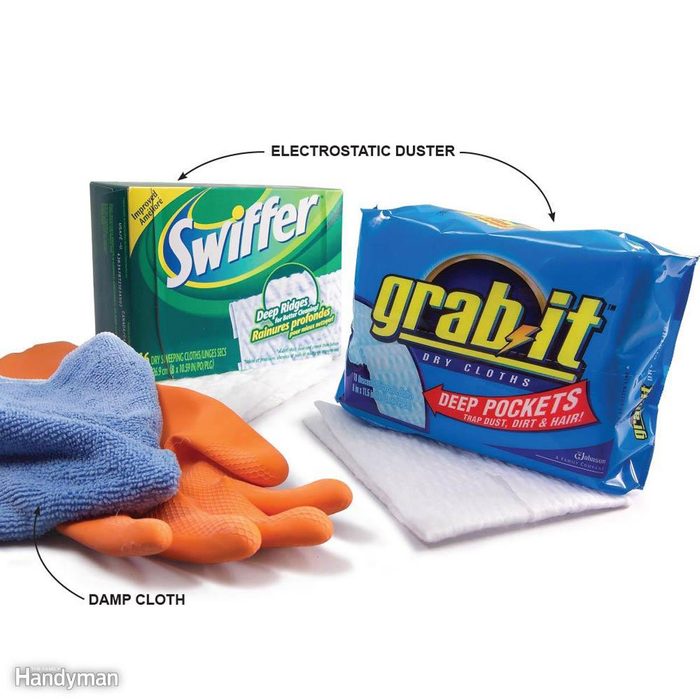
Capture Dust – Don’t Just Spread It Around
Feather dusters and dry rags pick up some of the dust they disturb, but most of it just settles elsewhere. Damp rags or disposable cloths that attract and hold dust with an electrostatic charge (like Swiffer or Grab-it) work much better. Cloths that attract dust with oils or waxes also work well but can leave residue on furniture. Use vacuum attachments only on surfaces that are hard to dust with a cloth, such as rough surfaces and intricate woodwork, because the exhaust stream from a vacuum whips up a dust storm. Tried of trying to think up a way to clean a chandelier? Check out one easy solution.

Keep Closets Clear for Easy Cleaning
Closets are dust reservoirs, full of tiny fibers from clothes, towels and bedding. Every time you open the door, you whip up an invisible dust storm. You can’t prevent clothes from shedding fibers, but you can make closets easier to keep clean and vastly cut down on dust. Here are some tips:
- Clear plastic containers are best. They lock fibers in and dust out, while letting you see what’s inside. When you dust, they’re easy to pull off the shelves and wipe clean.
- Enclose the clothes you rarely wear. Those coats you wear only in winter shed fibers year-round. Slip garment bags or large garbage bags over them. They help to contain fibers and keep the clothes themselves from becoming coated with dust.
- Keep closet floors clear. If the floor is cluttered, chances are you’ll just bypass it while vacuuming. But a wide-open floor adds only a few seconds to the vacuuming chore. And a wire shelf lets you clear all those shoes off the floor without losing storage space.
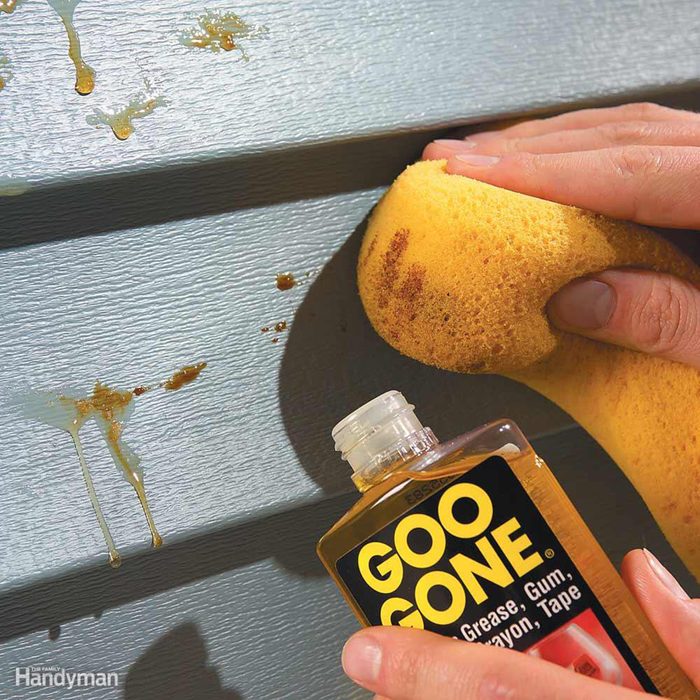
Remove Tree Sap from Vinyl Siding
If drippy trees or deck lumber deposit sap on your vinyl siding, don’t delay cleanup. The longer you wait, the more stubborn the sap will become. If you wait too long, you might have to use a pressure washer. If you attack the fresh sap within a week or so, a common kitchen cleaner such as Formula 409 or Fantastik will likely remove the goo. You can also use a biodegradable product such as Simple Green. If standard cleaners won’t dissolve the sap, use a citrus cleaner such as Goo Gone ($5 at home centers). Check the label of any product you use to make sure it’s recommended for vinyl and test it in an inconspicuous spot for discoloration. Apply the cleaner with a rag or sponge. Scrub tough spots with a soft-bristle brush.
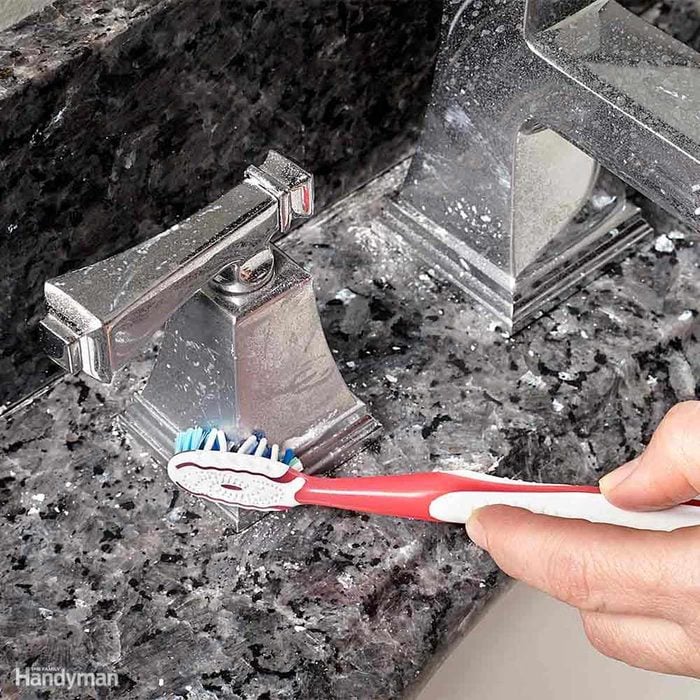
A Scrub and a Wax
Community Cook Joe Stiles writes: ‘Every three months, I use CLR Calcium, Lime and Rust Remover and an old toothbrush to clean all the faucets and lavatories. Then I apply an automotive car wax like Turtle Wax and buff after the wax hazes. Our fixtures look like new.”
See why keeping an old toothbrush is great for your computer.
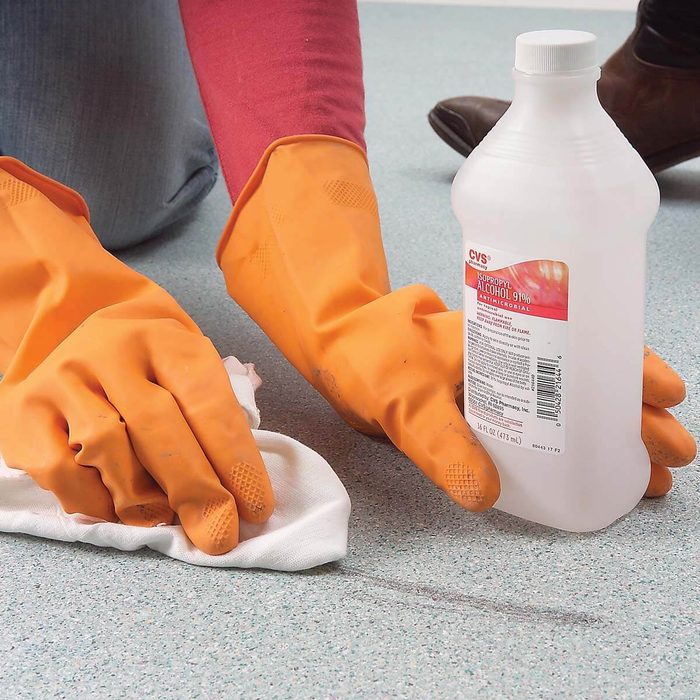
Remove Tough Stains from Vinyl Flooring
Sheet vinyl ‘resilient’ flooring is so easy to clean that it may never require anything beyond damp mopping with a cleaner intended for vinyl floors. But if your floor has marks or stains that still won’t come off, you can use stronger stuff. Isopropyl alcohol, sold as a disinfectant at drugstores, is a mild solvent. It’s the best cleaner for heel marks and works on other tough stains too. You can also use lighter fluid or mineral spirits. Remember that all these products are flammable; turn off any nearby pilot lights and hang rags out to dry before throwing them away. Learn how to use it to remove tough stains from vinyl flooring.
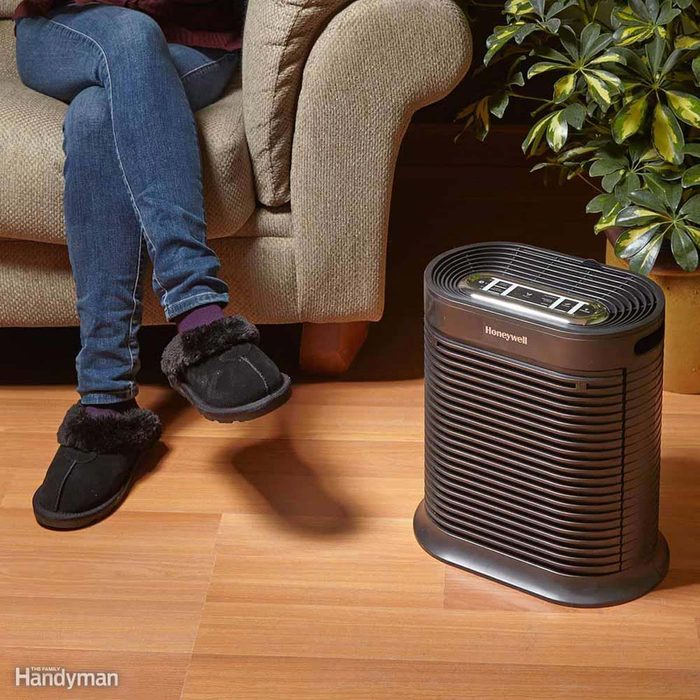
Purify the Air
Here are four things you can do to cleanse the dusty air in your home:
- Place air purifiers in your most-used rooms to help suck up dust before it settles. Choose units with True HEPA filters rather than ionic cleaners, which release ozone, a respiratory irritant.
- Add a plant to every room. Plants naturally absorb common indoor pollutants like benzene and formaldehyde. NASA studies have shown that many plants, including aloes, palms and ferns, can absorb as much as 80 percent of the formaldehyde in a room in 24 hours.
- Keep the humidity in your house between 40 and 50 percent to help lower static electricity, which can cause dust to stick to surfaces and make them harder to clean. A humidifier (cleaned regularly) and leafy indoor plants will both increase humidity levels. Just don’t increase the level to more than 50 percent. This will promote the growth of mold, a far more dangerous condition than dust. You can monitor humidity levels with a cheap hydrometer from a gardening store.
- Keep your windows closed on windy days. Dust enters through doors and windows in the form of pollen, mold spores and airborne pollutants.
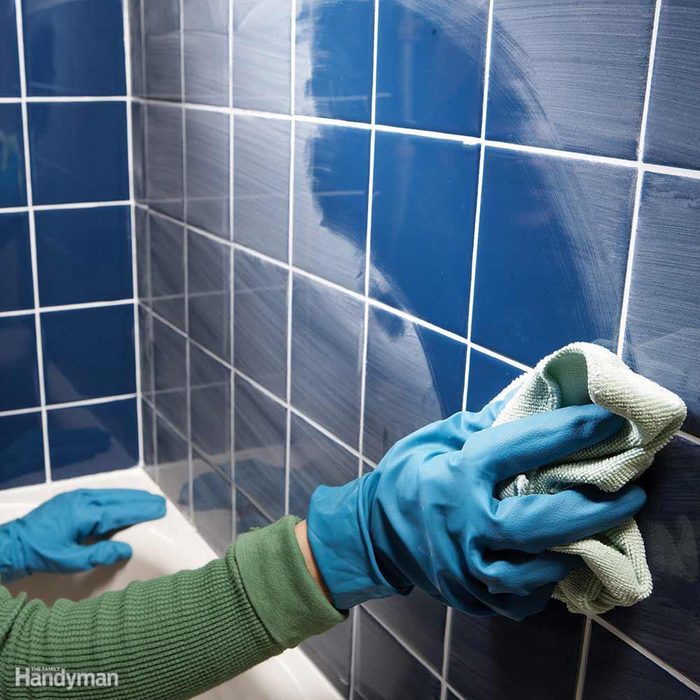
Easier Grout Haze Cleanup
The thousands of microscopic fabric hooks on a microfiber cloth (available at discount stores) make it perfect to cut through the dried grout haze left after a tiling project. You’ll still have to rinse and repeat, but the haze will clean up faster than it would with an ordinary rag.
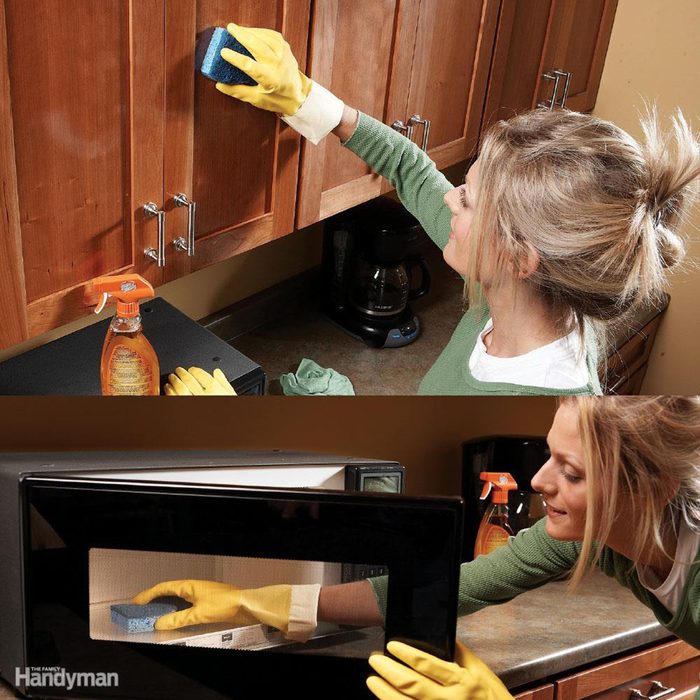
Cut Grease With a Hot Rag
Grease and dirt build up on kitchen cabinets over time. To clean your cabinets, heat a slightly damp sponge or cloth in the microwave for 20 to 30 seconds until it’s hot. Put on a pair of rubber gloves, spray the cabinets with an all-purpose cleaner containing orange oil, then wipe off the cleaner with the hot sponge. For stubborn spots, let the cleaner sit for five minutes first. Wipe in the direction of the wood grain. Rinse and reheat the sponge as it becomes saturated. Then wipe the cabinets with a cool, damp cloth. The orange oil leaves a shiny coating. This works for any wood or metal surface.
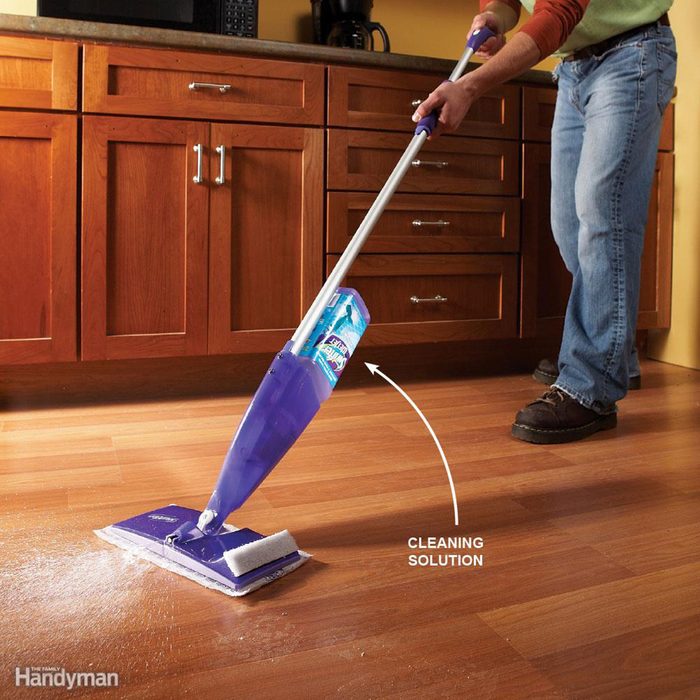
Clean Hard Floors Faster
If you’re still using a regular old mop for everyday cleanup of your hard-surface floors, there’s a better way. Save the mop for really dirty or muddy floors and simply spot-clean using the tool the pros use.

Blow Out the Garage
Forget the broom—clean out the garage with a leaf blower. It’s fast (about five minutes), you don’t have to move heavy stuff, and you can clean work surfaces and shelves along with the floor. First put away papers or anything else that you don’t want blown away. Open the overhead door. Put on a dust mask, earplugs and safety glasses, then turn on the leaf blower and blow out the dust and debris. Use the leaf blower to get under workbenches and to clean off the benches themselves. If you don’t own a leaf blower, you may be able to use your shop vacuum by connecting the hose to the exhaust port. This cleaning method works great for screen porches, too. No leaf blower? Our buyer’s guide can help you decide which one is best for you.
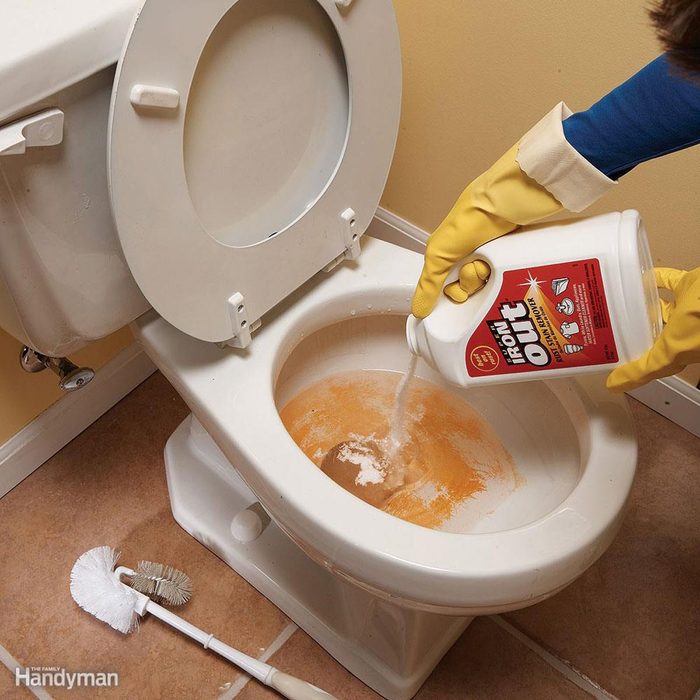
The Right Stuff for Rust
All-purpose cleaners won’t remove rust stains from sinks, tubs and toilets, even with a lot of elbow grease. The trick is to use a stain remover like Super Iron Out. Look for a rust stain remover or a product that contains diluted hydrochloric acid (also listed on product labels as hydrogen chloride, HCL or muriatic acid). Be careful not to use a product containing bleach—it’ll set the stain. For toilets, add Super Iron Out to the water in the bowl, then clean with a stiff nylon-bristled brush. For sinks and tubs, first wet the surface with water. Apply Super Iron Out to a damp sponge (wear rubber gloves and a mask—this stuff is powerful!). Wipe the stain with the sponge until it’s gone. Rinse the surface with plain water to completely remove the Super Iron Out.
Know the dangerous side of some cleaning products before using them.
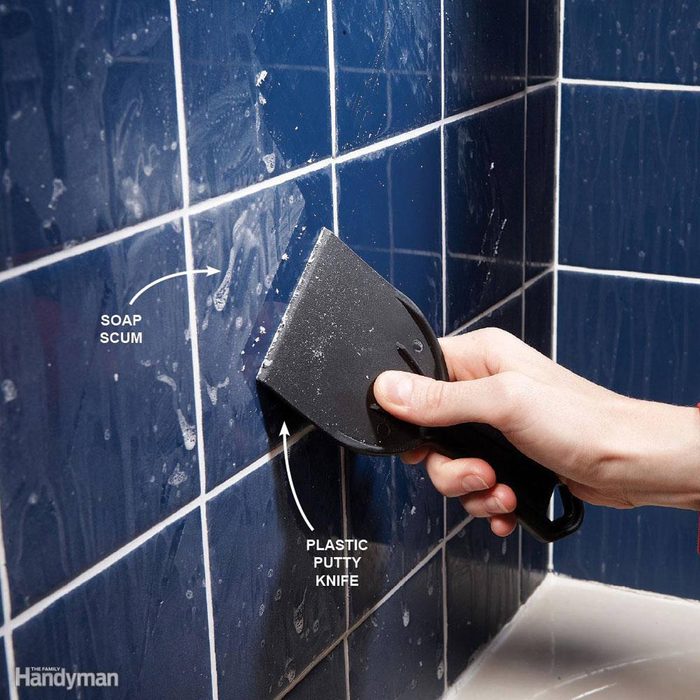
Remove Bathroom Soap Scum
Soap has a nasty way of forming a hard-to-remove film on tile in tubs and showers. You won’t get rid of it by rubbing. Instead, wait for the surface to dry, then scrape off the scum with a 4-in. plastic putty knife. For grout lines and textured surfaces, use a Mr. Clean Magic Eraser. To prevent soap scum buildup, stop using real soap and start using a synthetic. Chemically speaking, any soap in a liquid or gel form, and some bar soaps (Zest and Ivory), are actually synthetic soaps and much less likely to leave a tough film in your sink, shower or tub.
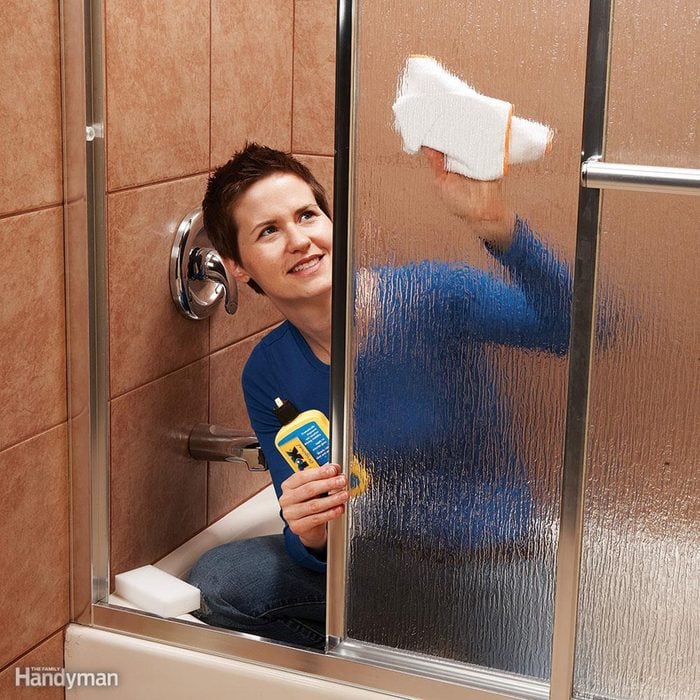
Scum-Proof Your Shower Doors
Keeping shower doors clean and streak free is a challenge—unless you know the pros’ secrets. Start by cleaning any mold, mildew or streaks off the glass with a glass cleaner. Use a Mr. Clean Magic Eraser to get into the cracks in textured glass. Scrape off tough buildup with a razor blade. Dry the doors with a cloth.

Spot-Clean Food and Drink Spills
The best way to prevent stains is to treat spills immediately. That’s why pros love stain pens, like Tide To Go and the Clorox Bleach Pen Gel, which are designed to remove small stains from upholstery, grout, caulk, porcelain and clothing (avoid the bleach pens for colored fabric). Just press the tip into the stain to release the solution, then rub the tip across the stain to remove it. Inexpensive and portable, they’re great at removing food and drink spills.
Before applying a cleaning solution to an entire surface or fixture, test it on a tiny area to make sure it won’t damage or discolor the finish.
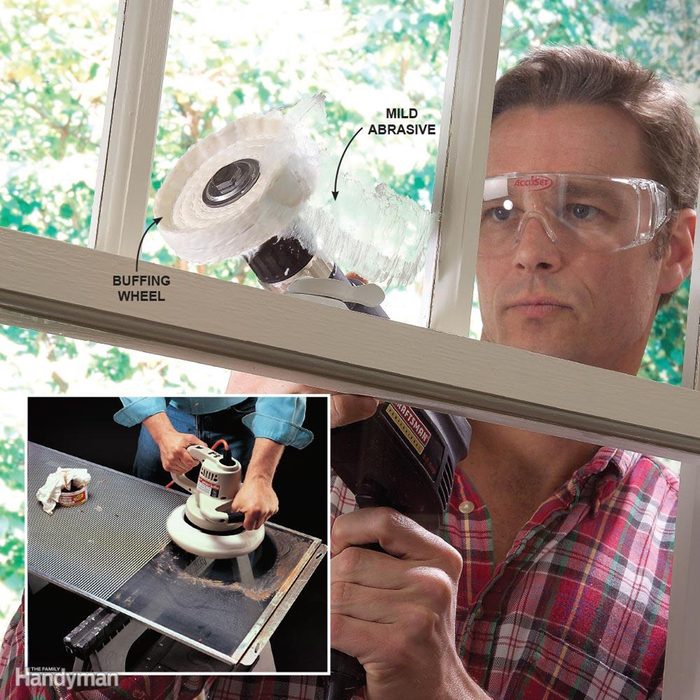
Get Tough on Glass Stains
If your usual glass cleaner won’t remove tough stains, apply a mild abrasive cleaner such as Soft Scrub, Bar Keepers Friend or Bon Ami and scrub with a soft cloth. (Here’s a tip for washing windows.) These abrasives usually won’t scratch glass, but test a small area first just to make sure. If elbow grease alone won’t do the job or if you have large areas to cover, use a drill and a small buffing wheel (find one at home centers).
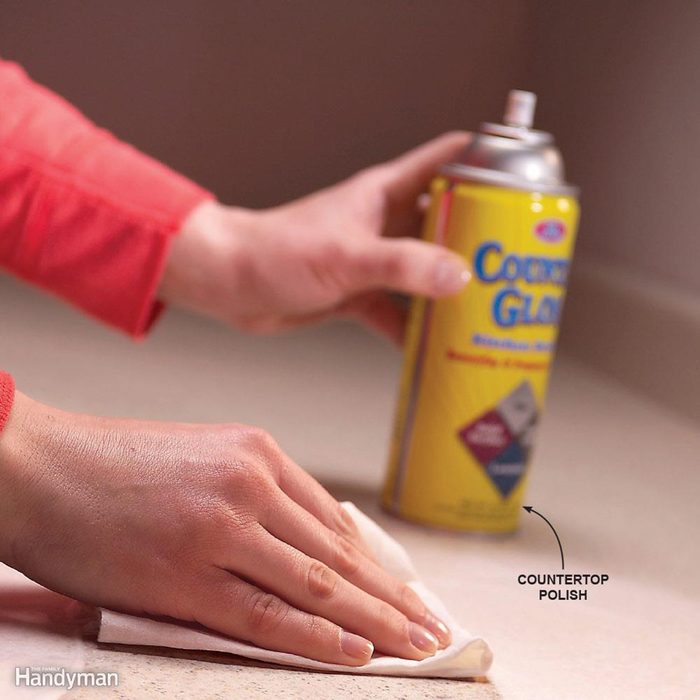
Stop Countertop Stains
If you have an older plastic laminate countertop, you’ve probably noticed that it doesn’t repel stains like it used to. That’s because years of wear have left the surface lightly scratched and porous. The best way to prevent stains is to wipe up spills immediately. But a protective coating of countertop polish can also help. Plus it will restore the shine to dull countertops. All you have to do is spray it on and wipe it off every few weeks. Most home centers and discount stores carry countertop polish such as Countertop Magic or Hope’s Counter Top Polish.

How to Remove Stains From Plastic Laminate Countertops
Got tough stains on your plastic laminate countertops? Using the right cleaner and having some patience will make even the most stubborn stains go away. Follow our advice and you’ll get rid of those ugly stains for good.
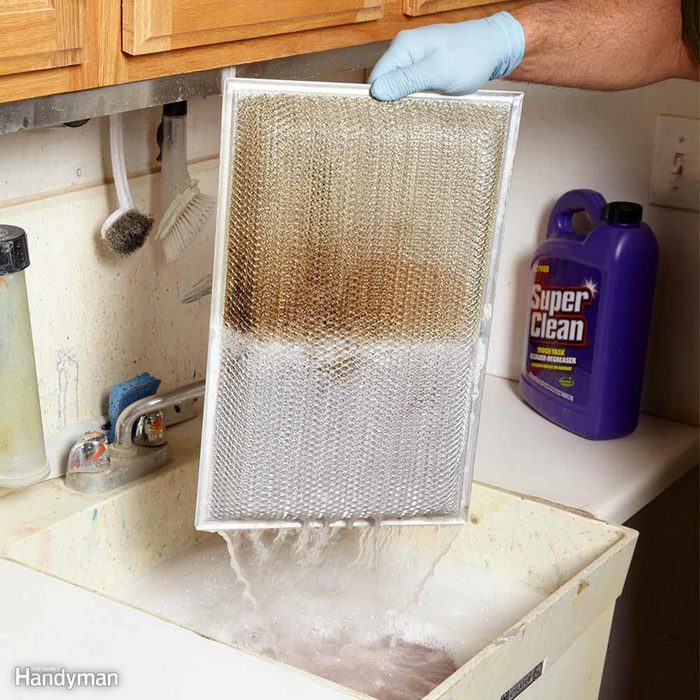
Clean Range Hood Grease Filters With a Degreaser
Running your vent hood grease filter through the dishwasher can yield disappointing results. Likewise with ‘grease cutting’ household cleaners. Get great results with a water-based degreaser from the auto parts store. Fill the sink with hot water and degreaser, drop in the filter and let the degreaser do all the work. The filter will come out sparkling clean in just a few minutes. Then just rinse it off.
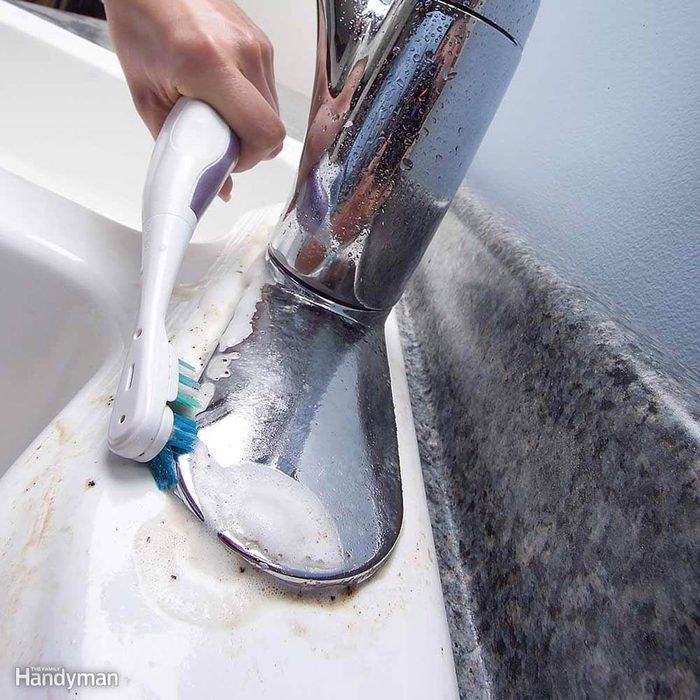
Scour Off Grime with an Electric Toothbrush
Now that discount and dollar stores carry cheap electric toothbrushes, you can add a modern twist to routine cleaning. Rapid vibration will quickly scrub out stubborn dirt, while the long handle can get to hard-to-reach places without all the elbow grease.

How to Clean Oven Door Glass
It’s a mystery how baking slop gets deposited between oven door glass panels. But it’s clear that you can’t remove it without disassembling the door. Get the instructions for removing the door and clean that grungy glass in less than an hour.
Plus: Appliance Care and Maintenance Tips to Make Appliances Last.
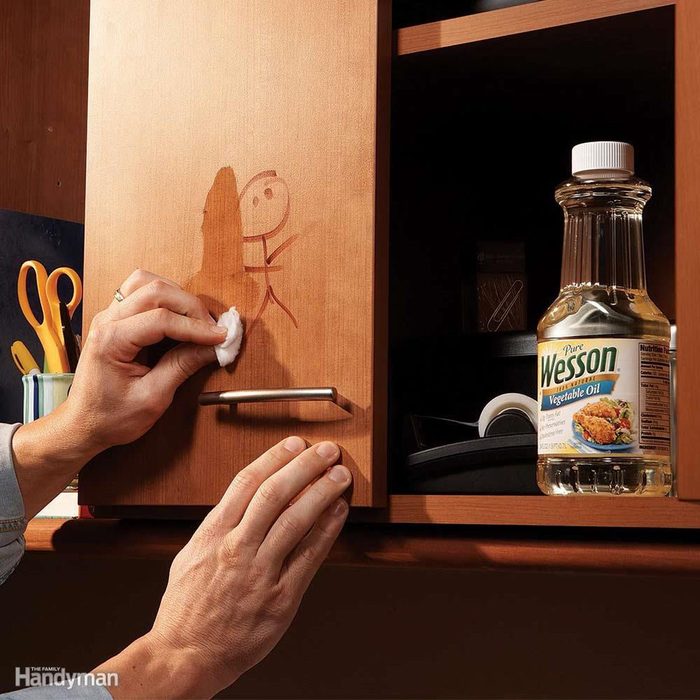
Marker Cleanup
When the permanent marker has ended up in the wrong hands, vegetable oil can clean it off lots of surfaces—even skin! Then just wipe up with a damp cloth and you’re done. See why lemon is such a popular scent with cleaning products.
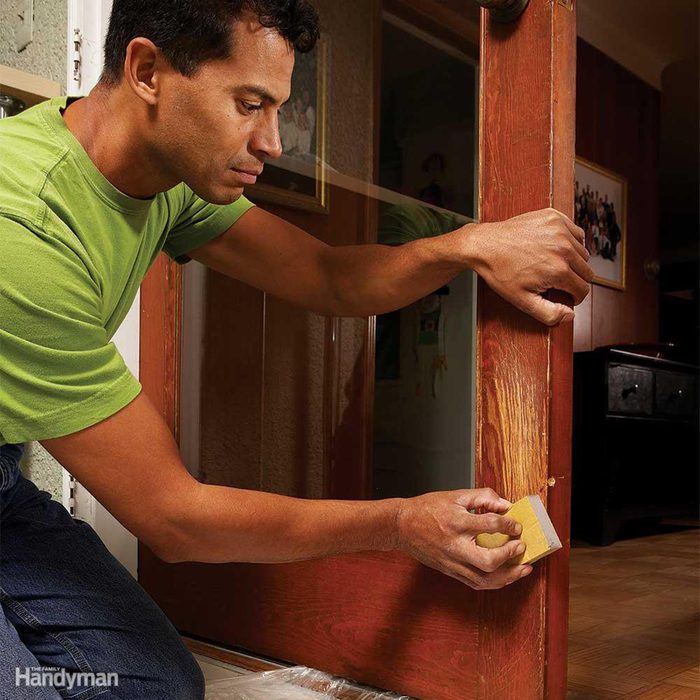
Mask Pet Claw Scratches
Mask shallow claw marks and scratches in wood doors with stain and varnish. Gel stains work well for matching the existing finish. Here’s how to easily repair pet claw marks.
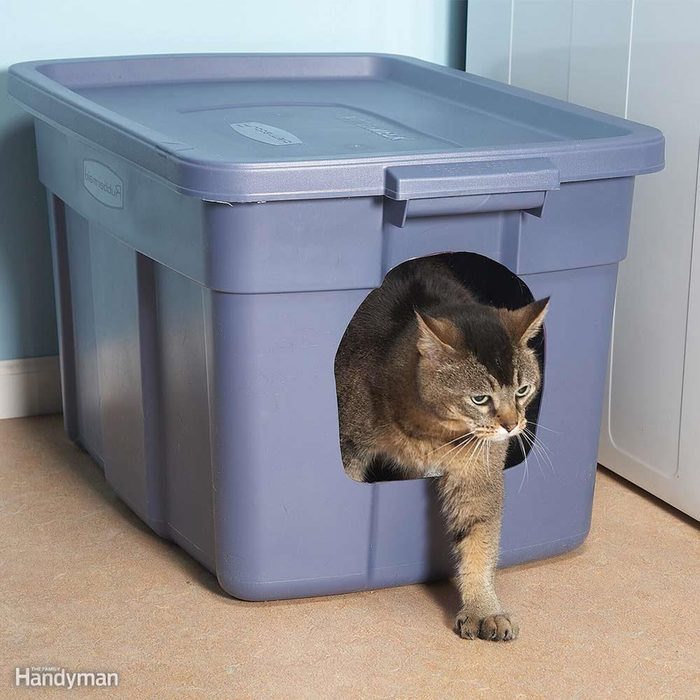
No-Mess Litter Box
It’s not fancy, but it’s a cheap way to keep litter in the litter box where it belongs. Trace an opening on one end of a plastic storage container, then push a sharp razor knife into the plastic and cut out the opening. Pour in the litter and your cat will figure out the rest.
Ditch Your Carpeting
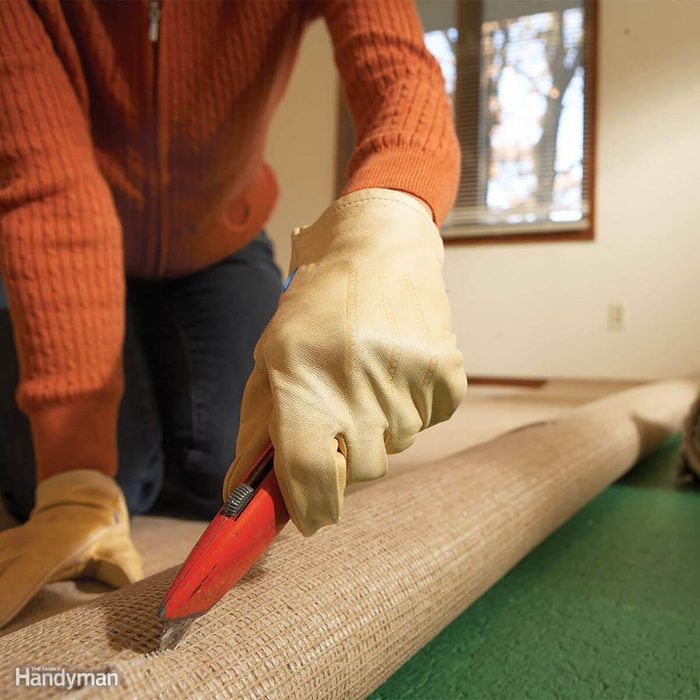
In most homes, carpet is by far the biggest dust reservoir. It’s a huge source of fibers and absorbs dust like a giant sponge. Even the padding underneath holds dust, which goes airborne with each footstep. Although ripping out your wall-to-wall carpet may sound radical, it’s the best thing you can do if you suffer from serious allergies. Replace carpeting with hard flooring like laminate, wood or tile, and wet mop it regularly (with a microfiber cloth) instead of sweeping. Sweeping is more likely to stir up dust than to remove it. Keeping it? Here are some carpet cleaning tips for long-lasting carpet.
Don’t Forget the Doormat
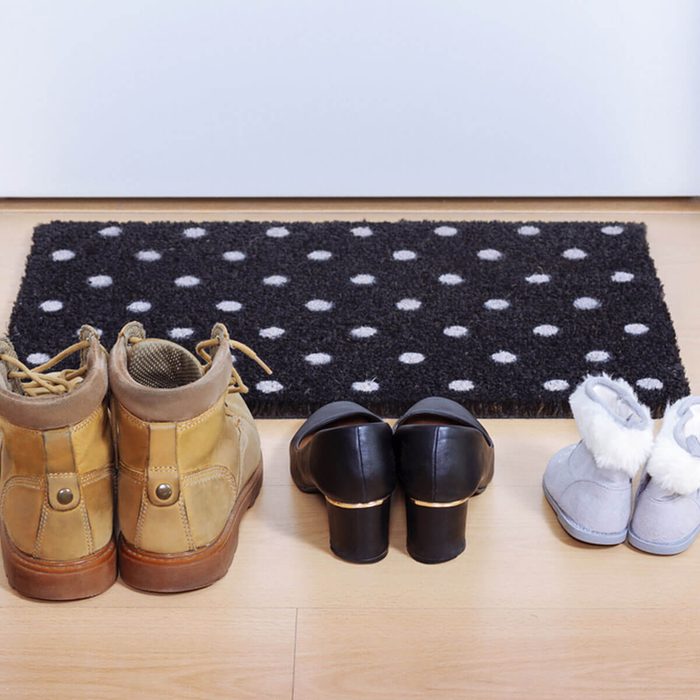
Doormats are your best friend when it comes to trapping dirt, so make sure you have two—one outside the house and one inside. This cleaning hack is especially helpful in the winter when you have salty and snowy boots going in and out of the house. Just be sure to clean the mats regularly as dirty mats contribute to the mess. Keep your hardwood floors clean with these tips.
Combine Tasks
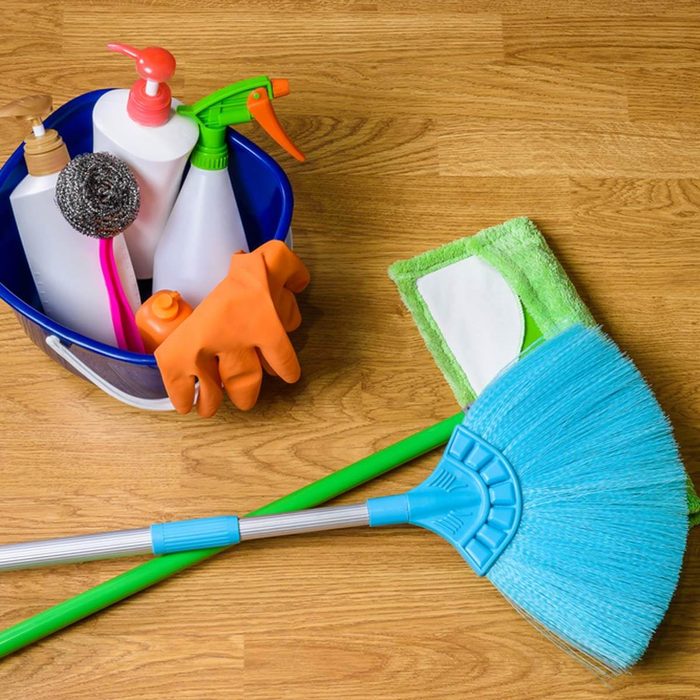
Kill two birds with one stone by doing similar cleaning tasks at the same time. “Clean your baseboards when you are vacuuming or washing floors, clean blinds when you are cleaning windows, etc.,” suggests Becky Rapinchuk, owner of CleanMama.net.
Here’s how often you should be cleaning everything in your home.
Skip the Bucket
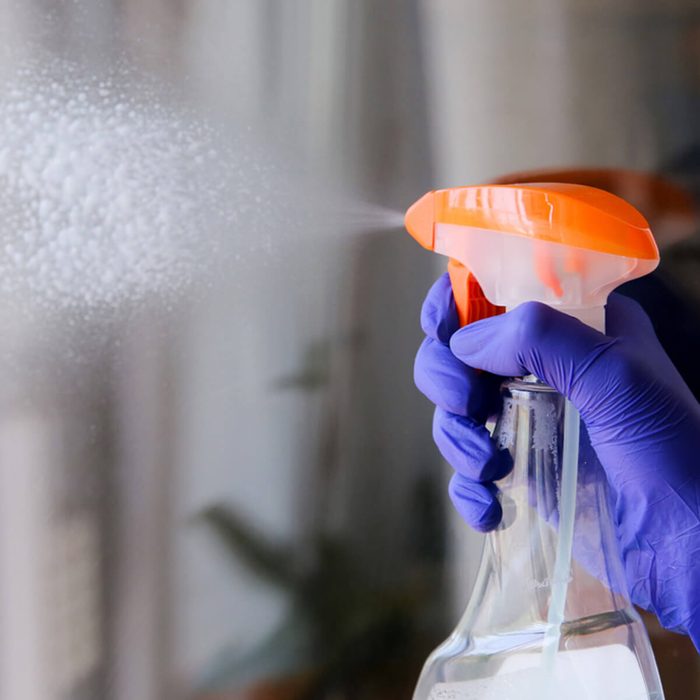
Sometimes moving around the mop bucket only makes more of a mess thanks to the dirty water splashing around. Leslie Reichert, founder of The Green Cleaning Coach and author of The Joy Of Green Cleaning, has a bucket-less mopping technique that works wonders: a spray bottle filled with diluted cleaning solution and a microfiber mop.
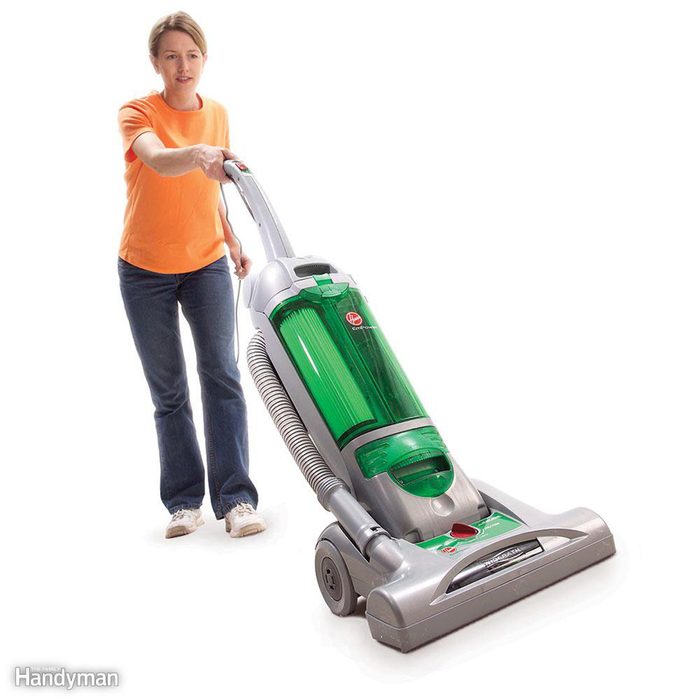
Use the Vacuum Correctly
Cleaning is the best way to maximize the life of your carpet and delay the heavy cost of replacement. Vacuum entrance areas and high-traffic areas twice a week and the rest of the carpeting at least weekly.
For the best results, set the height right. Raise it to its highest setting, turn it on and lower it until you can feel the vacuum trying to tug itself forward. Go slowly. It’s OK to make one quick pass over low-traffic areas, but make two slow passes over high-traffic areas. And, start with a clean filter. A dirty bag or filter reduces your vacuum’s cleaning power.