The Secret Technique for Perfectly Grilled Chicken


Updated: Jan. 23, 2022
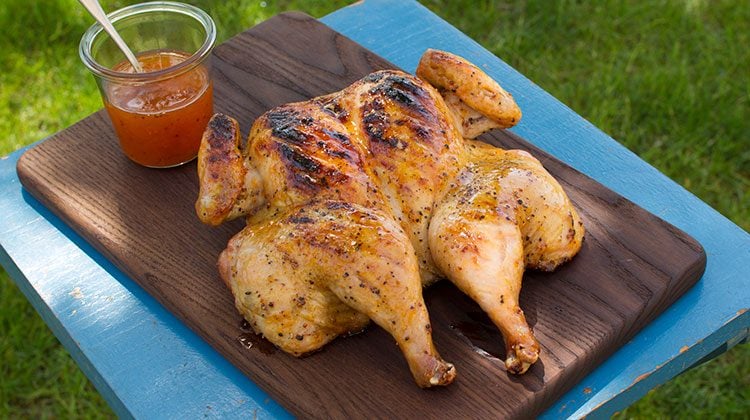
The secret to the most tender, juicy grilled chicken? Spatchcock it.
Ever come across a cooking term that leaves you reaching for the dictionary? I know I have countless times-especially when I’m rifling through the pages of my mother’s vintage cookbooks. The latest technique that left me stumped was when a recipe asked me to “spatchcock the bird.” I practically dropped my book. Spatch-what a bird?
Thankfully, experts in the Taste of Home Test Kitchen are here to clarify. To spatchcock-or to butterfly-a bird is to remove the backbone of a whole bird and lay it flat to cook. You can spatchcock practically any bird; think chickens, turkeys, Cornish game hens and even pigeons! Our resident food editor James Schend explains that this funny-sounding technique is one of the best ways to cook a bird. Looking for dinner right now? We’ve got 99 chicken dinners waiting for you.
Why Spatchcock?
- It’s quick. Because the bird is flattened, the cooking time is cut almost in half.
- The bird cooks evenly. With a whole bird, the breast meat often dries out before the dark meat is done. By flattening the chicken, the legs and thighs (dark meat) will be more exposed to the heat and cook in the same time as the breast.
- The skin gets nice and crispy. Since the whole bird is equally exposed to heat, every inch of its skin will evenly brown and develop that crave-worthy crispiness.
Convinced? Me too. Follow along as the Test Kitchen walks us through the easy steps for how to spatchcock chicken, then grill it up for maximum juiciness.
How to Spatchcock Chicken
You’ll Need:
- 1 broiler/fryer chicken (3 to 4 pounds)
- Glaze of choice (optional)*
* While a glaze isn’t mandatory for mastering this technique, we recommend brushing it onto your bird as it cooks. This will give it that mouthwatering flavor that keeps friends and family coming back for more.
Tools:
- Kitchen shears
Here’s how to make our favorite glaze
In a small saucepan, bring 1 cup white wine to a boil; cook 3-4 minutes or until wine is reduced by half. Stir in 1 cup apricot preserves and 1 tablespoon stone-ground mustard. Set aside for grilling.
Step 1: Cut along the side of the backbone
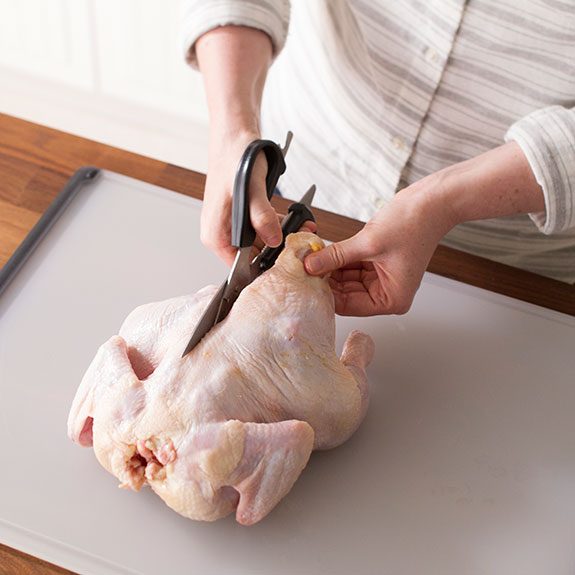
Place the whole chicken on a cutting board with the breast-side down. Locate the backbone along the center of the chicken. Starting at the tail (or pope’s nose), use a sharp pair of kitchen shears to cut alongside the spine. Try to cut as close as you can to the backbone so you don’t risk cutting any other joints. You may feel a little resistance as you cut through certain rib bones of the bird-in this case, press down on the shears with both hands.
Test Kitchen tip: If you’re right-handed, it’s easier to cut along the right side of the backbone. If you’re a lefty, the left side of the chicken is your best bet.
Step 2: Remove backbone
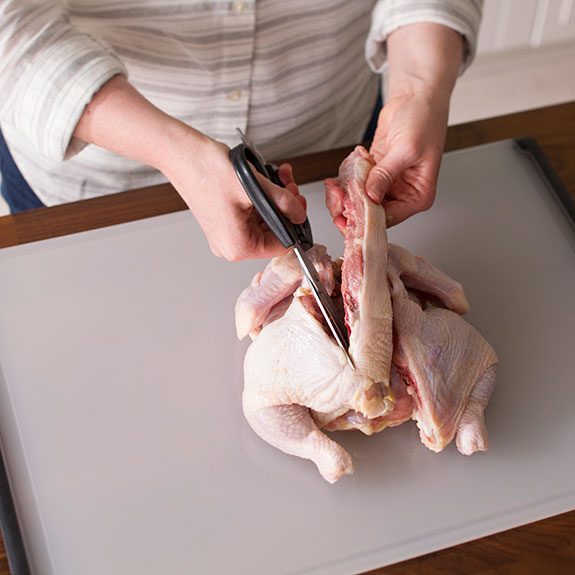
Rotate chicken 180° so that the uncut side is closer to your dominant hand. Cut along the bone again and remove the backbone from the chicken.
Test Kitchen tip: Don’t throw away that backbone! Place it in a resealable plastic bag and save it in the freezer for your next batch of homemade chicken stock.
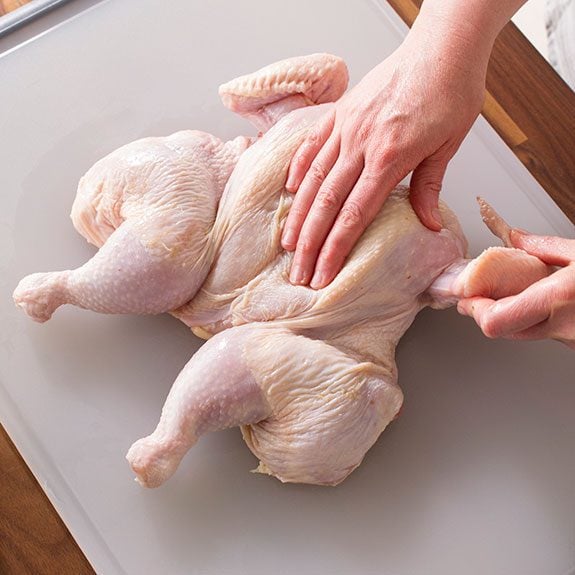
Step 3: Flatten
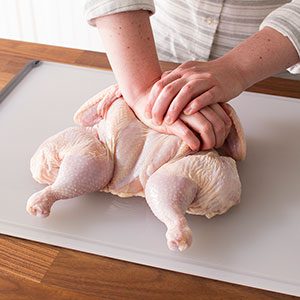
Back to the bird: Flip it over so that the breast side is facing upward. With two hands (and a little bit of hulk-strength), press down firmly on the center of the bird until you hear a crack. This is the wishbone breaking! Voila. Your bird is successfully spatchcocked.
Step 4:Make a few last-minute adjustments
Hold up, we’re not quite ready to cook just yet. See how those wings are splayed out? Give them a quick twist and tuck them underneath the body of the bird.
Test Kitchen tip: This helps keep the wingtips from burning and allows your bird to lie nice and flat.
Sprinkle the skin with kosher salt and pepper, and your chicken is good to go!
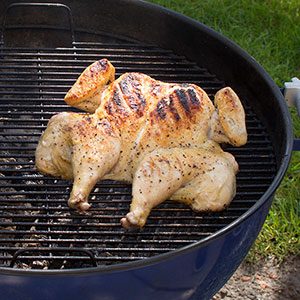
Step 5: Get cooking
You can cook spatchcocked chicken a number of ways, but when the weather’s nice, we prefer to grill ours outdoors. To prepare your grill, fire it up to indirect medium heat and grease the rack with a little oil.
Test Kitchen tip: We prefer to use hardwood charcoal for a rich, wood-fired flavor.
Let’s grill! Place the chicken skin-side down over direct heat. Cover and let cook for 10-15 minutes. Take a peek. The bird should look nicely charred. However, keep a careful eye on the grill. Any fat that drips from the bird can cause the fire to flare-up.
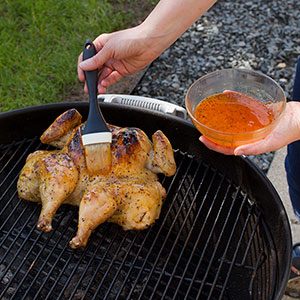
Next, turn the chicken over (skin-side up) and move it over to indirect heat. Grill for about 30 minutes longer. If you’ve got a glaze ready, brush the glaze onto its skin to baste. A silicone brush works well for this. Repeat occasionally as your bird cooks.
Test Kitchen tip: If some of the bird is still hanging over the open flame, don’t sweat it. The bones on the underside of the chicken will help to insulate the meat, keeping it from over-cooking. Just be sure to keep rotating it around so that a single side doesn’t get scorched.
Step 7: Check for doneness
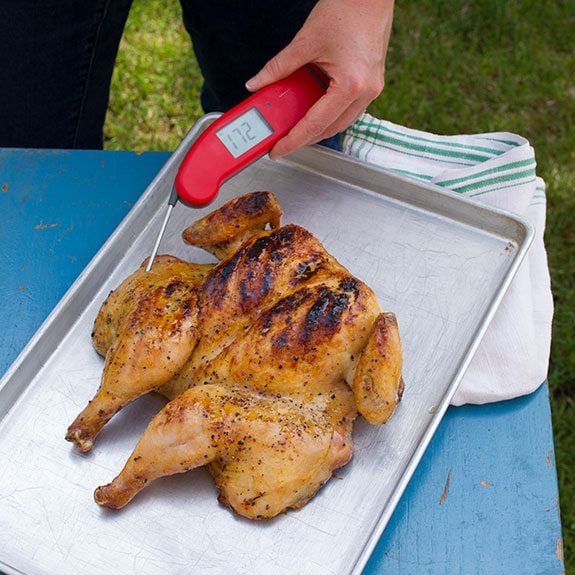
Use a thermometer to tell if the chicken is ready. The thigh should read between 170-175°. Using a pair of long-handled tongs, carefully remove the bird from the grill. Be sure not to pierce the skin or you’ll lose the bird’s tender juiciness.
Test Kitchen tip: While it’s safe to eat poultry once the meat has reached 165°, we prefer the flavor and texture of the thigh and leg meat when it’s cooked between 170-175°. Learn more about food safe cooking temperatures, here.
Let the bird rest for at least 10 minutes before serving. The chicken needs to sit in order for the juices to lock into the meat. Don’t fret: even after 10 minutes, it’ll still be plenty warm enough to serve!
Too cold to grill?
Alternatively, you can roast spatchcocked chicken in the oven. Place it on a roasting rack-or set it on top of a bed of veggies in a shallow baking pan. No need to flip. Just pop it in a 375° oven, breast-side up, until a thermometer reads 170° in its meatiest portion and 175° in the thigh. For more details, check out our step-by-step guide for how to roast chicken.


Originally Published: May 07, 2018