ⓘ
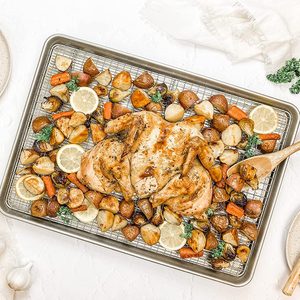
Looking to cook the frozen turkey in a way that it turns out tender on the inside and crispy on the outside? The Taste of Home Test Kitchen has discovered the secret to a perfectly cooked bird: spatchcocking.
What is a spatchcock turkey?
To spatchcock, you remove the backbone of a whole bird and lay it flat to cook.
Why spatchock your turkey?
Though the presentation isn’t traditional, there are a few reasons we prefer to spatchcock turkey:
- It’s quick. Because the bird is flattened, the cooking time is cut almost in half.
- The bird cooks evenly. With a whole bird, the breast meat often dries out before the dark meat is done. By flattening the turkey, the legs and thighs (dark meat) are more exposed to the heat, and so they cook in the same time as the breast.
- The skin gets nice and crispy. Since the whole bird is equally exposed to heat, every inch of its skin will evenly brown and develop that crave-worthy crispiness.
Convinced? Us too. Follow along as the Test Kitchen walks us through the easy steps of a spatchcock turkey recipe. Apply it to your Thanksgiving dinner—or any dinner this year.
How to Spatchcock a Turkey
Ingredients
- 1 turkey (12 to 14 pounds)
- 3 tablespoons kosher salt
- 2 teaspoons coarsely ground pepper
- 1 tablespoon minced fresh rosemary
- 1 tablespoon minced fresh thyme
- 1 tablespoon minced fresh sage
Tools
- Kitchen shears: You’ll use a pair of these heavy-duty kitchen scissors to flatten the turkey.
- Large cutting board: This task requires a turkey-size cutting board, ideally one with a trough to collect juices. Make sure to wash it between spatchcocking and carving!
- Baking sheet with rack: Using a baking sheet and rack will allow air to circulate for even drying and roasting.
Directions
Step 1: Pat the bird dry
Using paper towels, dry your turkey to remove any extra moisture from its skin. The less moisture, the more crispy the skin will get as it cooks.
Test Kitchen Tip: Lay a damp cloth beneath your cutting board. This will keep it from sliding while you work.
Step 2: Cut along the side of the backbone
 TMB Studio
Place the whole turkey on a cutting board with the breast-side down. Then, locate the backbone along the center of the bird. Starting at the tail, use a sharp pair of kitchen shears to cut alongside the spine. Try to cut as close as you can to the backbone so you don’t risk cutting any other joints. You may feel a little resistance as you cut through certain rib bones of the bird—in this case, press down on the shears with both hands.
Test Kitchen Tip: Finding it difficult to cut? Stand on a stool for extra leverage.
Step 3: Remove the backbone
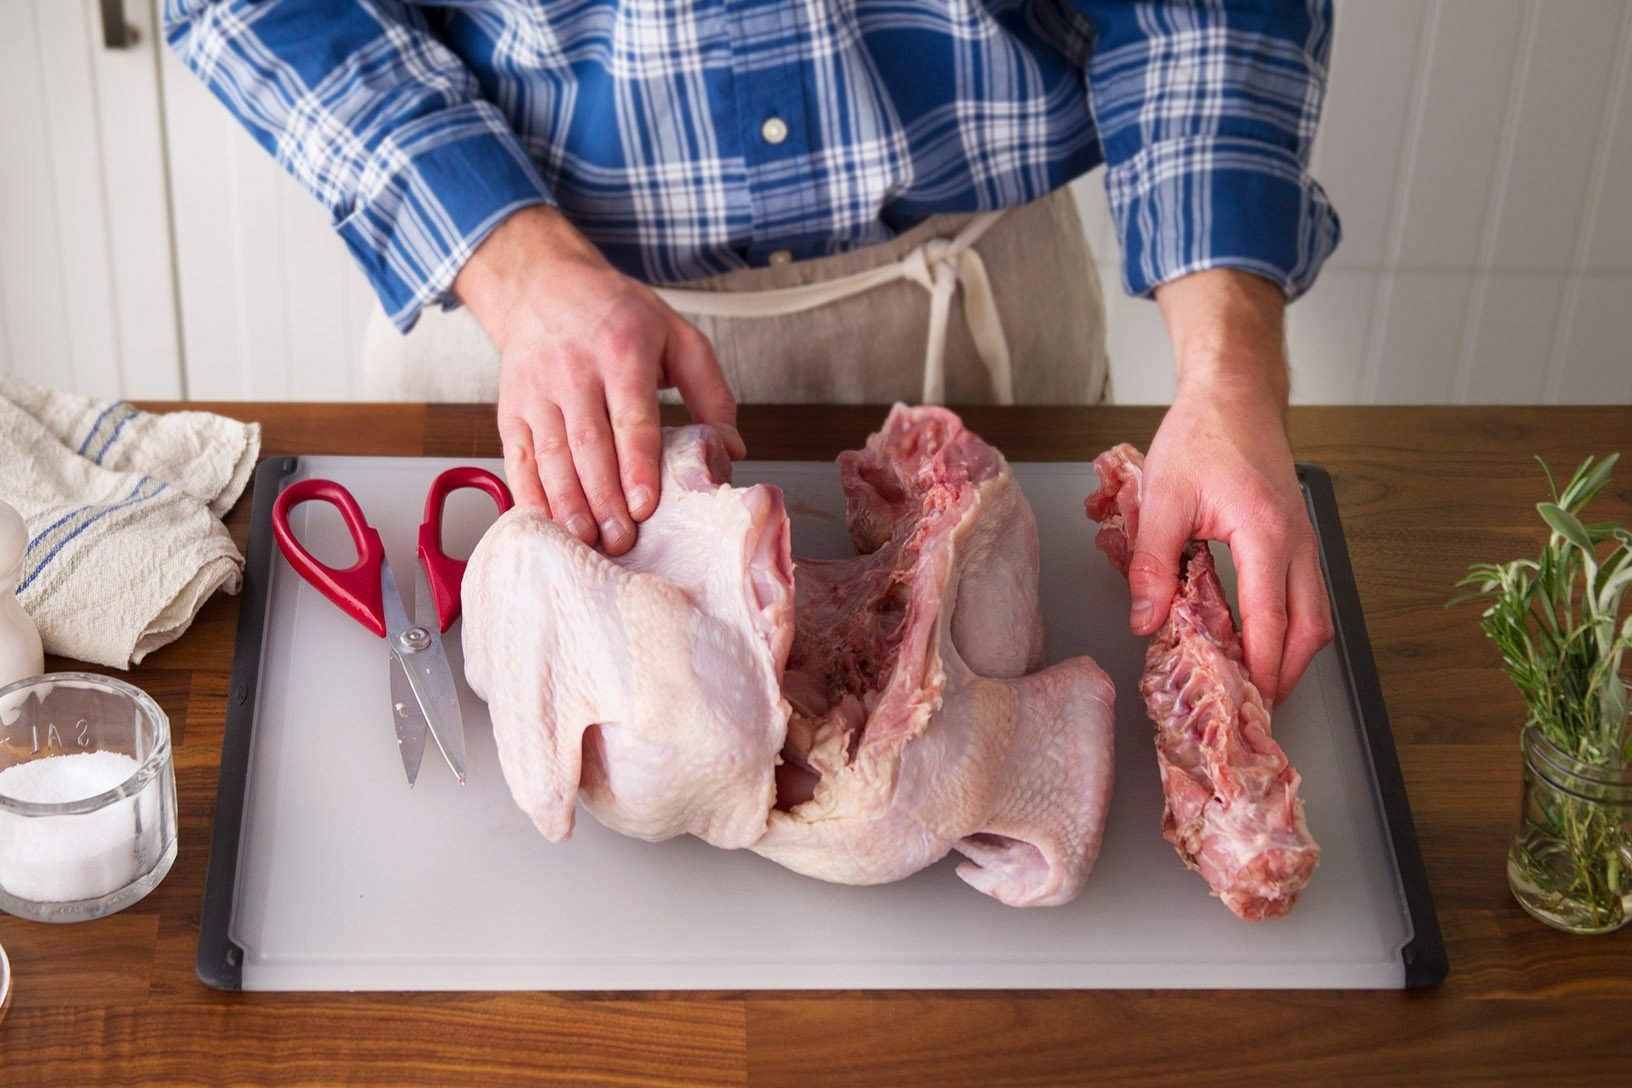 TMB Studio
Rotate the turkey 180° so that the uncut side is closer to your dominant hand. Cut along the bone again and remove the backbone from the turkey.
Test Kitchen Tip: Don’t throw away that backbone! Place it in a resealable plastic bag and save it in the freezer for your next batch of homemade stock or gravy.
Step 4: Flatten the bird
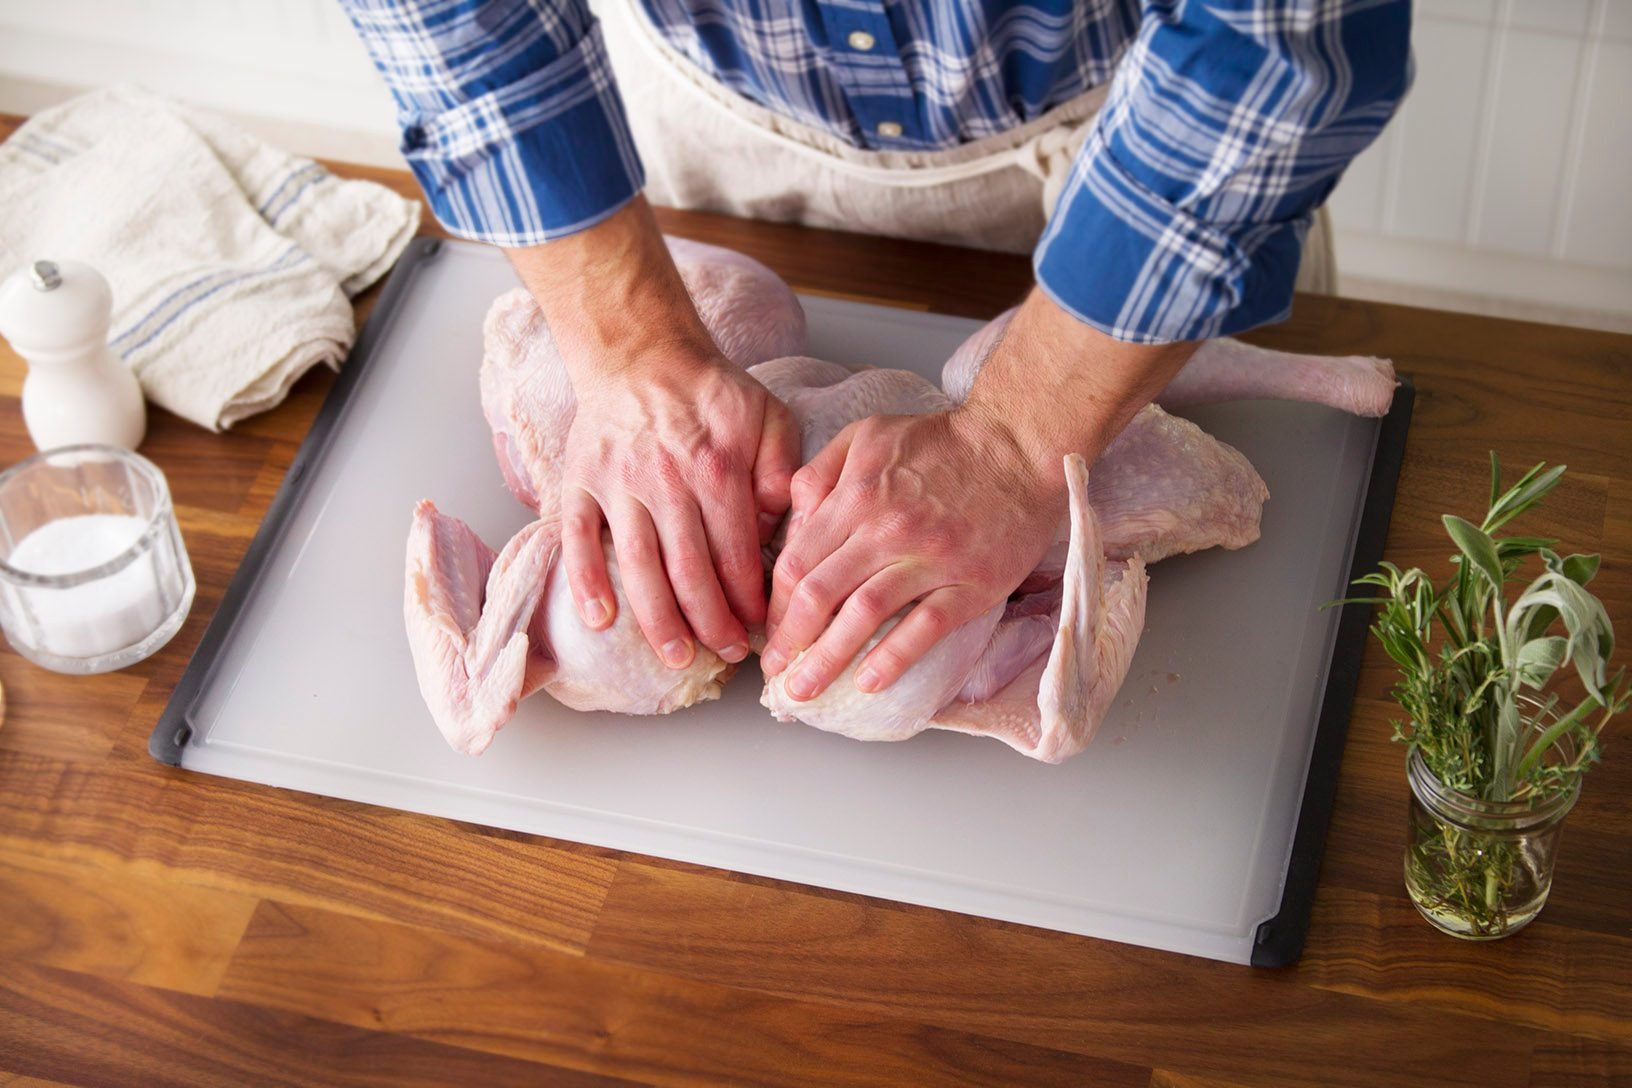 TMB Studio
Back to the bird: Flip it over so the breast side is facing upward. With two hands (and a little bit of hulk-strength), press down firmly on the center of the bird until you hear a crack. This is the wishbone breaking! Voila. Your turkey is successfully spatchcocked.
One last thing. See how those wings are splayed out? Give them a quick twist and tuck them underneath the body of the bird. This helps keep the wingtips from burning and allows your bird to lie nice and flat.
Step 5: Add herbs and seasonings
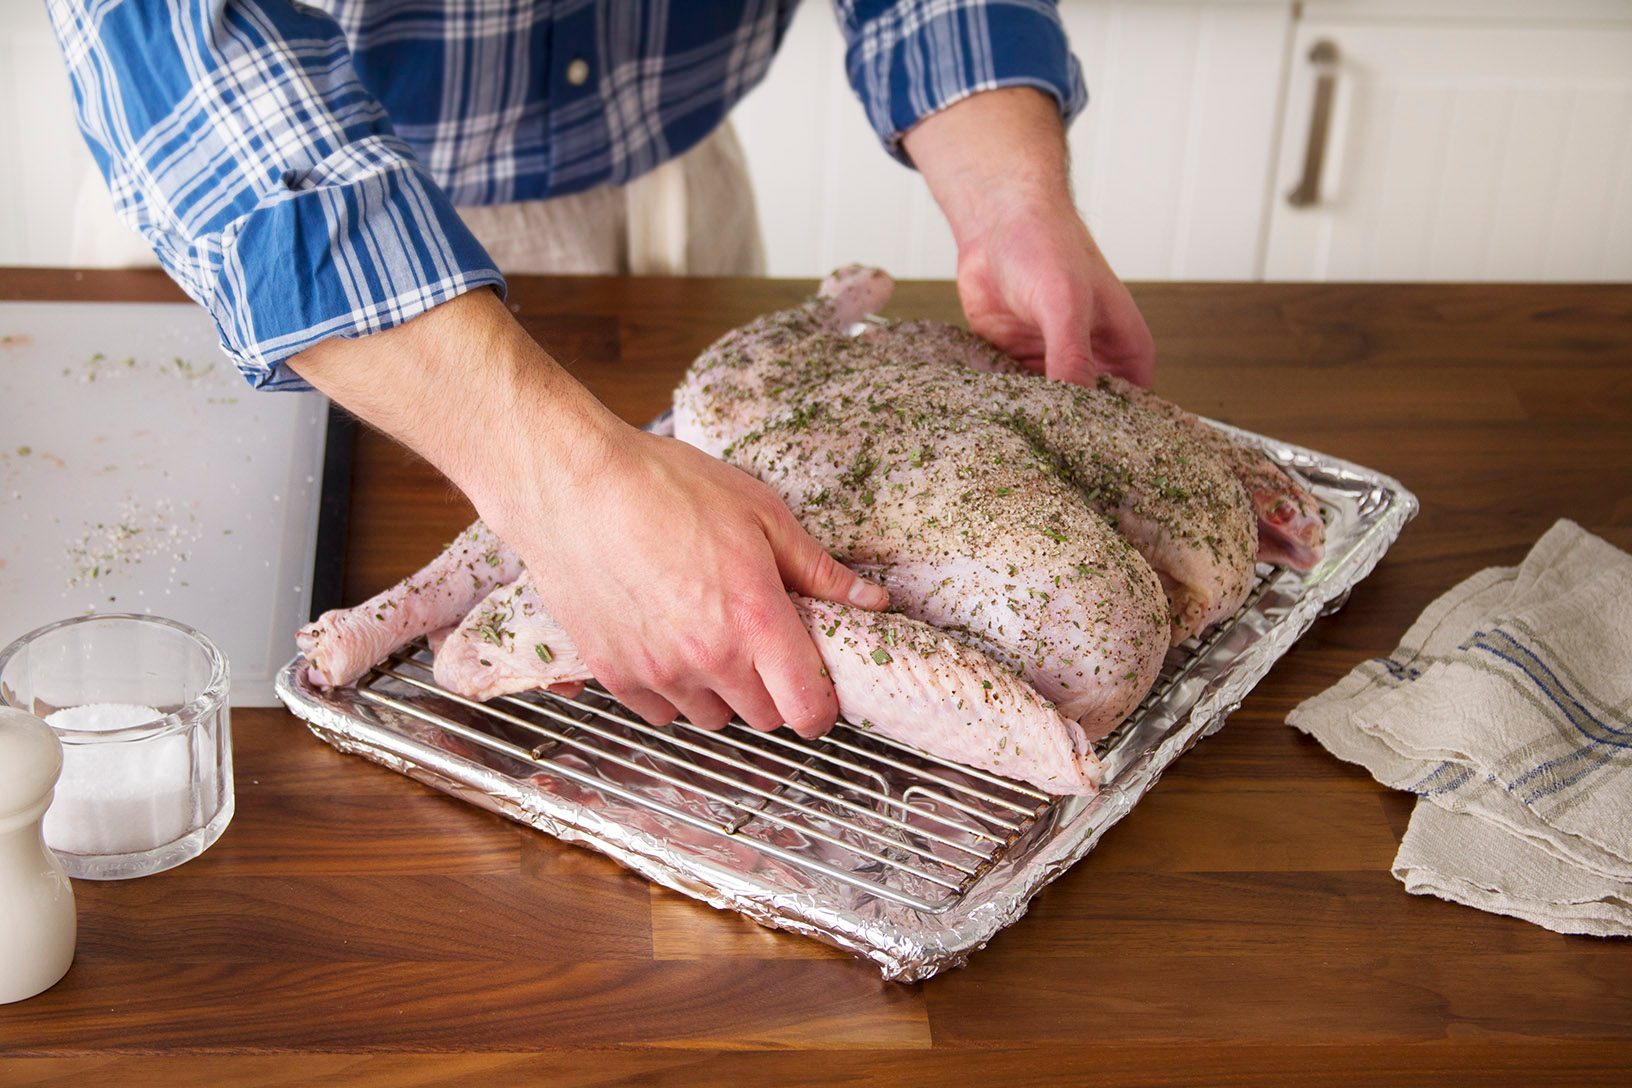 TMB Studio
Transfer the turkey to a rack on a foil-lined rimmed baking pan. Mix the salt, pepper and minced herbs, and rub (with gusto!) all over the turkey.
Test Kitchen Tip: Adding salt to the skin now will help remove extra moisture so the skin can get extra crispy.
Step 6: Refrigerate overnight
Pop it in the fridge, uncovered, overnight. Trust us: A little patience makes a big difference.
Test Kitchen Tip: Don’t be tempted to cover the turkey with plastic wrap or foil before chilling. You want it to air out. The more the skin is exposed to air drying in the fridge, the crispier it will be after roasting.
Step 7: Get cooking
Ready to roast? Dial up the oven to 450°F and remove the spatchcock turkey from the refrigerator. Let your turkey come to room temperature while the oven gets toasty. (It’ll cook more quickly and evenly this way.)
At last! It’s time to cook. Send the bird into the oven and roast for about 1-1/4 to 1-1/2 hours. You’ll know that it’s cooked to perfection when a thermometer inserted into the thickest part of the thigh reads 170°-175°.
Test Kitchen Tip: If your oven is filled with Thanksgiving sides or pie, consider smoking or grilling the turkey instead.
Step 8: Let your turkey rest
Don’t grab that carving knife just yet! Once out of the oven, let the turkey stand for 15 minutes before carving. This will help the meat retain its juices.
Step 9: Carve and eat!
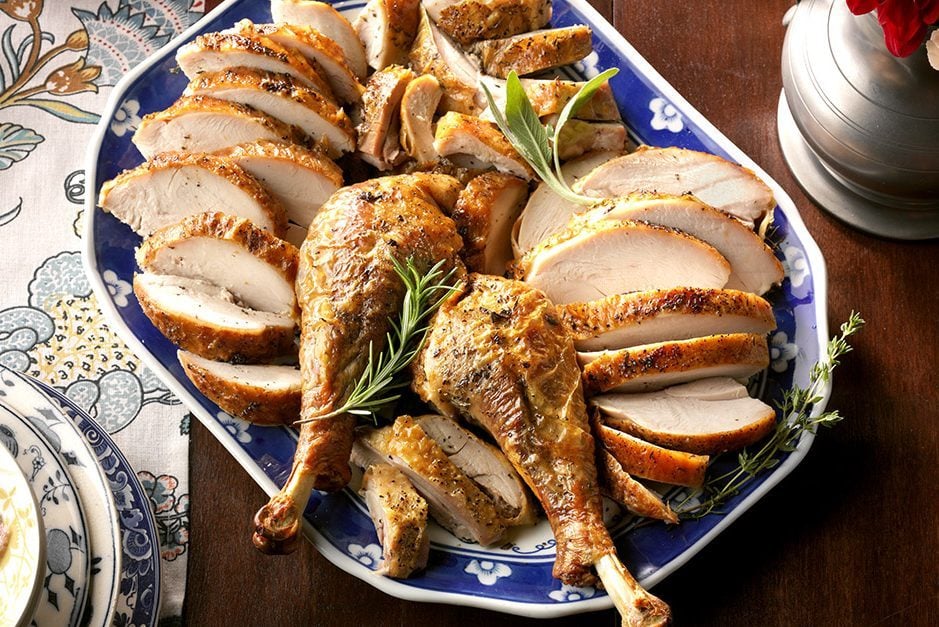 TMB Studio
Follow our step-by-step guide for how to carve a turkey: In short, start with the legs, move on to the breast and finally plate up the wings. The end result is a gorgeous spread everyone will be grateful for.
Wondering what to serve on the side? Try superstar sides like Triple Cranberry Sauce, Creamy Make-Ahead Mashed Potatoes and Sweet Potato Crescents. But be warned, they just might steal the spotlight!
And Then There's Dessert...
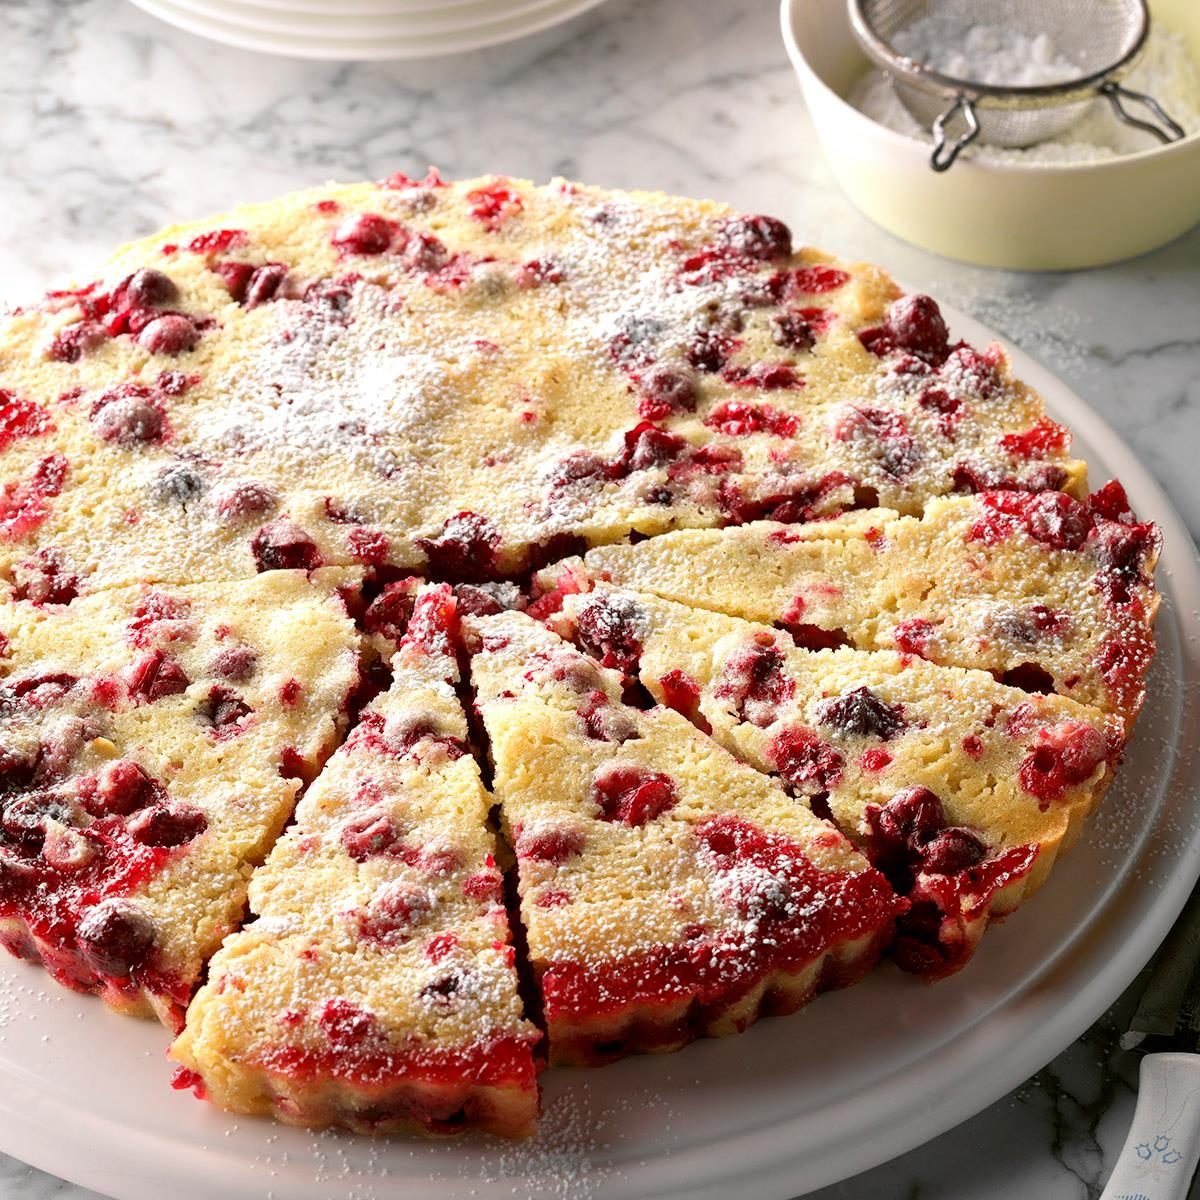
Nantucket Cranberry Tart
While everyone is enjoying a bountiful meal, this eye-catching tart can be baking to perfection in the oven. The pretty holiday dessert calls for very few ingredients, and it's a snap to assemble. —Jackie Zack, Riverside, Connecticut
Go to Recipe
Freezer Pumpkin PieThis freezer pumpkin pie is a cool twist on tradition. Gingersnaps and pecans form the delicious baked crust for the pumpkin and ice cream filling. —Vera Reid, Laramie, Wyoming
Round out the rest of your meal with these
easy Thanksgiving recipes.
Pumpkin Spice CakeWe sometimes call this pumpkin spice cake "Thanksgiving Cake" because it's a tasty alternative to pie, but we don't relegate it to just that holiday. I think you'll agree it's delicious any time of the year.—Kathy Rhoads, Circleville, Ohio. If you're looking for more recipes, then try these
Thanksgiving desserts that aren't pie.
Festive Cranberry-Topped CheesecakeWhen my daughter was 4 months old, my husband and I hosted both of our families for Christmas dinner. I served this cheesecake for dessert. It's quite festive—it was thoroughly enjoyed by all. —Stacy Dutka, Bienfait, Saskatchewan. If you're looking for small-batch recipes, then check out our collection of
mini Thanksgiving desserts.
Rustic Caramel Apple TartLike an apple pie without the pan, this scrumptious tart has a crispy crust that cuts nicely and a yummy caramel topping. —Betty Fulks, Onia, Arkansas. Don't forget to check out our collection of
easy Thanksgiving recipes.
Classic Apple Cranberry CrispFor a little old-fashioned goodness, treat your clan to this divine dish that bakes up warm and bubbly. It's great on its own or served with a scoop of ice cream. —Billie Moss, Walnut Creek, California
Start the feast with these simple
Thanksgiving appetizers.
Chocolate Truffle PieI discovered a fast recipe for a delectable chocolate mousse some years ago and thought it might make a good filling for a pie. The chocolate lovers in our family endorse this scrumptious dessert, saying that it "melts in your mouth"! —Keri Scofield Lawson, Fullerton, California
Easy Apple CakeAfter testing many apple cake recipes with fresh apples, this old-fashioned cake is moist, dense and down-home delicious. Even better, it's quick to fix and, served warm with whipped cream or a dollop of frozen custard, one of my family’s very favorite recipes for decades. —Sherry Ashenfelter, Waterville, Ohio
Peanut Butter Pudding PieThis peanut butter pudding pie is pretty enough to serve to company... if your family doesn't get to it first! No one can resist a sweet piece of this creamy chocolate and peanut butter dessert. —Valerie Sisson, Norton, Ohio
This pie is one of our favorite desserts to make in a flash. Check out more
quick, easy desserts to add to your recipe box.
Red Wine & Cranberry Poached PearsWhile being poached, the pear absorbs the sweetness and spice from the sugar, wine, cinnamon and peppercorn. It makes an easy yet elegant dessert that's perfect for a special night. —Kiersten Atkinson, Birmingham, Alabama
Hosting just got even easier thanks to these
five-ingredient Thanksgiving recipes!
Easy Banana Pudding with Cream CheeseI blend cream cheese, sweetened condensed milk and whipped topping into instant pudding then layer it with vanilla wafers and sliced bananas. Served in a pretty glass bowl, this banana pudding with cream cheese makes for a fancy yet fuss-free dessert. —Edna Perry, Rice, Texas
Pumpkin Chiffon PieFor a tasty treat during the fall, try this pumpkin chiffon pie. The vanilla pudding makes is extra creamy.—Karen Grimes, Stephens City, Virginia
Easy Apple CrispHere's an easy apple crisp! This is a delicious dessert perfect for young cooks to prepare. It's super simple to make since there's no crust—just a crumbly topping. Plus, with apples and oats, it's a wholesome treat. —Sheri Hatten, Devil's Lake, North Dakota
Before you get baking, check out
the best apples for apple crisp.
Pecan Upside-Down CakeMy family does not enjoy fruity upside-down cakes, so I change the fruit to chopped nuts. They like this combination because it reminds them of sticky buns. Any type of nut may be used in this recipe. —Mary Ann Lee, Clifton Park, New York
Pecan Banana Bundt CakeMy daughter, Liz, often made this banana bundt cake for us. It was delicious and different. She discovered five-spice powder during a culinary class field trip. —Marina Castle Kelley, Canyon Country, California
Snappy Pumpkin DessertOur town has a pumpkin-canning factory, so we're known as the "Pumpkin Capital of the World." New pumpkin recipes are always welcomed by our family, and this has become a favorite. The gingersnap crust is the perfect flavor pairing to the pumpkin. —Nilah Fischer, Morton, Illinois
Rustic Cranberry TartsI like to serve colorful desserts for gatherings with family and friends. These beautiful tarts are filled with cranberry and citrus flavor, and they’re easy to make and serve. —Holly Bauer, West Bend, Wisconsin
Gingerbread Pumpkin TrifleI like to spice up our Thanksgiving dinner with this special dessert featuring two popular holiday flavors. A delicious alternative to pumpkin pie, it's my favorite potluck contribution. —Deborah F. Hahn, Belle, Missouri
Caramel Peanut BarsRich chocolate, crunchy peanuts and gooey caramel peek out from between golden oat and crumb layers. Delicious!—Ardyce Piehl, Wisconsin Dells, Wisconsin
Honey Bun CakeI take along recipe cards to hand out when I bring this moist, fluffy cake to school socials. It always goes quickly. —Kathy Mayo, Winston-Salem, North Carolina
No-Bake Apple PieWe always have an abundance of apples in the fall, so I like to make this easy pie. My husband has diabetes, and this recipe fits into his diet ... but everyone enjoys it. —Shirley Vredenburg, Ossineke, Michigan
Pumpkin Snack CakeThe crunchy, sweet topping makes this simple pumpkin snack cake taste extra special. If you prefer a sweeter cake, omit the topping and spread with your favorite frosting instead. —Steven Schend, Grand Rapids, Michigan
Also check out these
Thanksgiving desserts made with a healthy twist!
Copycat Patti's Sawdust PieWe top this with sliced bananas, whipped cream and more sliced bananas. It's based on a sawdust pie recipe my mom got from a potholder she bought at the Patti's 1880s Settlement in Grand Rivers, Kentucky. —Jennifer Choisser, Paducah, Kentucky
Mixed Nut BarsOne pan of these bars goes a long way. They get a nice flavor from butterscotch chips. —Bobbi Brown, Waupaca, Wisconsin
Hot Chocolate TiramisuInstead of using coffee and rum, I let cinnamon shine in this tiramisu. It's best if eaten within two days—if it even lasts that long! —Cathy Geniti, Saratoga Springs, New York
Possum PieWe found this Possum Pie recipe in a recipe box from the previous cafe owner. It's been on our menu ever since. —David Heilemann, Eureka Springs, Arkansas
Slow-Cooked Pumpkin Apple CobblerThis spiced cobbler with apples and cranberries is sure to please all of your holiday guests. It is perfect for fall but can be made year-round since it uses fresh or frozen cranberries. —Joan Hallford, North Richland Hills, Texas
Gooey Butter CakeA friend gave me a quick version of this gooey butter cake recipe using a cake mix, but I prefer baking from scratch, so I made my own version. My family can't get enough! The middle will sink a little; this is normal. This dessert is delicious served warm or cold. —Cheri Foster, Vail, Arizona
Pumpkin BrowniesChocolate and pumpkin pair up to make a family-favorite fall dessert. These pumpkin brownies are fantastic for parties and picnics. —
Taste of Home Test Kitchen
Apple Betty with Almond CreamI love making this apple betty for friends during the peak of apple season. I plan a quick soup and bread meal, so we can get right to the dessert! —Elizabeth Godecke, Chicago, Illinois
Apple Brandy Pecan CakeMy favorite apple cake is made with a shot of brandy and drizzled with caramel to set off the wonderful flavors. If alcohol is a no-go, use orange juice instead of apple brandy. If you'd rather follow a chocolate route, add mini chocolate chips to the cake and use chocolate ice cream topping for the drizzle. —Nancy Heishman, Las Vegas, Nevada
Pumpkin TiramisuTiramisu is a classic dessert that everyone enjoys. For a more fall flavor, try this version, which features a creamy pumpkin filling and sweet spices.—Holly Billings, Battlefield, Missouri