5 Easy Ways to Melt Chocolate Every Home Baker Should Know


Updated: Jul. 12, 2022
Sue Stetzel teaches us how to melt chocolate the right way.
Melted chocolate tends to find its way into our sweetest, most decadent dessert recipes. And what’s not to love? A drizzle of that stuff can turn fresh fruit into a charming dessert or become the heart of a showstopping cake. If you’ve ever tried to melt chocolate on your own, you know the task isn’t as simple as it may seem. One false move and the smooth, dazzling drizzle of your dreams can become a burnt, crumbly mess.
Luckily, Taste of Home Community Cook Coordinator and chocolate-melting guru, Sue Stetzel, is here to help. As a fervent home baker, she’s melted many, many chocolate bars with much success. Her secret is simply to avoid a few common mistakes.
How to Melt Chocolate: 5 Ways
Our Test Kitchen uses a handful of different techniques to melt chocolate—and each has its own benefits depending on what you’re using the chocolate for. Follow along as we guide you step-by-step on how to melt chocolate the quickest way, the best way for drizzling and more.
1: The Microwave Method (Aka the Quick-and-Easy Way)
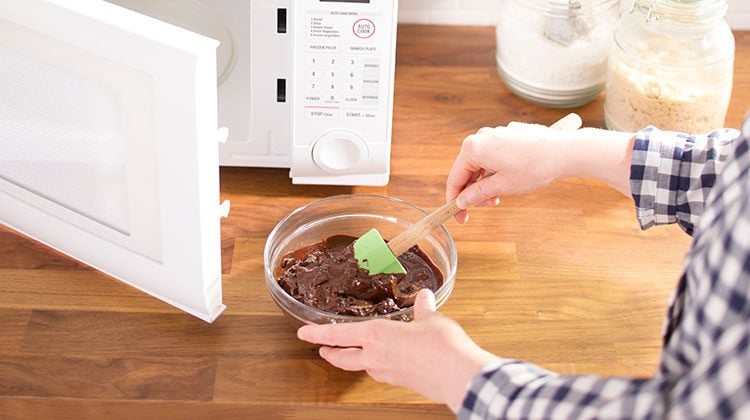
Best for melting chocolate fast without dirtying many candy tools.
Step 1: Chop chocolate into small pieces and place in microwave-safe bowl.
Step 2: Microwave at 70% power for 1 minute. Remove from microwave and give it a stir.
Step 3: Continue to microwave in 30-second increments, stirring frequently, until the chocolate has fully melted.
Editor’s tip: Because each microwave behaves differently, it’s best to keep a careful eye on your chocolate. The main drawback to this method is that it’s easy to overcook chocolate in a microwave. (This is truer still for white chocolate!)
2: The Stovetop Method (Aka the Double Boiler Method)
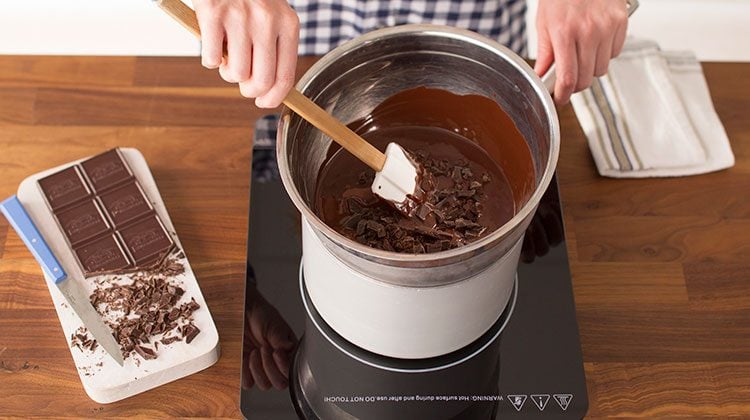
Best for keeping a close watch on the melting chocolate (and making your home smell like a chocolate factory)!
Step 1: Add chopped chocolate to the top of a double boiler over barely simmering water.
Editor’s tip: Don’t have a double boiler? A metal bowl over a saucepan works in a pinch. Just make sure the bottom of the bowl doesn’t touch the water in the pan.
Step 2: Stir gently and frequently until the chocolate has completely melted. Use a heat-safe rubber spatula to scrape the sides of the bowl as you stir.
3: The Water Bath Method (Aka the Hands-Off Way)
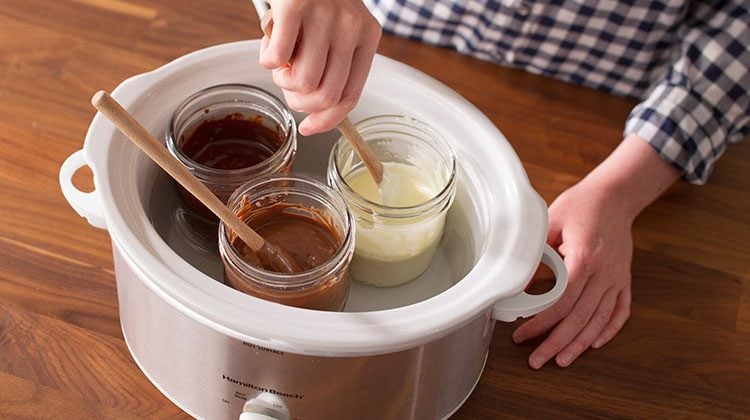
Best for melting multiple kinds of chocolate at once.
Step 1: Fill a slow cooker one-third of the way with hot water. Set the heat to high, leaving the lid off.
Step 2: Place wide-mouth mason jars filled with chopped chocolate pieces into the water.
Editor’s tip: Take extra care to keep water from getting inside the jars—no seized chocolate, please!
Step 3: Step away for 30 minutes or so, leaving the lid off, and you’ll return to beautifully melted chocolate that’s ready to drizzle.
4: The Slow Cooker Method (Aka the Big-Batch Way)
Best for melting chocolate in large batches. Great for fondue parties…or the average Tuesday.
Step 1: Place chopped chocolate pieces directly into a slow cooker.
Step 2: Set heat to high, cover and let cook for one hour.
Step 3: Reduce heat to low and continue cooking, covered, for an additional hour or until completely melted, stirring every 15 minutes.
5: The Sandwich Bag Method (Aka the Decorator’s Way)
Best for when you want to drizzle or decorate with melted chocolate.
Step 1: Place chopped chocolate in a resealable plastic bag. (A sandwich-sized Ziploc works great.)
Step 2: Seal completely, and place in a bowl filled with hot (but not boiling) water.
Editor’s tip: Worried some water might seep in? Place the sealed bag inside another resealable plastic bag for extra protection.
Step 3: When the chocolate is melted, use scissors to cut a very small hole in a corner of the bag, then drizzle at will! Our French Kiss Truffles are a good place to start.
Mistakes to Avoid While Melting Chocolate
Mistake #1: Forgetting to Dry Your Tools
Before you begin, make sure that your equipment is bone-dry. (This includes the whisk, too!) It only takes a drop of water to turn chocolate from warm and melty to gritty and gross. Kitchen experts call the latter seized chocolate. When moisture comes into contact with chocolate, it causes the sugar to turn into syrup and the cocoa particles to clump. You’ll know your chocolate has seized if it looks dry and lumpy.
Pro tip: Have a bowl of seized chocolate? Here’s what to do: If you’re making candy (Homemade Peanut Butter Cups, for example) or any other recipe where the chocolate needs to re-harden, you’ll need to set the seized batch aside and start over. But don’t throw it out! Simply add more water, melted butter or cream, a little at a time, and stir or whisk until smooth. This reactivated chocolate is a little less potent and won’t firm back up, but it still makes a great topping for vanilla ice cream.
Mistake #2: Rushing It
When exposed to too much heat too fast, chocolate gets an icky, grainy texture—or worse, it can burn entirely. The thing to remember when melting chocolate is to cook low and slow. For most chocolate-melting methods, it’s smart to stir often to keep any sections (often along the edges) from overheating.
Editor’s tip: Instead of breaking chocolate into pieces with your hands, take a few moments to roughly chop the chocolate. Breaking the bar into small pieces allows the chocolate to melt evenly. Burnt bits begone!
Mistake #3: Not Springing for the Good Stuff
Though we certainly wouldn’t turn down a bargain brand if it were served to us (all chocolate is delicious in our eyes!), one secret for a smooth-as-silk finish is to invest in good-quality chocolate. Look for one that’s got a high cocoa butter content. I recommend buying two or three different brands and performing a taste test at home to determine which you like best. (See how we did it with chocolate ice cream, here!)
How to Use Melted Chocolate
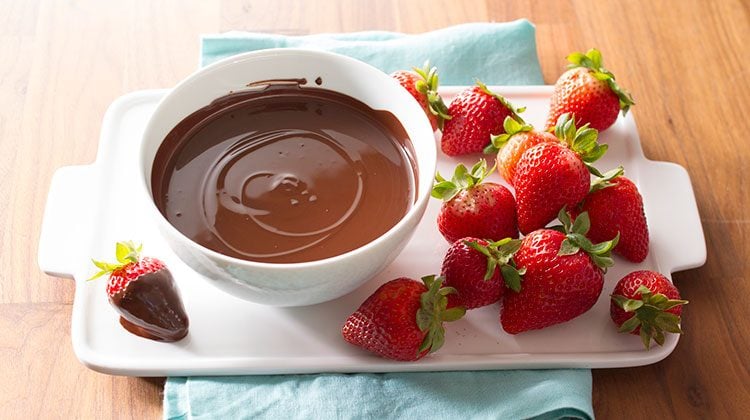
Follow these methods to a T, and you’ll be up to your ears in rich, silky-smooth melted chocolate. What to do with it afterward is entirely up to you. Taste of Home staffers enjoy it with strawberries, marshmallows and pretzels (but we won’t judge if you have at it with a spoon). Looking for something more involved? Here’s a list of ideas to get you started.
- Dip: For an easy, light dessert, dip your favorite fresh or dried fruit halfway into melted chocolate. Place on parchment paper; add sprinkles if you’d like. Then, let stand until the chocolate has set. Start with our recipe for Chocolate-Dipped Apple Rings.
- Drizzle: Give waffles, milkshakes or homemade candies the Jackson Pollock treatment by dripping, drizzling or splattering melted chocolate on top. Play with colored chocolates to make the decoration pop. Need inspiration? Check out this jaw-dropping recipe for White Chocolate Cranberry Blondies.
- Decorate: Got a birthday or special event? Use the sandwich bag method to create a DIY piping bag, using the melted chocolate as icing. Write a special message on top of the cake or add a simple design such as polka dots.
Get your chocolate fix (without the guilt) with our favorite light chocolate dessert recipes. (They’re all under 300 calories per serving!) Go ahead. Indulge!
Next, learn how to temper chocolate.
Originally Published: January 20, 2021