ⓘ
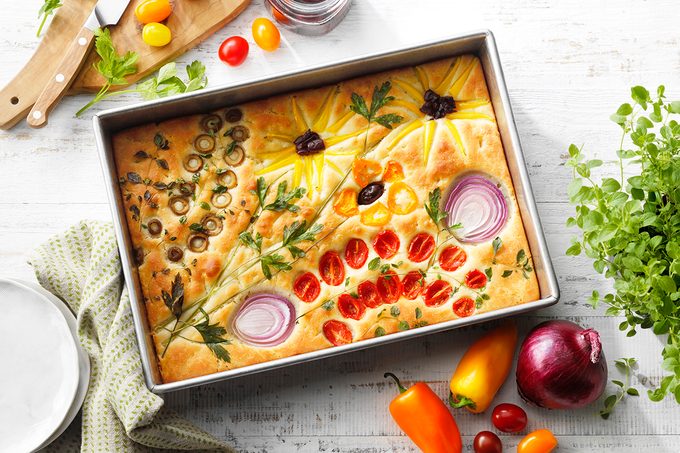
Everyone a freshly baked loaf of bread—especially when that bread is a tender, flavor-filled pan of focaccia. The only thing that could make this bake better is when it gets transformed into a piece of bread art. Sometimes called garden focaccia, this is a soft loaf that gets topped with all the best and brightest herbs and veggies.
And nope, you don’t need to be an artist to turn bread into a canvas. All you need to do is pick a few herbs from the garden and grab few veggies up at the farmers market. You’ll find this no-knead bread is a snap to put together and no matter how you arrange your produce on top, it’ll be a showstopper.
How to Make Garden Focaccia Bread
 Taste of Home
This focaccia recipe comes to us from Taste of Home‘s very own James Schend, deputy editor. He explains that this bread is so easy to make: “It’s one of the least labor-intensive breads since there isn’t any kneading.” The result yields a tender yet chewy bread—one that’s also perfect for layering with veggie decorations.
Ingredients
- 1 packet (1/4 ounce) active dry yeast
- 1-1/4 cups warm water, divided
- 1 tablespoon honey
- 3 cups all-purpose flour
- 1/4 cup plus 3 tablespoons olive oil, divided
- 3/4 teaspoon salt
- 1 teaspoon flaky sea salt (optional)
- Veggies and herbs to decorate
Go to Recipe
Test Kitchen-Recommended Tools
One of the joys of this recipe—besides it being absolutely gorgeous—is that it doesn’t require a lot of special tools. You’ll need the kitchen basics.
- Liquid measuring cup: Use this to measure the olive oil and proof the yeast.
- Mixing bowl: To mix up bread dough, you’ll want an oversized bowl. This set of glass bowls is great for prep and mixing.
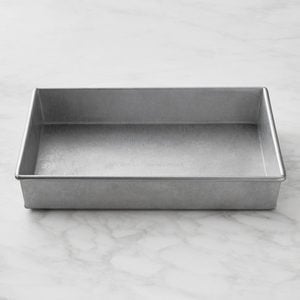
- Metal 13×9 pan: For this recipe, our Test Kitchen recommends using a metal baking pan. This pan will heat up quickly to give the focaccia a nice crust on the bottom.
Directions
Step 1: Proof the Yeast
 Taste of Home
This decorated focaccia starts the same way any yeasted bread recipe does: with proofing yeast.
Proofing yeast activates this microorganism and gets it ready to use in your bread. To do this, dissolve a packet of yeast in a half-cup of warm water (about 100-110ºF) mixed with a tablespoon of honey.
Stir and let this mix stand for five minutes or until it looks frothy. That’s how you know the yeast is alive and ready to be added into the mix. If it doesn’t bubble, start over and make sure your water isn’t too hot.
Editor’s tip: If you don’t have honey in your cupboard, a tablespoon of sugar will work just fine.
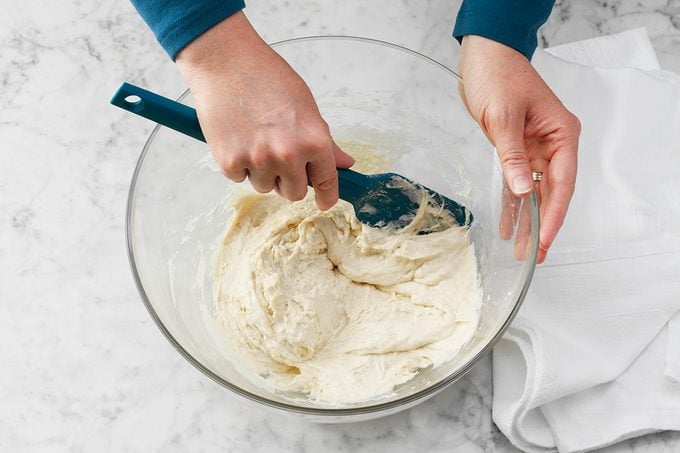
Step 2: Make the Dough
 Taste of Home
In a large mixing bowl, add the flour, 1/4 cup olive oil, salt, water and yeast mixture and stir until smooth. You can use your stand mixer if you like, but this dough will come together easily mixing by hand. In fact, this is the perfect time to break out your dough whisk—just one of our favorite bread-baking tools.
Unlike more traditional loaves, focaccia dough is a bit wet, so don’t be concerned if the dough is a little sticky.
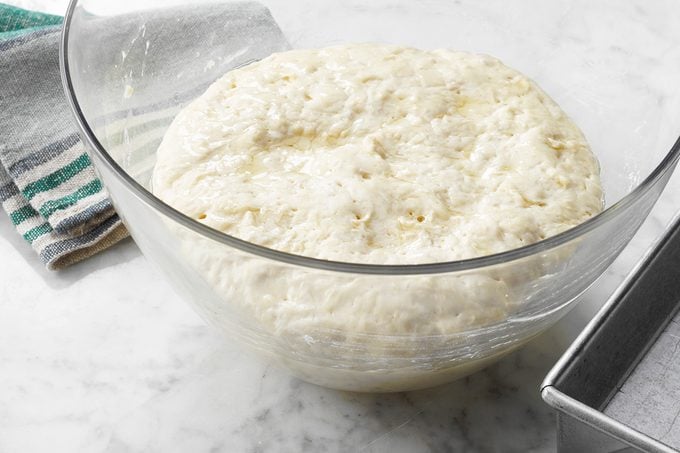
Step 3: Proof
 Taste of Home
When your dough is well mixed, scrape down the sides of the bowl, cover and let the dough rise until it doubles in size. This should take about 45 minutes.
If you’re having a hard time getting the dough to rise at room temperature, you can follow these bread-proofing tricks.
Step 4: Prep Your Baking Pan
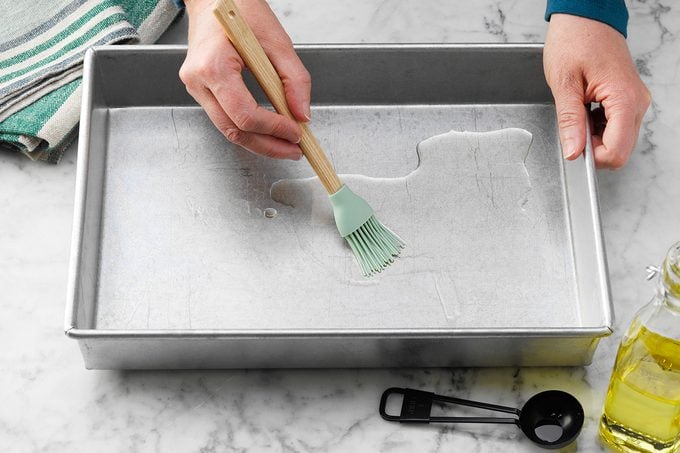 Taste of Home
While the bread proofs, prep your baking pan. Brush a 13×9 pan—our test kitchen used a metal pan here—with a tablespoon of olive oil.
The oil will keep the bread from sticking, but it also adds more flavor. Focaccia is all about the olive oil, so be sure you’re using the good stuff.
Step 5: Press the Dough into the Pan
 Taste of Home
When your pan is prepped, gently scrape the focaccia dough into the pan. Oil your hands and spread dough so it covers the bottom of the pan.
If you find that the dough springs back and doesn’t want to stretch to every corner, let it rest there for 10 minutes and try again. Sometimes the dough just needs to rest a bit longer until it’s pliable enough for this step.
Step 6: Add Dimples and Proof Again
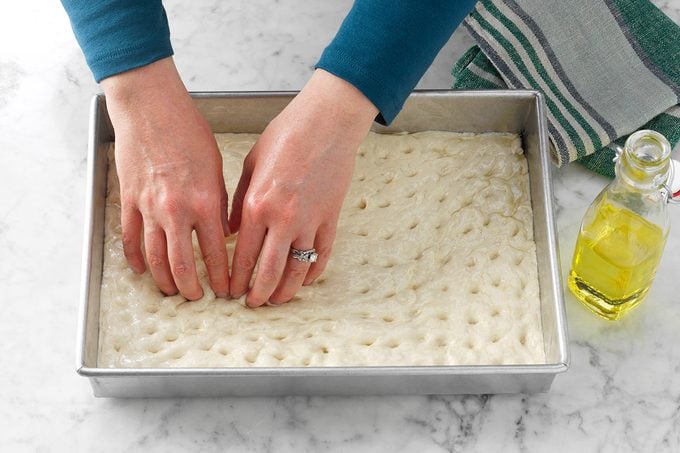 Taste of Home
After stretching the dough, make indentations using your fingertips. These divots will catch all the oil and gives focaccia its signature appearance.
When pressing into the dough, push until you feel the bottom of the pan (but don’t break through the dough to the pan itself). You want these dimples deep to catch the olive oil—they will become much shallower after proofing and baking.
Step 7: Decorate
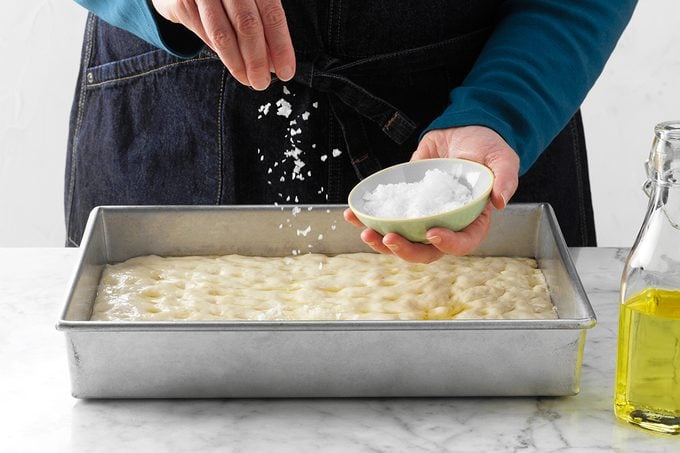 Taste of Home
If you want to keep this focaccia simple, just sprinkle with flaky sea salt. Our Test Kitchen likes the generously sized flakes in a box of Maldon sea salt.
But we know you don’t want to keep it simple! Now is the time to head out to your garden and see what fresh veggies are growing. Use cherry tomatoes, peppers and fresh herbs to decorate the top of the bread. You can even use a few items from the fridge like olives.
Check out these decorated focaccia ideas for inspiration.
Step 8: Proof Again
After you’ve decorated, let the bread proof again. This time just for 30 to 40 minutes.
Step 9: Bake
Bake the focaccia in a 425ºF oven for 20 to 25 minutes. The bread should look golden brown.
This bread is best served warm, so slice into it right away! And if you can’t finish it in one go, it will keep for a few days on the counter; just keep it wrapped up or in an airtight container. You can freeze bread, too.
What Vegetables and Herbs Work Best for Garden Focaccia?
 Taste of Home
Our Test Kitchen experimented a lot with this decorated focaccia bread. After baking up several pans, our pros discovered that some veggies and herbs worked better than others when it came to decoration.
Here are the veggies and herbs that worked:
- Fresh tomatoes: Grape and cherry tomatoes work especially well for garden focaccia. Slices of larger tomatoes may give off a bit too much moisture, so stick with smaller varieties. And remember: Cherry tomatoes come in lots of colors, so make use of the rainbow!
- Olives: Our Test Kitchen loved the taste of olives with this focaccia recipe. Use these carefully in your decorating because some types of olives can get a bit shriveled. But that slight withering will not affect the taste.
- Oregano: Oregano adds wonderful Italian flavor and bakes up perfectly on top of this bread.
- Parsely: If you want beautiful leafy greens in your design, this is the fresh herb to reach for. Go for Italian or flat-leaf parsley over the curly option.
- Peppers: Peppers of all kinds are a favorite in our Test Kitchen for decorating this garden focaccia. Use bell peppers, snacking peppers or jalapeños. Any way you slice them (really, slice them any way), they make for gorgeous designs.
- Red onion: You can add a touch of purple to your decorated bread with red onion. It will lighten up a bit in the baking process but still remains pretty and delicious.
These are the veggies to avoid when decorating focaccia:
- Red cabbage: This veggie didn’t hold onto its color or flavor. If you want purple hues to decorate your garden focaccia, go with red onion instead.
- Rosemary: This herb had a tendency to burn while baking. If you want to add some rosemary flavor to your bread, add chopped, fresh rosemary leaves to the dough. Dried rosemary also works.
- Sun-dried tomatoes: These tomatoes had a tendency to burn around the edges. Stick with fresh tomatoes to decorate.
- Thyme: Just like with rosemary, fresh thyme sprigs burned up in the oven. Add some of this herb to the bread dough to get the most thyme flavor.
Make More Gorgeous Bread Recipes
This garden focaccia isn’t the only showstopping bread recipe you can bake up. Try a spiced star bread, maple twist bread .
 Taste of Home
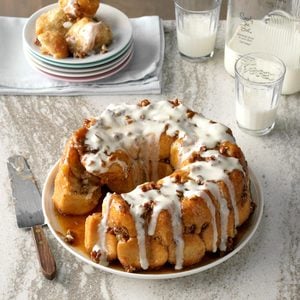
The kids will get a kick out of pulling off gooey pieces of this delectable monkey bread. It's hard to resist the caramel-coated treat. —Taste of Home Test Kitchen, Milwaukee, Wisconsin
Get Recipe
Cherry Tomato & Basil FocacciaWhen I had 80 pounds of tomatoes, I got creative incorporating them into meals. Sometimes I slice this loaf into squares to make sandwiches with fresh mozzarella cheese and deli meats. —Katie Ferrier, Houston, Texas
Everything BreadI love to make bread from scratch and this has become one of our tried-and-true favorites to serve with any meal, casual or formal. —Traci Wynne, Denver, Pennsylvania
Chai-Spiced Star BreadMy chai star bread is great for potlucks or parties because it's easy to share and looks beautiful. Prepare it ahead of time, refrigerate, then just pop it in the oven before serving. Try using this recipe with other fruits, too, like persimmons or apples. —Elizabeth Ding, El Cerrito, California
Chocolate BabkaI love this chocolate babka. It's a rewarding recipe for taking the next step in your bread baking. Even if it's slightly imperfect going into the oven, it turns out gorgeous. Look at those swirls! —Lisa Kaminski, Wauwatosa, Wisconsin
Homemade Egg BreadPeople rave about this tender, delicate bread every time I serve it. The braided look is just beautiful and is actually quite easy to do. —June Mullins, Livonia, Missouri
Maple Butter TwistsMy stepmother gave me the recipe for a delicious yeast coffee cake shaped into pretty rings. When I make it for friends, they always ask for seconds. —June Gilliland, Hope, Indiana
Garlic Rosemary Pull-Apart BreadThis recipe is a different type of pull-apart bread. Eat it by itself, dipped in marinara, or as part of a meal. For a different flavor, add sun-dried tomatoes, pesto, or an onion soup mix packet instead of the rosemary-garlic combo. —Christina Trikoris, Clarksville, Tennessee
Glazed Cranberry Swirl LoafThis is one of my favorite recipes to serve during the holidays. Without the filling, it makes a nice soft, chewy bread for any regular day! —Chris Carattini, Chadron, Nebraska
Creamy Chive RingsWhen I brought this savory ring to an extension luncheon, club members
let me know how much they enjoyed it. Next meeting I had to bring copies of the recipe for everyone there! —Pamela Schlickbernd West Point, Nebraska
Josh's Marbled Rye BreadThis impressive marble rye bread may look like it would be difficult to make, but it's actually quite easy! The flavors of the bread are mild yet satisfying. And I enjoy eating it with just a simple spread of butter or on a hearty sandwich loaded with my favorite fixings. —Josh Rink, Milwaukee, Wisconsin
Chocolate and Cherry StromboliThis melty, chocolaty spin on stromboli is delicious for both breakfast and dessert. Serve it with a cup of coffee, and even the coldest winter day instantly feels more snug. —Lorraine Caland, Shuniah, Ontario
Celebration BraidDuring the holidays, I sometimes make a couple of these golden loaves a day to give as gifts. Everyone in our family loves them any time of year. The recipe originated with one for Jewish challah, which I began making over a decade ago. —Marcia Vermaire, Fruitport, Michigan
Maple Twist Coffee CakeIf you like maple flavor, you will love this recipe. It is so pretty with all the twists and is always a hit at bake sales I have brought it too.—Deanna Richter, Elmore, Minnesota
Cardamom BraidsThis is an old recipe that I like to make for breakfast. Slices are splendid for dunking in a cup of coffee. —Walter Dust, Rapid City, Michigan
This coffee ring is an old family recipe that's long been a hit with anyone who's tried it. The yeast bread is a great Sunday treat—or the perfect way to kick off your holiday celebration. —Beverly Hansen, Sunny Hills, Florida
Moroccan Spiced Fruit & Nut BreadRed pepper flakes combined with the cinnamon and allspice give each slice of this bread a subtle hint of warmth. —Donna Marie Ryan, Topsfield, Massachusetts
Rosemary Orange BreadOf all the herbs, rosemary is my favorite. This bread goes great with a roast, chicken or pasta with red sauce. It's especially festive to serve at holiday time. —Deidre Fallavollita, Vienna, Virginia
Apple Dumpling Pull-Apart BreadI converted a basic sweet dough into this incredible apple-filled pull-apart loaf. The results are anything but basic. It takes time but I guarantee it's worth it. Using both sauces is twice as tasty. —Gina Nistico, Denver, Colorado
Chipotle Focaccia with Garlic-Onion ToppingChipotle peppers make some people grab their water glasses, while others can't get enough of the smoky heat. I came up with this recipe to fit right in the middle. Add more chipotle if you crave spiciness. —Frances Kay Bouma, Trail, British Columbia
Cardamom Braid BreadI came across this recipe in 1983 and have been making it for the holidays ever since. One year I gave away 20 loaves! —Rita Bergman, Olympia, Washington
Homemade Irish Soda BreadSome people consider bread to be the most important part of a meal...and this Irish bread satisfies such folks! This recipe is by far the best soda bread I've ever tried. With the addition of raisins, it is moist and delicious! —Evelyn Kenney, Trenton, New Jersey
Cherry-Go-RoundThis fancy coffee cake is surprisingly easy to prepare. It makes a delightful gift during the holidays or year-round. —Kathy McCreary, Wichita, Kansas
Gouda and Roasted Potato BreadOur family tried roasted potato bread at a bakery on a road trip, and I came up with my own recipe when we realized we lived much too far away to have it regularly. It makes for a really amazing roast beef sandwich and also goes well with soups. —Elisabeth Larsen, Pleasant Grove, Utah
Black Raspberry Bubble RingI first made this pretty bread years ago for a 4-H project. It helped me win grand champion for my county and took me to the Ohio State Fair. It takes some time to make, but I pull out this recipe anytime I want a breakfast or dessert that will really impress. —Kila Frank, Reedsville, Ohio
Rustic Rye BreadThis gorgeous rye bread has just a touch of sweetness and the perfect amount of caraway seeds. With a crusty top and firm texture, it holds up well to sandwiches, but a pat of butter will do the job, too. —Holly Wade, Harrisonburg, Virginia
Polish Poppy Seed LoavesTraditionally, these loaves were eaten after sundown on Christmas Eve as part of a 12-course meal. At our house, we never can wait that long to bite into the pretty spiral slices of this tender, coffee cake-like treat.—Linda Gronewaller, Hutchinson, Kansas
Muenster BreadMany years ago my sister and I won blue ribbons in 4-H with this bread. The recipe makes a beautiful golden loaf with cheese peeking out of every slice. —Melanie Mero, Ida, Michigan
Italian Snack BreadI've served this snack bread alongside spaghetti, as an appetizer and as a main dish. Because it stays so tender, I often bake it a day before. —Joan Nowacki, Pewaukee, Wisconsin
Cinnamon Swirl BreadYour family will be impressed with the soft texture and appealing swirls of cinnamon in these buttery breakfast loaves. —Diane Armstrong, Elm Grove, Wisconsin
Danish Coffee CakesI think that as long as I’m in the kitchen baking I might as well make enough to share. This traditional recipe gives me three cheese-filled coffee cakes drizzled with a sweet vanilla icing. —Sheri Kratcha, Avoca, Wisconsin
Sesame Wheat BraidsWhen I started making this bread, my husband and our six children liked it so much that I was baking every day! I was thrilled when the judges at our county fair gave these braids both a blue ribbon and a best of show award! —Nancy Montgomery, Hartville, Ohio
Poteca Nut RollMy mother-in-law brought this recipe from Yugoslavia in the early 1900's. It was a tradition in her family to serve it for holidays and special occasions. Now it's my tradition. Family members often help roll our the dough and add the filling. —Mrs. Anthony Setta, Saegertown, Pennsylvania
Mom's Italian BreadI think Mom used to bake at least four of these tender loaves at once, and they never lasted long. She served the bread with every Italian meal. I love it toasted too. —Linda Harrington, Windham, New Hampshire
Apricot-Almond Tea RingsApricots and almonds are the perfect pairing in this luscious iced ring. It’s a great breakfast treat to serve the family and a perfect centerpiece for a coffee date with friends.— Ann G. Hillmeyer, Sandia Park, New Mexico
Garlic Bubble LoafI tweaked my friend's family recipe for pull-apart rolls, and here's the result. This homemade garlic bread loaf is a must for your next pasta night, when everyone will have fun pulling off each rich and buttery piece. —Lynn Nichols, Bartlett, Nebraska
Olive FocacciaWhen I add my own special touches to a basic focaccia recipe—including sun-dried tomatoes, olives and roasted sweet red peppers—the results were simply delectable. The flavorful, chewy loaf makes a wonderful accompaniment to nearly any meal. —Dee Froemel, Hayward, Wisconsin
Rosemary Walnut BreadI received this recipe from a friend who was moving into a new apartment. To celebrate, she made this bread to share and now it is served at many of my family functions.—Robin Haas, Cranston, Rhode Island
Sally Lunn Batter BreadThe tantalizing aroma of this golden loaf baking always draws people into my mother's kitchen. With its circular shape, it's a pretty bread, too. I've never seen it last more than 2 hours once it's out of the oven! — Jeanne Voss, Anaheim Hills, California
Old-World Rye BreadRye and caraway lend to this bread's wonderful flavor, while the surprise ingredient of baking cocoa gives it a rich, dark color. I sometimes stir in a cup each of raisins and walnuts. —Perlene Hoekema, Lynden, Washington
Apple Raisin BreadI've been making this bread for many years. It smells so good in the oven and tastes even better. I make bread almost every Saturday, and it doesn't stay around long with our sons home from college in the summer. —Perlene Hoekema, Lynden, Washington
Veggie Pull-Apart BreadA bread machine hurries along the dough-making process, but chopped vegetables, bacon and cheese make the buttery wreath unforgettable. —Christi Ross, Guthrie, Texas
Up Next: The Best Bread Recipes of 2023