Learn how to make flourless chocolate cake at home. This cake is special occasion-ready but takes just five ingredients—really!
ⓘ
Flourless chocolate cake is one of those special occasion desserts. You see it on the dessert menu at your favorite steakhouse or served up at elegant parties. While this cake may seem poised for these celebratory occasions, it’s actually not too complicated to make right at home.
With just five ingredients, you can make this dessert yourself. It’s a great finish to any meal. Friends and family will be impressed (especially if you top it off with some ice cream). Plus, if you’ve got gluten-free guests, you don’t need to sweat—this treat is naturally gluten-free.
With some tips from our Test Kitchen, we’ll show you how to make this decadent cake yourself.
Hey, baker! Come on over to Bakeable, our online baking community,
where you’ll find our best tips and top-rated recipes. Then, share your bakes in our Bakeable Facebook group. We’d love to see ’em.
Our Favorite Flourless Chocolate Cake Recipe
Taste of Home
Our Test Kitchen’s go-to flourless chocolate cake recipe comes to us from reader Kayla Albrecht of Illinois. She says that this recipe is for serious chocoholics, and we agree.
Start by separating the eggs. Use an egg separator, a spoon or just the shells. Just be very careful not to get a single drop of yolk in the whites.
Once all your eggs are separated, let them sit at room temperature for 30 minutes. Now, you might be wondering, why not just let the eggs come to room temp and then separate? Well, it’s easiest to separate the yolks from the whites when the eggs are cold, but the whites will whip up to their greatest volume at room temperature.
Step 2: Get the Oven and Pan Ready
Next, get your pan and oven ready. Since this cake batter relies on egg whites for all its lift, it’s important to have these ready so you can get it into the oven as quickly as possible.
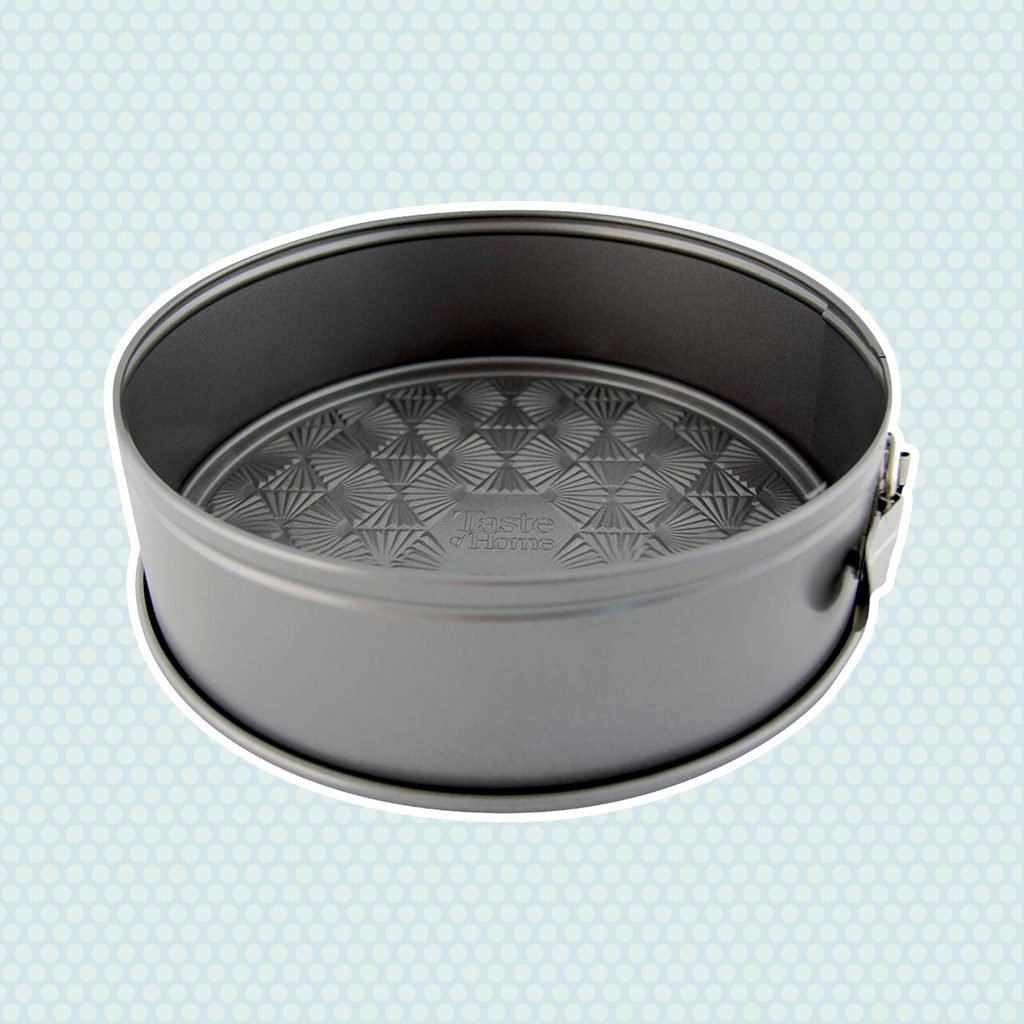
Preheat the oven to 350ºF and grease a nine-inch springform pan—yep, even if it’s nonstick. It’s best to take every precaution with a delicate cake like this.
Step 3: Melt the Chocolate
Taste of Home
Next, start to melt the chocolate. Our Test Kitchen recommends placing a heat-safe bowl over a pan of simmering water and stirring the chocolate and butter gently until smooth and glossy. When completely melted, remove from the heat and let the mixture cool slightly.
Editor’s tip: Be mindful not to let any water or steam come into contact with the chocolate. This will cause the chocolate to seize and then there’s no saving it.
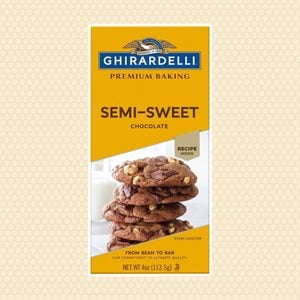
A few words here on your chocolate. When it comes to chocolate, use your favorite brand of semisweet chocolate in this recipe. With so few ingredients, quality really does stand out, so don’t scrimp!
Step 4: Beat the Egg Yolks and Chocolate
Taste of Home
Next, grab your hand mixer (a stand mixer fitted with the whisk attachment works, too) and beat the egg yolks until thick and lemon-colored. When you pull your beaters out of the bowl, the yolks should be ribbon-like (this is known as ribbon stage).
Gradually add in the cooled chocolate mixture and beat to combine.
Step 5: Beat the Egg Whites Until Stiff Peaks Form
Taste of Home
This is the magic step. Whipped egg whites are what gives this recipe its body, that oomph that makes the cake light and airy (and not just a giant block of chocolate).
In a separate clean, large bowl, combine the egg whites with the cream of tartar and start beating on medium speed until they are foamy.
Gradually add the sugar a tablespoon at a time. Continue beating on high after each addition until the sugar is fully dissolved. This gradual addition allows the sugar to incorporate into the whites without becoming gritty.
Editor’s tip: Cream of tartar is an acid that stabilizes the egg whites, helping them stay fluffy and tall without deflating. You don’t strictly need it, but it’ll help you out.
Keep beating the egg whites until they reach the stiff peak stage. You’ll know they’re ready when you lift the beaters out of the bowl and the whites stand straight up—no drooping or dripping into the bowl. To be absolutely sure, tilt the bowl—stiff egg whites won’t budge. One final test: Dip your finger into the mix to make sure the mix is satiny and smooth, not gritty—all the sugar should have dissolved.
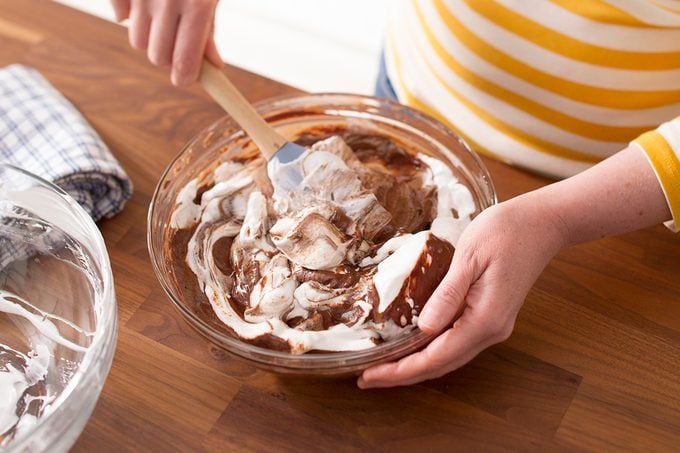
Step 6: Fold Very Carefully
Taste of Home
Time to combine the chocolate mix with the egg white mix—the last step before baking! Don’t rush this step, as you want to preserve as much of the aeration you’ve beaten into those egg whites as possible.
To maintain as much of this air as possible, you’ll want to fold the mixtures together. To do this, add about a quarter of the egg whites into the chocolate and fold gently. Use a rubber spatula and gently scrape from the bottom of the bowl and fold the mixture over the top. Turn the bowl a quarter turn and repeat—adding the remainder of the egg whites. Fold until just combined—don’t keep working this batter.
Editor’s tip: Better to err on the side of slightly undermixing than on overmixing. Overmixing can make the cake too dense, as you deflate the egg whites too much. Small pieces of egg white visible in the mix are OK.
Editor’s tip: You might notice a flaky, crackly top layer—this is normal! It’s actually a very thin layer of meringue that rises to the top and sets as the cake bakes. You might notice this with brownies or other recipes where beaten whites are folded into a chocolate mixture. It’s going to be delicate and crispy on the top and moist and fudgy in the center (also known as perfect).
Step 8: Cool and Dust with Confectioners’ Sugar
Taste of Home
This may be the hardest part. Let the cake cool completely in the springform pan set on a wire rack. When cool to touch, loosen the sides of the cake from the pan with a knife before removing the pan’s rim. If you want a little extra fancy touch, dust the cake with confectioners’ sugar before serving. Cut your delicious, indulgent cake and enjoy! Hungry for more? Next, try this no-bake chocolate ripple cake.
Test Kitchen tip: For the cleanest slices, dip your knife in hot water, wipe it clean with a dish towel and slice. Repeat the process for every piece and you’ll have restaurant-quality slices!
If you can’t finish this cake in a day, just pop under a cake dome or store slices in airtight containers and eat within a few days. It’s just as good on day two or three!
This cake won Grand Champion at the Alaska State Fair, and you will see why once you taste it. This decadent chocolate cake boasts a luscious ganache filling and fudge buttercream frosting. —Cindi DeClue, Anchorage, Alaska
Yummy Chocolate CakeMy husband and I are trying to eat lighter but still crave sweets. This moist, healthy chocolate cake really helps with that. With the rich frosting, it makes a decadent treat! —LaDonna Reed, Ponca City, Oklahoma
Three-Layer Chocolate Ganache CakeThis decadent triple-layer beauty is pure chocolate indulgence. The cake layers can be frozen prior to final assembly; in fact, they're easier to work with when frozen. —Kathleen Smith, Overland, Missouri. Looking for more? Try this famous chocolate cake from Matilda, a beloved family film.
Classic Chocolate CakeIf you need to learn how to make chocolate cake from scratch, this easy homemade chocolate cake recipe is a perfect place to start. It appeared on a can of Hershey's cocoa way back in 1943. I tried it, my boys liked it, and I've been making it ever since. —Betty Follas, Morgan Hill, California
Chocolate Comfort CakeThis moist and delicious chocolate cake is usually the first dessert to go. People even eat the crumbs. It’s always my top choice for holiday dinners. —Ellen Riley, Murfreesboro, Tennessee
Best Texas Sheet CakeThis chocolaty delight was one of my favorites growing up. The Texas sheet cake is so moist and the icing so sweet that everyone who samples it wants a copy of the recipe. —Susan Ormond, Jamestown, North Carolin. If you're looking for an easy and fast recipe, then try making this chocolate ripple cake.
Chocolate Chiffon CakeIf you want to offer family and friends a dessert that really stands out from the rest, this is the cake to make. The beautiful high, rich sponge cake is drizzled with a succulent chocolate glaze. —Erma Fox, Memphis, Missouri
Vegan Chocolate CupcakesThese indulgent vegan chocolate cupcakes have no butter, eggs or dairy milk, but you'd never guess it. This recipe is perfect for potlucks and family gatherings that include guests with food restrictions. —Taste of Home Test Kitchen, Milwaukee, Wisconsin
Sandy's Chocolate CakeYears ago, I drove 4-1/2 hours to a cake contest, holding my entry on my lap the whole way. But it paid off. One bite and you'll see why this velvety beauty was named the best chocolate cake recipe and won first prize. —Sandra Johnson, Tioga, Pennsylvania
Chocolate-Peanut Butter Sheet CakeI love peanut butter and chocolate, so I combined recipes to blend the two. This chocolate peanut butter cake is heavenly served plain or topped with ice cream. —Lisa Varner, El Paso, Texas
Moist Chocolate CakeThis moist chocolate cake recipe with coffee reminds me of my grandmother because it was one of her specialties. I bake it often for family parties, and it always brings back fond memories. The cake is light and airy with a delicious chocolate taste. This recipe is a keeper! —Patricia Kreitz, Richland, Pennsylvania
One-Bowl Chocolate CakeThis cake mixes up quickly and bakes while we enjoy our dinner. My son, David, loves to help decorate it. —Coleen Martin, Brookfield, Wisconsin
Chocolate Espresso-Nut TorteI love chocolate and nuts, and they come together deliciously in this torte. Serve it with sweetened whipped cream or your favorite ice cream. —Thomas Faglon, Somerset, New Jersey
Chocolate Bavarian TorteWhenever I take this eye-catching torte to a potluck, I get so many requests for the recipe. —Edith Holmstrom, Madison, Wisconsin
Chocolate Ganache Peanut Butter CupcakesI've been baking cakes for years and enjoy trying new combinations of flavors and textures. For this peanut butter cupcake recipe, I blended peanut butter and chocolate. As soon as I took the first bite, I knew I had created something divine! —Ronda Schabes, Vicksburg, Michigan
Ganache-Topped Chocolate CakeTo say this cake is elegant would be an understatement. It’s worthy of special occasions, but once you learn how to make chocolate ganache, it's so easy to whip together that you can enjoy it any day of the week. —Taste of Home Test Kitchen
Chocolate Pudding CakeThis rich, chocolate pudding cake is one of my favorites. I like to serve it warm with a scoop of vanilla ice cream. Whenever I take it to parties, everybody wants the recipe. —Paige Arnette, Lawrenceville, Georgia
Malted Chocolate & Stout Layer CakeIf you want a dessert that will take the cake at a St. Patrick's Day celebration, look no further! The rich chocolate cake is incredibly moist and has a nice malt flavor that's perfectly complemented by the Irish cream frosting. —Jennifer Wayland, Morris Plains, New Jersey
Chocolate Hazelnut TorteMost cake recipes feed a crowd. So we came up with this elegant little cake that serves six. That's enough for two…with just the right amount of leftovers! —Taste of Home Test Kitchen
Banana Chocolate CakeThis light-as-air chocolate cake has a yummy banana flavor. It’s scrumptious as is, but you can also dress it up with nuts or light frostings. —Tina Bellows, Racine, Wisconsin
Sauerkraut Chocolate CakeFor an adventurous cake, try this recipe. People might need a little coaxing to try it but once they do, they will love it.—The Fremont Company
Reese's Chocolate Snack CakeMy family constantly requests this cake is constantly. I don't mind making it because it's surprisingly low-cal. And its yellow and orange toppings make it the perfect dessert for a Halloween party. —Eileen Travis, Ukiah, California
Chocolate Angel CakeWhen I was married in 1944, I could barely boil water. My dear mother-in-law taught me her specialty—making the lightest angel food cakes ever. This chocolate version is an easy, impressive treat. —Joyce Shiffler, Colorado Springs, Colorado
Best Gluten-Free Chocolate CakeThis gluten-free chocolate cake is a yummy treat that everyone can enjoy. Sometimes I stir in gluten-free chocolate chips or chopped nuts for variety. —Nichele McCague, Poway, California
Rich Chocolate Peanut Butter CakeThe combination of mocha and peanut butter will satisfy every sweet tooth at your table. The garnish is a little extra work, but what are special occasions for? —Tammy Bollman, Minatare, Nebraska
Chocolate Almond CakeFluffy white homemade frosting tops this rich chocolate almond cake. Sliced toasted almonds on top add a little crunch. —Sherri Gentry, Dallas, Oregon
Chocolate Carrot CakeFinely shredding the carrots gives this cake an extra-nice texture. The walnuts sprinkled on top add crunch, but you can leave them off if you prefer. —Pamela Brown, Williamsburg, Michigan
Cinnamon Chocolate CakeA healthy hint of cinnamon gives this chocolate cake an extra step up over the expected sheet cake. The sweet frosting is full of crunchy pecans. —Victor Clifford, San Jose, California
German Black Forest CakeAs far as I know, this cake recipe can be traced back to my German great-grandma. When I got married, my mother gave me a copy and I hope to someday pass it down to my children. —Stephanie Travis, Fallon, Nevada
Crazy CakeI have made this chocolate cake for over 50 years. Otherwise known as "crazy cake," this classic, tender and moist dessert requires only a two-step procedure to make.
Contest-Winning Moist Chocolate CakeYou don't have to spend a lot of time to serve an elegant and delicious dessert. Just mix up the batter in one bowl, bake and get ready for people to love this moist dark chocolate cake recipe. —Christa Hageman, Telford, Pennsylvania
German Chocolate CakeThis German chocolate cake is my husband’s favorite! Each bite has crunch from the pecans, and sweetness from coconut and chocolate. —Joyce Platfoot, Wapakoneta, Ohio
Marvelous Cannoli CakeA luscious, chocolate-studded cannoli filling separates the tender vanilla layers of this rich cake, which starts with a package mix. It’s best when served well chilled.—Antoinette Owens, Ridgefield, Connecticut
Double-Chocolate Toffee Icebox CakeMy mother-in-law taught me that anything tastes good if you use enough chocolate or cream. This no-bake dessert proves she was right. Sometimes I use chocolate graham crackers and stack up the layers in a 9-inch square pan. —Bee Engelhart, Bloomfield Township, Michigan
We are no longer supporting IE (Internet Explorer) as we strive to provide site experiences for browsers that support new web standards and security practices.