How to Make Decorative Pie Crusts

Updated: Feb. 07, 2024
Go beyond basics with your pies. We'll show you how to make decorative pie crusts that will make these desserts really stand out.
Once you have the proper pie baking tools and your pastry crust recipe mastered, there are plenty of ways to gussy up plain pie. From twists and braids to cut-outs and layered looks, these pie decorating techniques will make your dessert the star of the show.
Not a fan of pastry crust? Try these easy alternatives for making pie crust without pastry dough including a graham cracker crust and more.
Fluted Edge
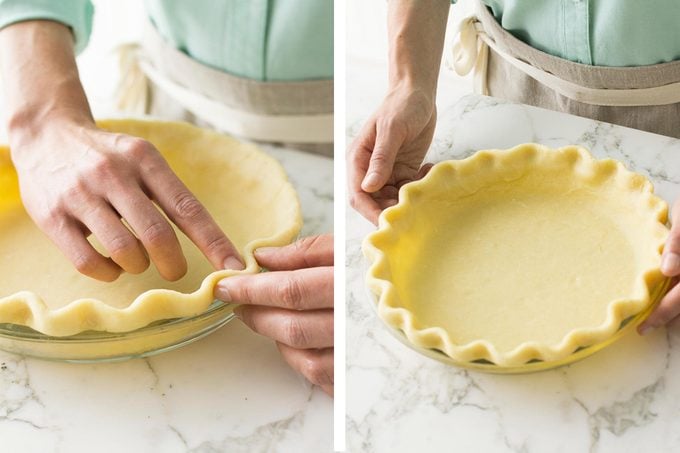
The fluted edge is one of the most common finishes for pies, and it’s simple to do. You can use this on single- and double-crusted pies.
To create a fluted edge, trim the pie pastry to about a half-inch beyond the rim of your pie plate (an entire inch if you’re working with a double-crusted pie). This overhang is then turned under to form the edge.
Flute the crust by positioning your index finger on the edge pointing outward. Then place your thumb and index finger of your other hand on the outside of the edge and pinch the pastry around your finger to form a V (the photos illustrate the point a bit better!). Continue around the entire edge of the pie.
Roped Edge
Roped edges are just a step up from the basic fluted edge. Like fluting, you can use this technique on single- and double-crust pies. Also like fluting, you trim pastry about a half-inch from the edge of the pie plate for single-crust pies and leave an inch of extra for double-crust pies.
To create the rope, make a fist with one hand and press your thumb at an angle into the pastry. Pinch some of the pastry between your thumb and index finger. Repeat at about half-inch intervals around the crust. For a looser-looking rope, position your thumb at a wider angle and repeat at one-inch intervals.
Braided Edge

If you’re making a single-crusted pie, you can get a bit more creative with your edges (since you don’t need to seal anything in). To make a braided edge, double your crust recipe—you’ll need the extras for the plait.
Start by lining your pie plate with the bottom pastry and trimming it so it’s even with the edge of the pan. Roll the remaining pastry dough into a 10×8″ rectangle. Using a ruler, cut 12 quarter-inch-wide strips. You can cut with a sharp knife or even a pizza cutter. Then carefully braid together the strips.

Brush edge of crust with water; place braid on edge and press lightly to secure. Repeat with remaining strips, attaching additional braids until the entire edge is covered. To protect the edges during baking and prevent over-browning, be sure to cover with foil.
Reverse Scalloped Edge
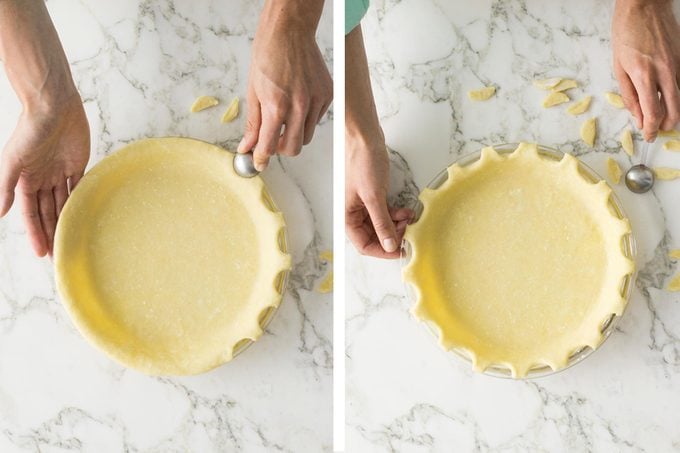
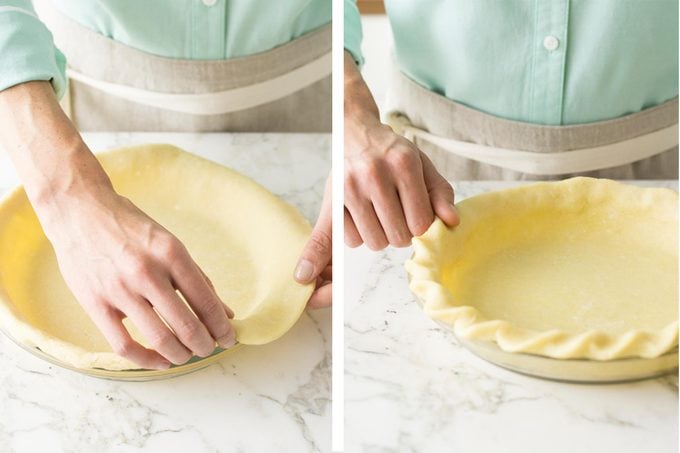
This reverse scalloped edge is a simple finish for single-crust pies. Line your pie dish with the pastry and trim it until it’s even with the plate.
Then use a measuring spoon to cut scallops around the outside. Remove and discard the cut pieces. If you want more defined scallops, use a larger measuring spoon.
Shaped Trim
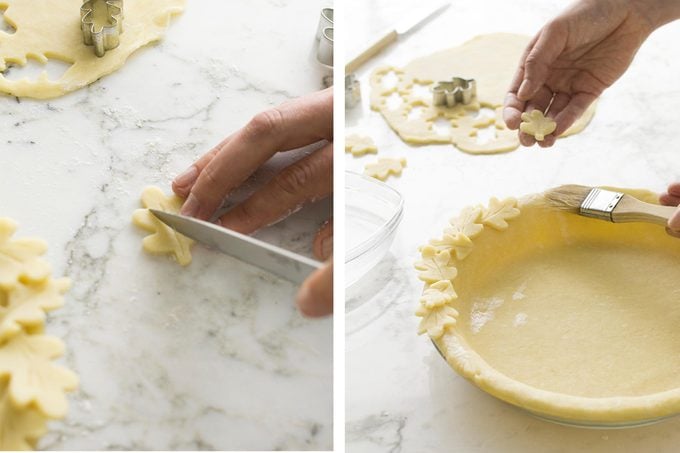
You can also use small cookie cutters to form a super cute decorative edge on your pies. You can use any shape you want, but be sure to use smaller cookie cutters—ideally between one and two inches in size. Like the braided crust, you’ll want to make extra pie pastry for this technique.
Roll your extra dough out thinly and cut out shapes with your cutters. If you find they’re sticking, give them a quick dusting with flowers. If you want to add extra detail, like veins in leaves or definition in shapes like pumpkins, use a sharp knife to add indentations.
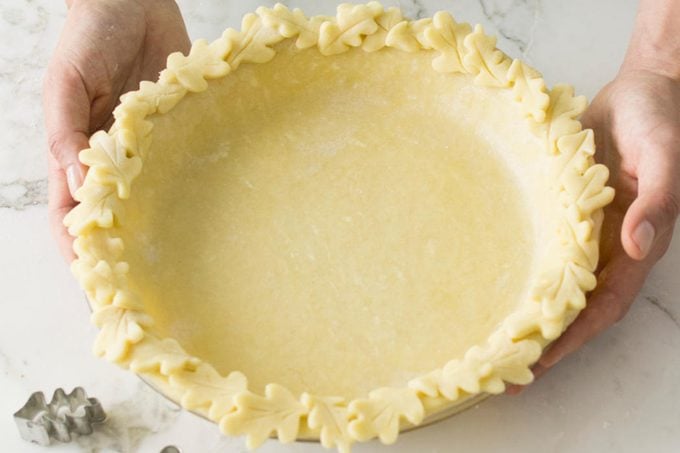
To attach the shapes to the pie crust, brush the bottom of each with water and press to the edge of the crust. Overlap your shapes slightly. If you like, bake up a few extras to scatter on top of your pie as decoration. Just be mindful to keep an eye on the crust to make sure it isn’t browning too quickly. Again, that foil pie guard is a good idea here.
Pastry Cutout

You can also use the same cookie cutter method to cover the entire top crust of your pie. Since you’re covering a larger area, you can use almost any size cookie cutters you like.
To layer onto the pie, brush the bottom of each shape with water and arrange over the top of the pie. Press lightly to secure shapes to the edge and one another. Then bake as normal! This is an easy way to get a wonderfully decorative top without a lot of fuss (no offense to lattice pies).
Reverse Cutout

You can also do the reverse of this method for double-crusted pies. For this technique, roll out your top pastry as normal, then using a medium or small cookie cutter, cut out select parts of the crust. Be sure not to place these cutouts too close together.
Then lay the crust on top and crimp and finish as you see fit.
The Finishing Touches (Combine with Any Decorative Method)
You don’t need to stop decorating your pie with just the crust. You can add a few more finishing touches to give your pie a professional look.
Egg Wash

Pros know that the secret to a glossy pie crust is an egg wash. Lightly brush your crust before you bake with an egg (or just the white or yolk—depending on the recipe) whisked with a teaspoon of water. This will give your pie a beautiful shine.
Sugar
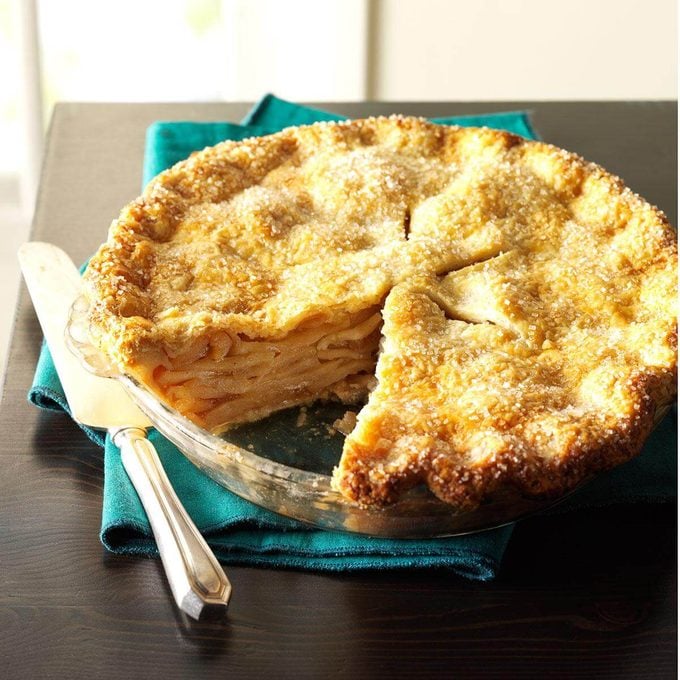
Who doesn’t love sweetness with a little crunch? Try these sugar toppings on your next pie crust. Simply brush the crust with water before sprinkling the sugar. You can use coarse sanding sugar or turbinado sugar for a more distinct crunch, or traditional granulated sugar for a pretty finish.
Decide to start with a little pie refresher course beforehand? No problem! Here’s our complete guide for how to make pie and the perfect apple pie crust for easy reference.
Originally Published: September 24, 2018