How to Roast Pumpkin Seeds, Step by Step

Updated: Oct. 13, 2023
Don't throw away those pumpkin seeds! Roasted pumpkin seeds are an easy, healthy snack your family will love. Here's how to roast pumpkin seeds the right way.
Confession: For years, I threw away the seeds after carving pumpkins. Roasting them just didn’t seem worth the trouble—why mess with all that stringy, slimy pumpkin flesh?
Then a few years ago, after learning more about food waste and vowing to make the most of every ingredient, I decided not to toss the seeds. Instead, I learned how to roast pumpkin seeds and realized that crispy, baked pumpkin seeds are super easy to make! Their nutty flavor was so addictive, they didn’t even make it to the pantry. My family gobbled them up, risking burned fingers, straight from the sheet tray.
The best part is, pumpkin seeds are good for you. They’re high in protein and fiber, and they’re a good source of minerals like zinc and iron. You can even cook with pumpkin seed oil. So the next time you make jack-o’-lanterns, save the insides and follow our Test Kitchen’s step-by-step guide for how to roast pumpkin seeds.
Roasted Pumpkin Seeds Recipe
Here’s how to easily roast pumpkin seeds. Trust us—these toasted seeds aren’t going to last long! This roasted pumpkin seeds recipe makes 2 cups.
Ingredients
- 2 cups fresh pumpkin seeds, or whatever you scoop from 1 pumpkin
- 3 tablespoons butter, melted, or an equal amount of your favorite cooking oil
- 1 teaspoon salt or other seasonings
- 1 teaspoon Worcestershire sauce, optional
Directions
Step 1: Preheat the oven
Preheat the oven to 250°F. Line a large sheet pan with aluminum foil and lightly grease it with butter or oil. This reduces cleanup later—trust us on this!
Test Kitchen Tip: Preheating your oven will help the pumpkin seeds cook evenly. The result: perfectly roasted, crispy pumpkin seeds.
Step 2: Scoop out the seeds
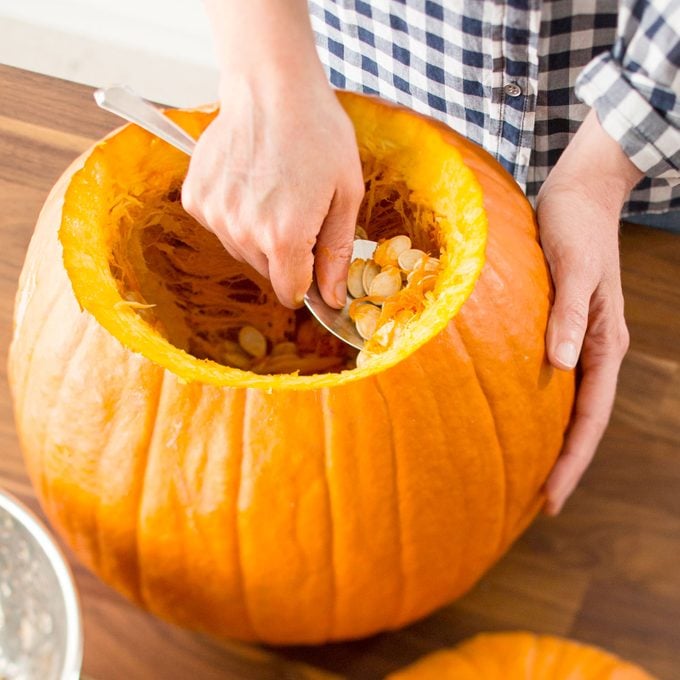
Most of us are pretty familiar with this part from a lifetime of pumpkin carving. Using a sharp, sturdy knife, cut around the top of the pumpkin and remove the “lid.” Using a large spoon, scrape the sides of the pumpkin to remove the seeds and pulp. Place everything—pulp and all—in a large bowl.
Step 3: Separate the gunk from the pumpkin seeds
You might be wondering, “Do you have to clean pumpkin seeds before roasting?” The answer is yes. I used to dread handling that slimy, stringy pumpkin flesh, but it’s actually much easier than I thought. Just use your fingertips to pull the seeds free. Leave the large pieces of pumpkin pulp in the bowl as you transfer the seeds to a colander. They’ll still look pretty goopy—don’t worry.
The fibrous strands can be challenging to remove, but we have a trick for that: Rinse the seeds in the colander under cold running water. The water will loosen the strands and make it easier to pull them off.
Test Kitchen Tip: Don’t worry if you have some pumpkin pulp clinging to the seeds. It’s really hard to remove every last bit! During testing, we found that extra strands didn’t make a huge difference once the seeds were roasted. But leaving all the gunk on prevents the seeds from getting nice and toasted.
Step 4: Rinse and drain
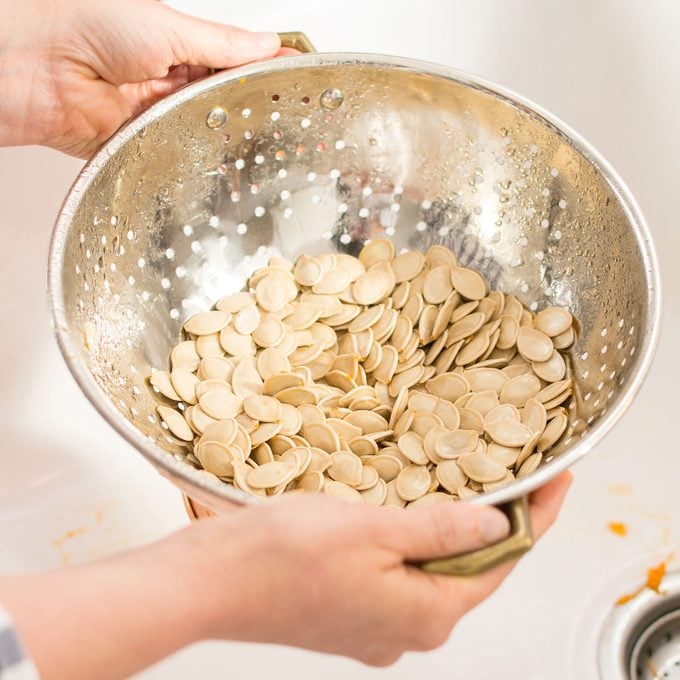
Once you’ve removed most of the pulpy pieces, it’s time to get the seeds ready for seasoning. Some people swear by boiling or soaking the seeds in salt water to make them extra crispy after baking, but we didn’t find that this extra step made much of a difference. Simply rinse the seeds under cold running water and pat them dry with a towel.
Test Kitchen Tip: Patting the seeds dry is an important step. Excess water can create steam in the oven, which prevents the seeds from crisping. The seasonings we use in the next step also adhere better to dry seeds.
Step 5: Season the pumpkin seeds
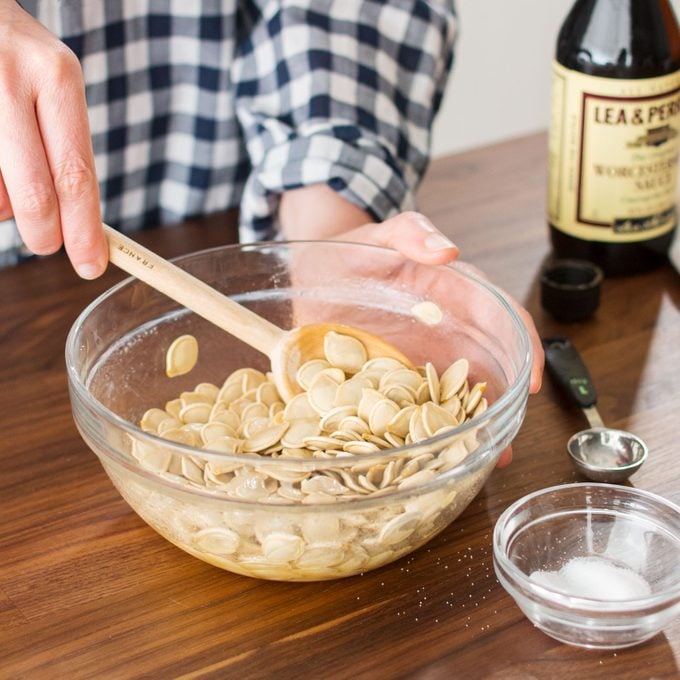
It’s time to season! We like salt and Worcestershire sauce, but you can also use pumpkin spice seasoning, or just sprinkle with salt and pepper. Or, try one of these other roasted pumpkin seed variations:
- Spicy pumpkin seeds: For those craving a little added heat, these spicy pumpkin seeds will get the job done.
- Garlic pumpkin seeds: Toss these seeds in a snack mix for the ultimate combination of flavors.
- Mocha pumpkin seeds: These pumpkin seeds are covered in baking cocoa and coffee granules for a sweet little treat.
Whichever flavor profile you choose, combine the seasonings with the butter or oil in a small bowl. Then drizzle the mixture over the dry seeds in a medium-sized bowl. Stir to make sure each seed is coated.
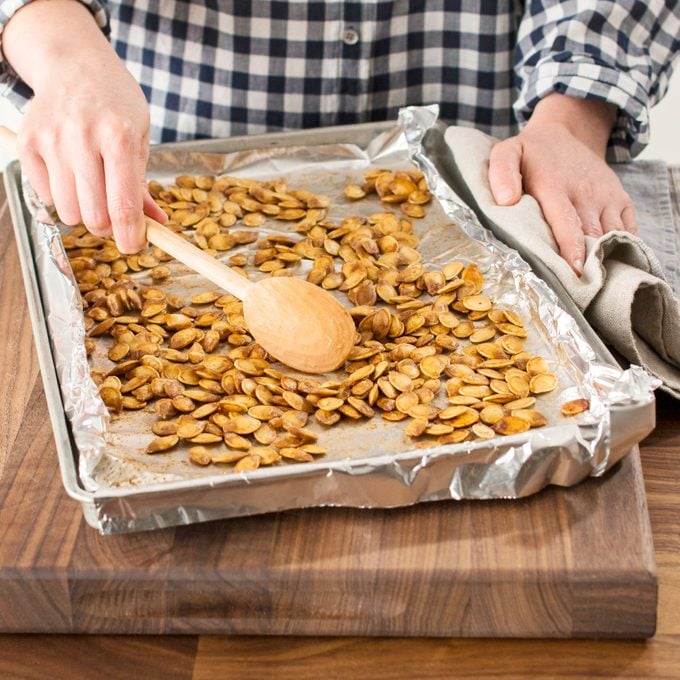
Step 6: Bake the pumpkin seeds, stirring occasionally
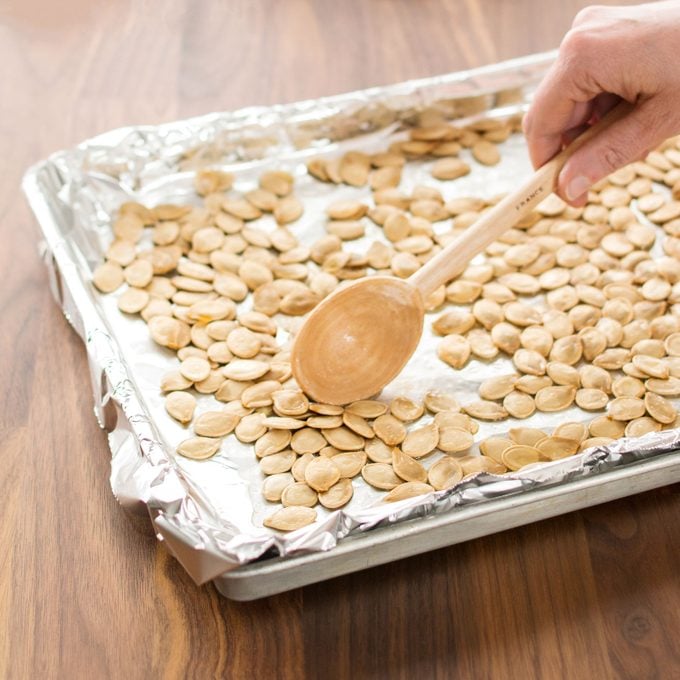
Now we’re ready to bake! Spread the seeds evenly in a single layer on your prepared baking sheet. Bake for 45 minutes, making sure to stir and toss the seeds occasionally.
Test Kitchen Tip: Most ovens have hot spots, which can lead to burnt seeds. Our experts found that stirring the seeds from time to time promotes even browning.
Step 7: Finish baking pumpkin seeds on higher heat
Cooking in a 250° oven helps the pumpkin seeds cook evenly inside and out, so they don’t burn before they’re cooked through. But we won’t settle for evenly cooked seeds—we want crispy seeds!
The solution: Increase the oven temperature to 325° after the first 45 minutes. Then continue baking the seeds for about 5 more minutes, or until they’re lightly browned and dry.
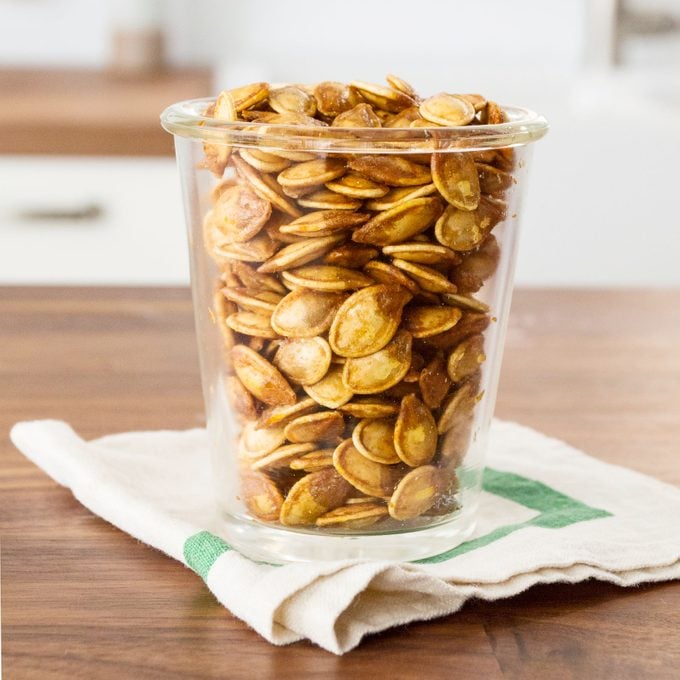
Step 8: Serve, store and enjoy!
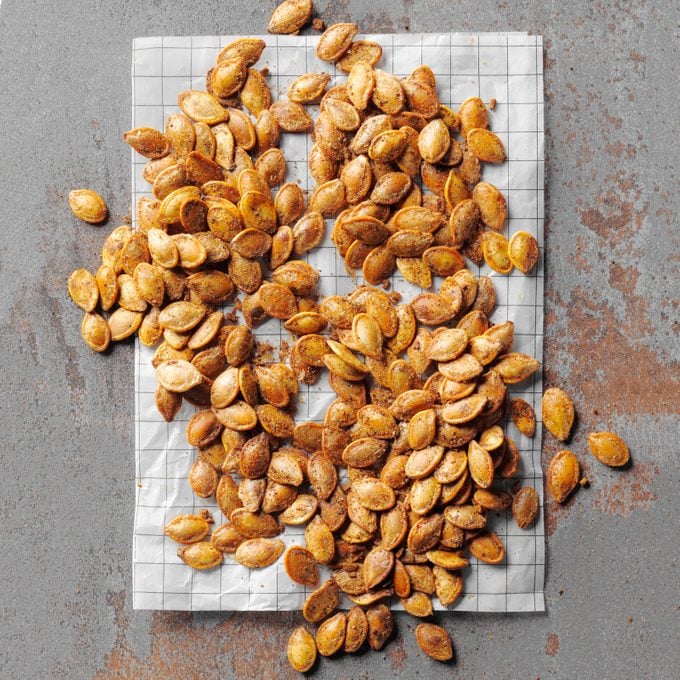
You can serve the seeds warm (I always risk singed fingertips to snatch a snack right off the sheet pan), or you can let them cool and enjoy at room temperature. If you’re storing them for later use, set the pan on a cooling rack until the seeds are fully cooled, then place in an airtight container.
This recipe yields approximately 2 cups of seeds, so you’ll have enough to snack on and use in some fun recipes. The nutty flavor makes pumpkin seeds a great substitute for nuts in this pumpkin pie-spiced granola. They also make an excellent salad topping—try them in this apple walnut salad.
Roasted Pumpkin Seed Tips
Should pumpkin seeds be soaked before I roast them?
Some people soak pumpkin seeds before roasting them—they say it helps make the seeds extra crispy. But our Test Kitchen found that soaking the seeds didn’t make much of a difference when it came to crispiness. If you do soak your seeds, though, be sure to dry them thoroughly before roasting. Otherwise, the water could steam in the oven, causing the seeds to be chewy instead of crispy.
Do roasted pumpkin seeds go bad?
Like other types of nuts and seeds, roasted pumpkin seeds can go rancid. Store cooked pumpkin seeds in an airtight container for up to 2 weeks. You can also freeze them for up to 3 months, but they might not be as crispy as they were before freezing.
If you carve pumpkins but don’t want to roast the seeds right away, rinse them to remove the pulp and refrigerate in an airtight container. Roast within 2 to 3 days. You can also freeze raw pumpkin seeds—just wash them to remove the pulp, then allow them to dry completely before freezing in an airtight container.
Why are my roasted pumpkin seeds chewy?
There are several reasons why roasted pumpkin seeds may be chewy. For proper preparation, you’ll want to make sure there isn’t too much pulp still attached to the seeds before baking them. It’s also vital that they’re plenty dry after rinsing off the pulp.
Once it’s time to bake, make sure the seeds aren’t too crowded on the pan. Spread them evenly and in a single layer on the baking sheet. Next, make sure they’re baked at a high enough temperature. For best results, you’ll want to roast them at 250° for 45 minutes and then at 325° for 5 minutes or until the seeds are golden brown.
Which pumpkins have the best seeds for roasting?
You can roast the seeds from any kind of pumpkin. Some people prefer pumpkin seeds that have thin outer shells or no hulls at all. Styrian and Kakai pumpkins are typically grown for their hull-less seeds, which are better known as pepitas. However, these pumpkin varieties may be hard to find. You can also roast the seeds from other types of winter squash, like butternut and acorn.
How do you eat pumpkin seeds?
You can eat the outer shell of pumpkin seeds and many people do. But if you prefer hull-less pumpkin seeds, you can remove the hulls or stick to pepitas.
There are dozens of ways to use pumpkin seeds, whether you snack on them straight from the sheet pan, toss them on salads or add them to granola. You can also try sprinkling them on a bowl of butternut squash soup or whipping up a batch of this pumpkin seed toffee.
Taste of Home Senior Food Editor Peggy Woodward, RDN, and former Taste of Home Associate Digital Editor Teddy Nykiel contributed to this article.
Originally Published: July 12, 2022